Creating Your Own FRACAS Formulas
You can define your own custom formulas to perform using your FRACAS data. You may want to set up formulas for FRACAS-based metrics that are important for you. For example, you can compute the total cost of repairs or the number of days to close an incident report.
There are five types of FRACAS formulas you can define: Incidents-based, Incident Subtable-based, Problems-based, Problem Subtable-based or Analysis Tree formulas. Incidents-based and Problems-based formulas help you to define custom formulas for each Incident and/or Problem. Incident Subtable-based and Problem Subtable-based formulas help you to define custom formulas associated with any Incident Subtable and/or Problem Subtable records. Analysis Tree formulas enable you to roll up data across all your Incidents or Problems and store the resulting aggregate or summary result in an Analysis Tree subassembly data field.
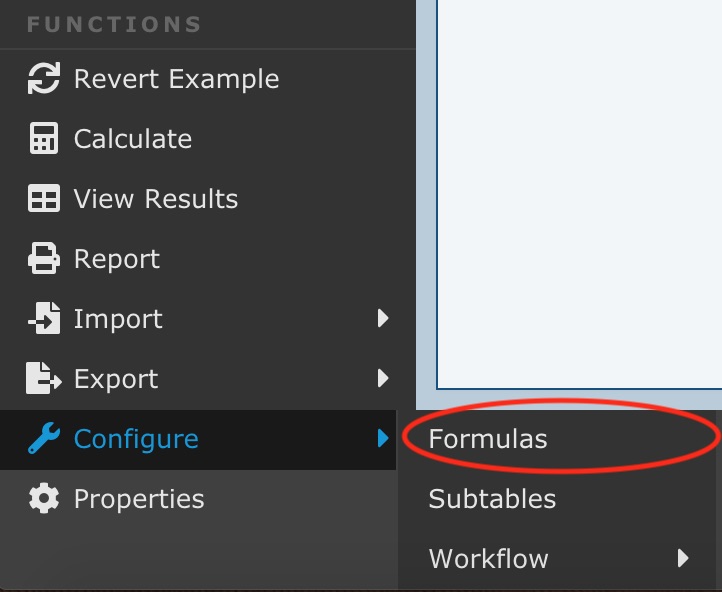
To define your own custom formulas, from the Sidebar menu, click Configure and then click Formulas.
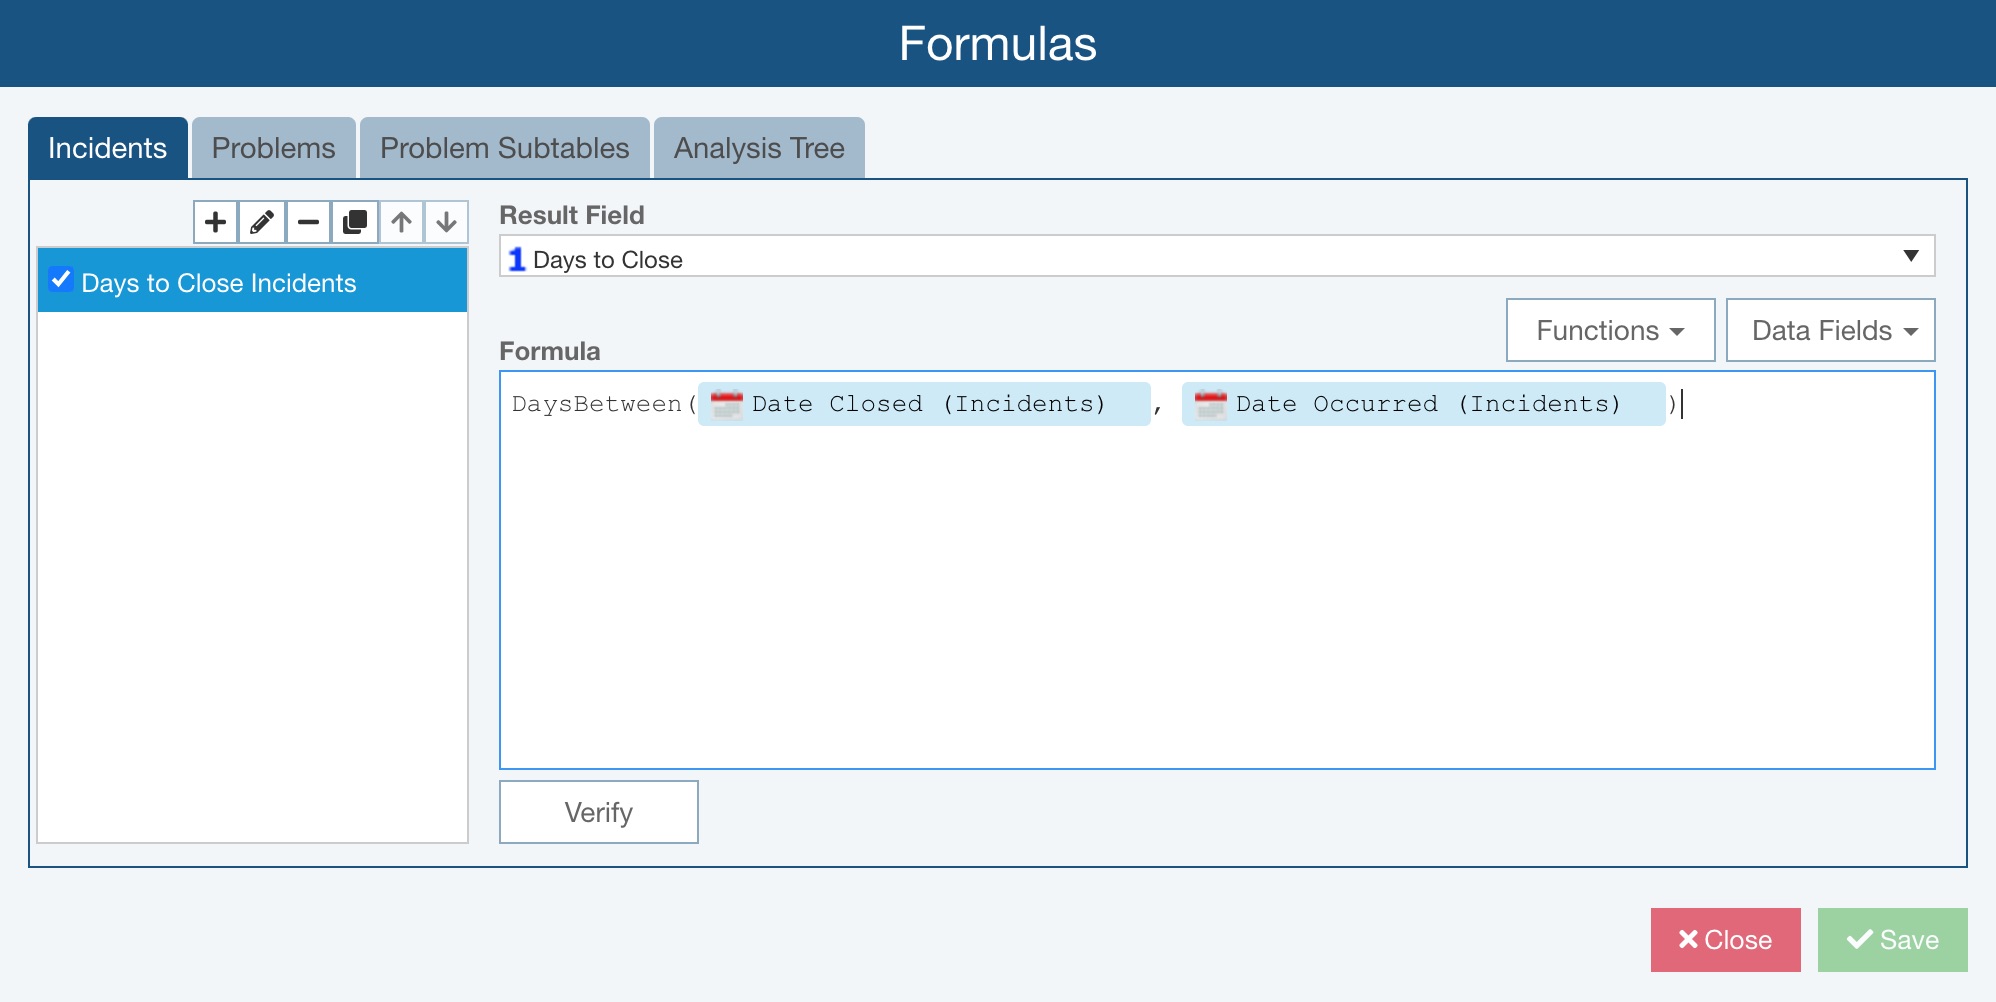
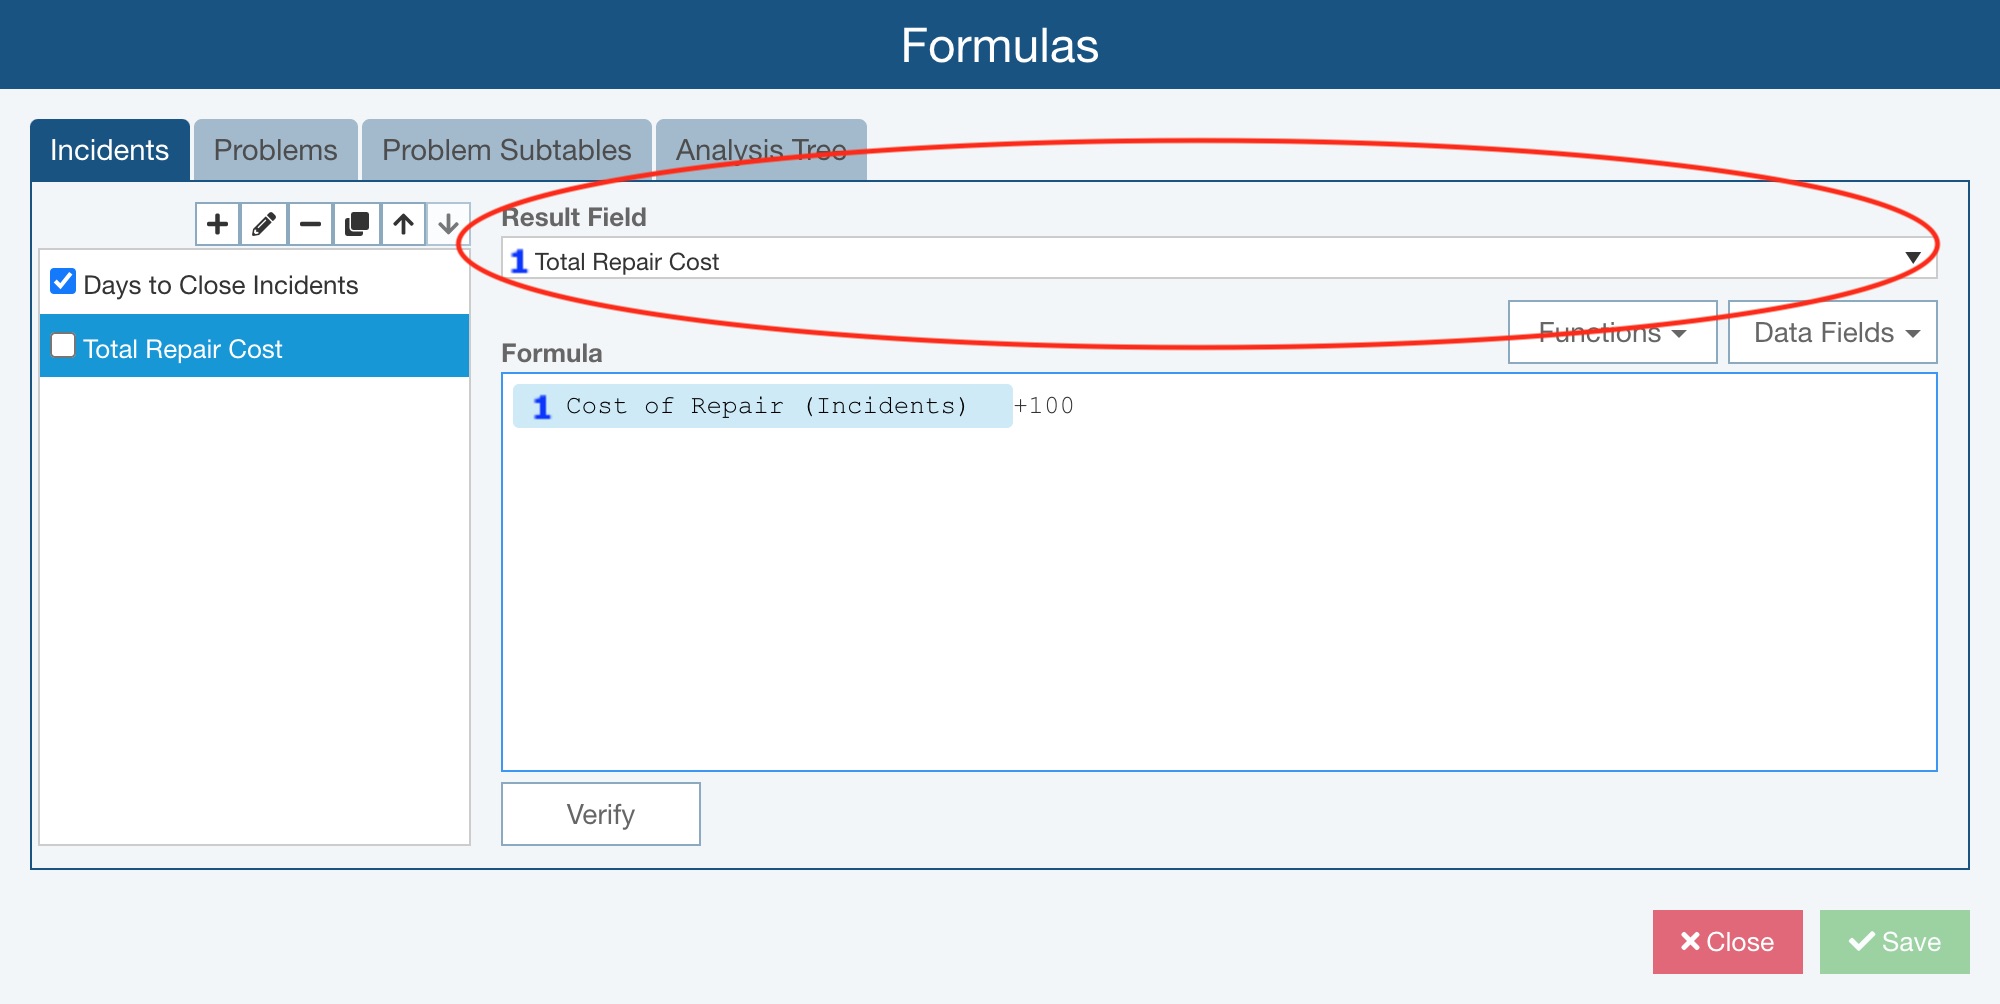
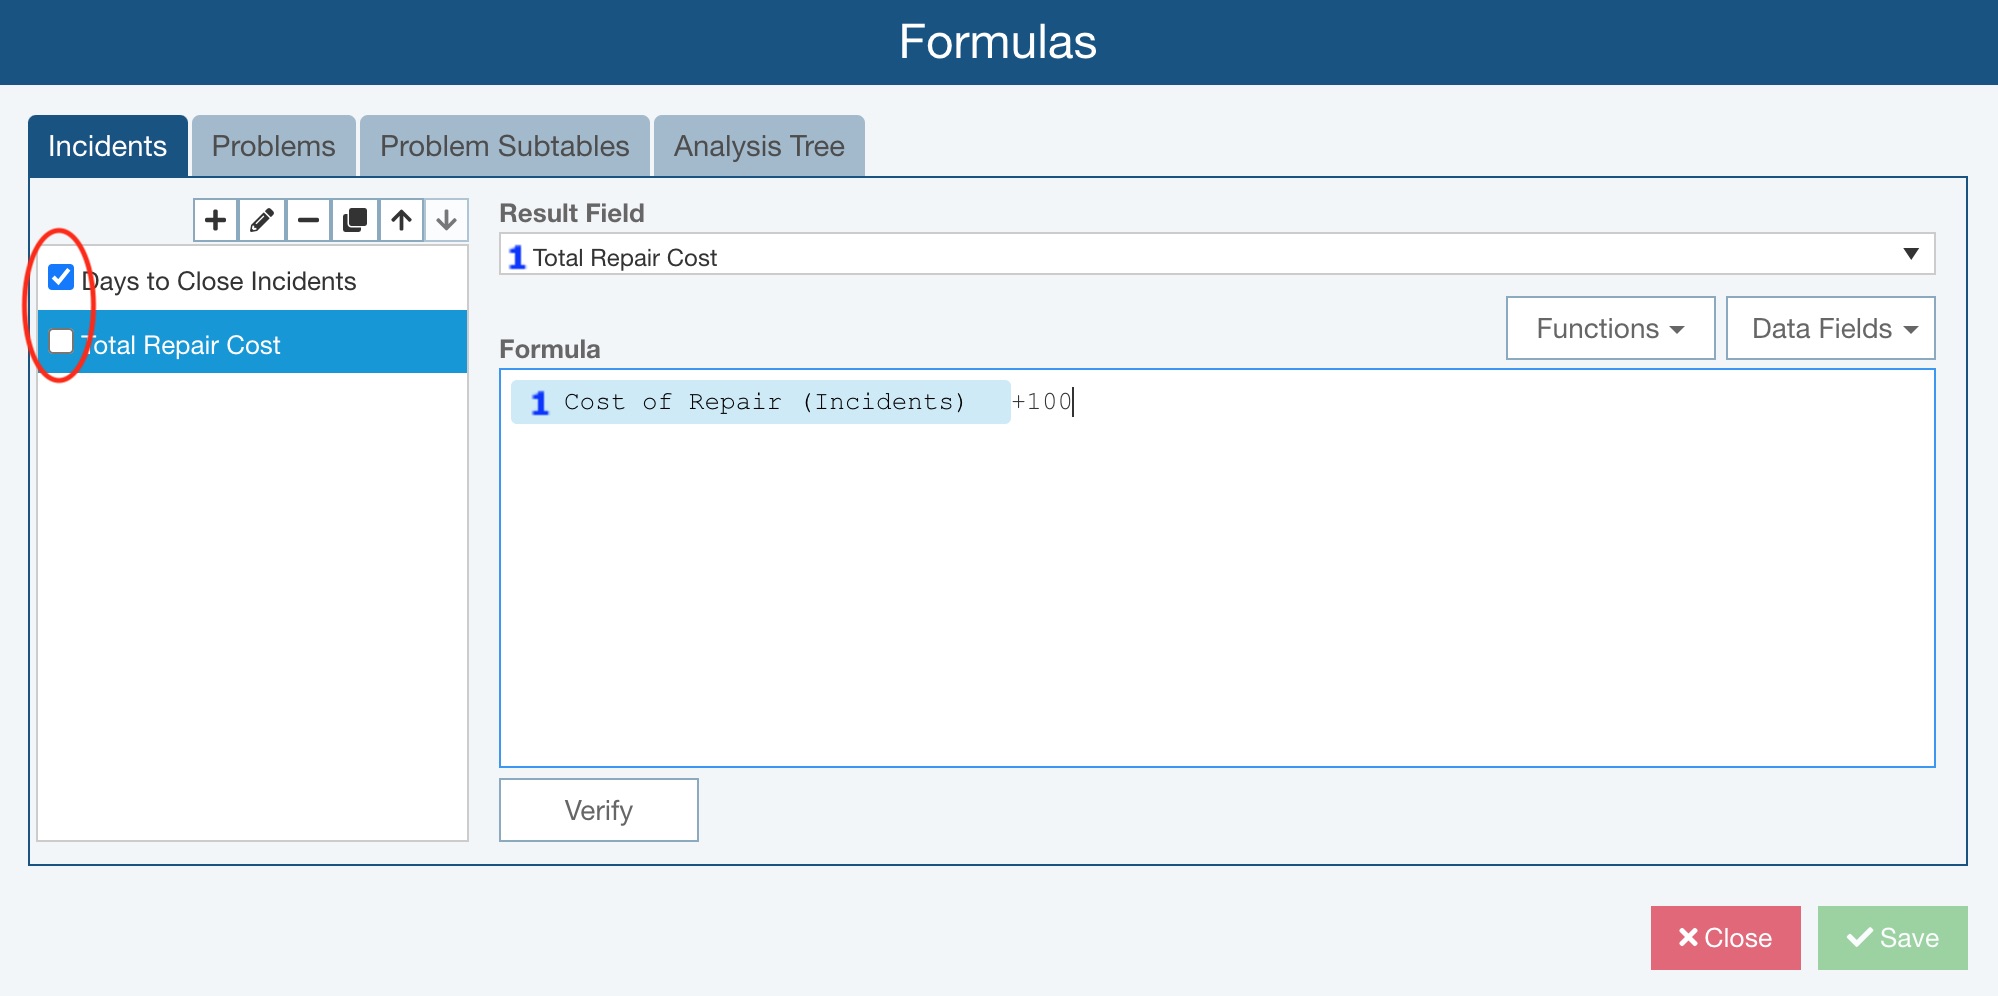
The Formulas dialog appears. The custom FRACAS formula shown below, Days to Close Incidents, appears in the Relyence supplied Drone Example Analysis.
The toolbar buttons on the Formulas dialog are used to manage your custom formulas.

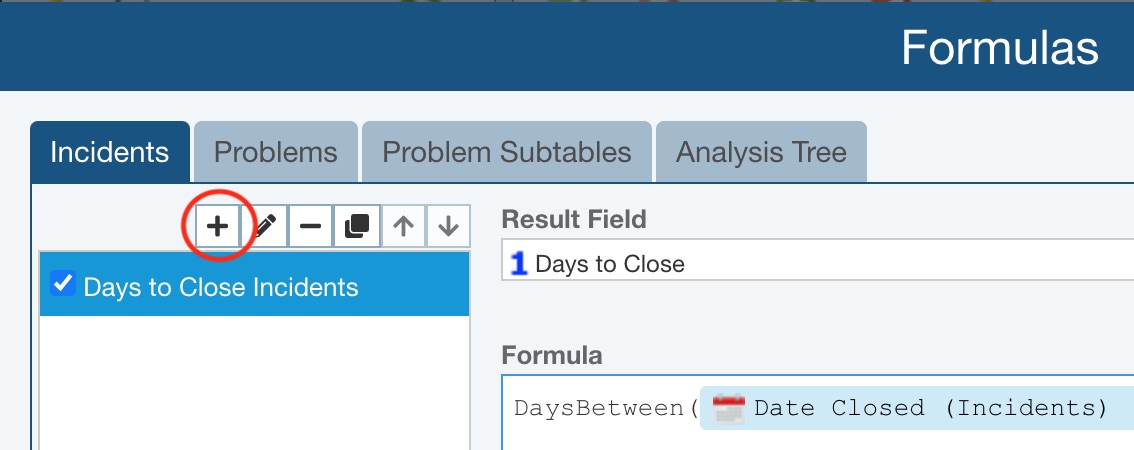
To add a new formula, click the plus (+) icon. To edit an existing formula, select it from the list and click the pencil icon. To delete a formula, select it from the list and click the minus (-) icon. To make a copy of a formula, select it from the list and click the copy icon.
Use the up and down arrow icons to rearrange the order of your formulas. Formulas are calculated in the order they are listed. This allows you to cascade formulas together, so the results of one formula can be used in another. Otherwise, the order of the formulas in this list is not important.
To add a new formula, select the relevant tab in the Formulas dialog and click the Add button.
The Add Formula dialog appears.
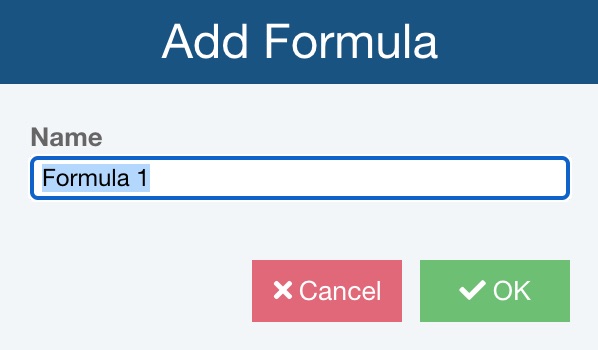
Enter a Name for the custom formula to replace the default formula name and click OK.
Back on the Formulas dialog, for Result Field, select the field that will store the result of your formula, or custom calculation.
Note that you may have to enter a new field to hold the formula result if it is not present. For more details on adding fields, see the Customizing the FRACAS Interface topic.
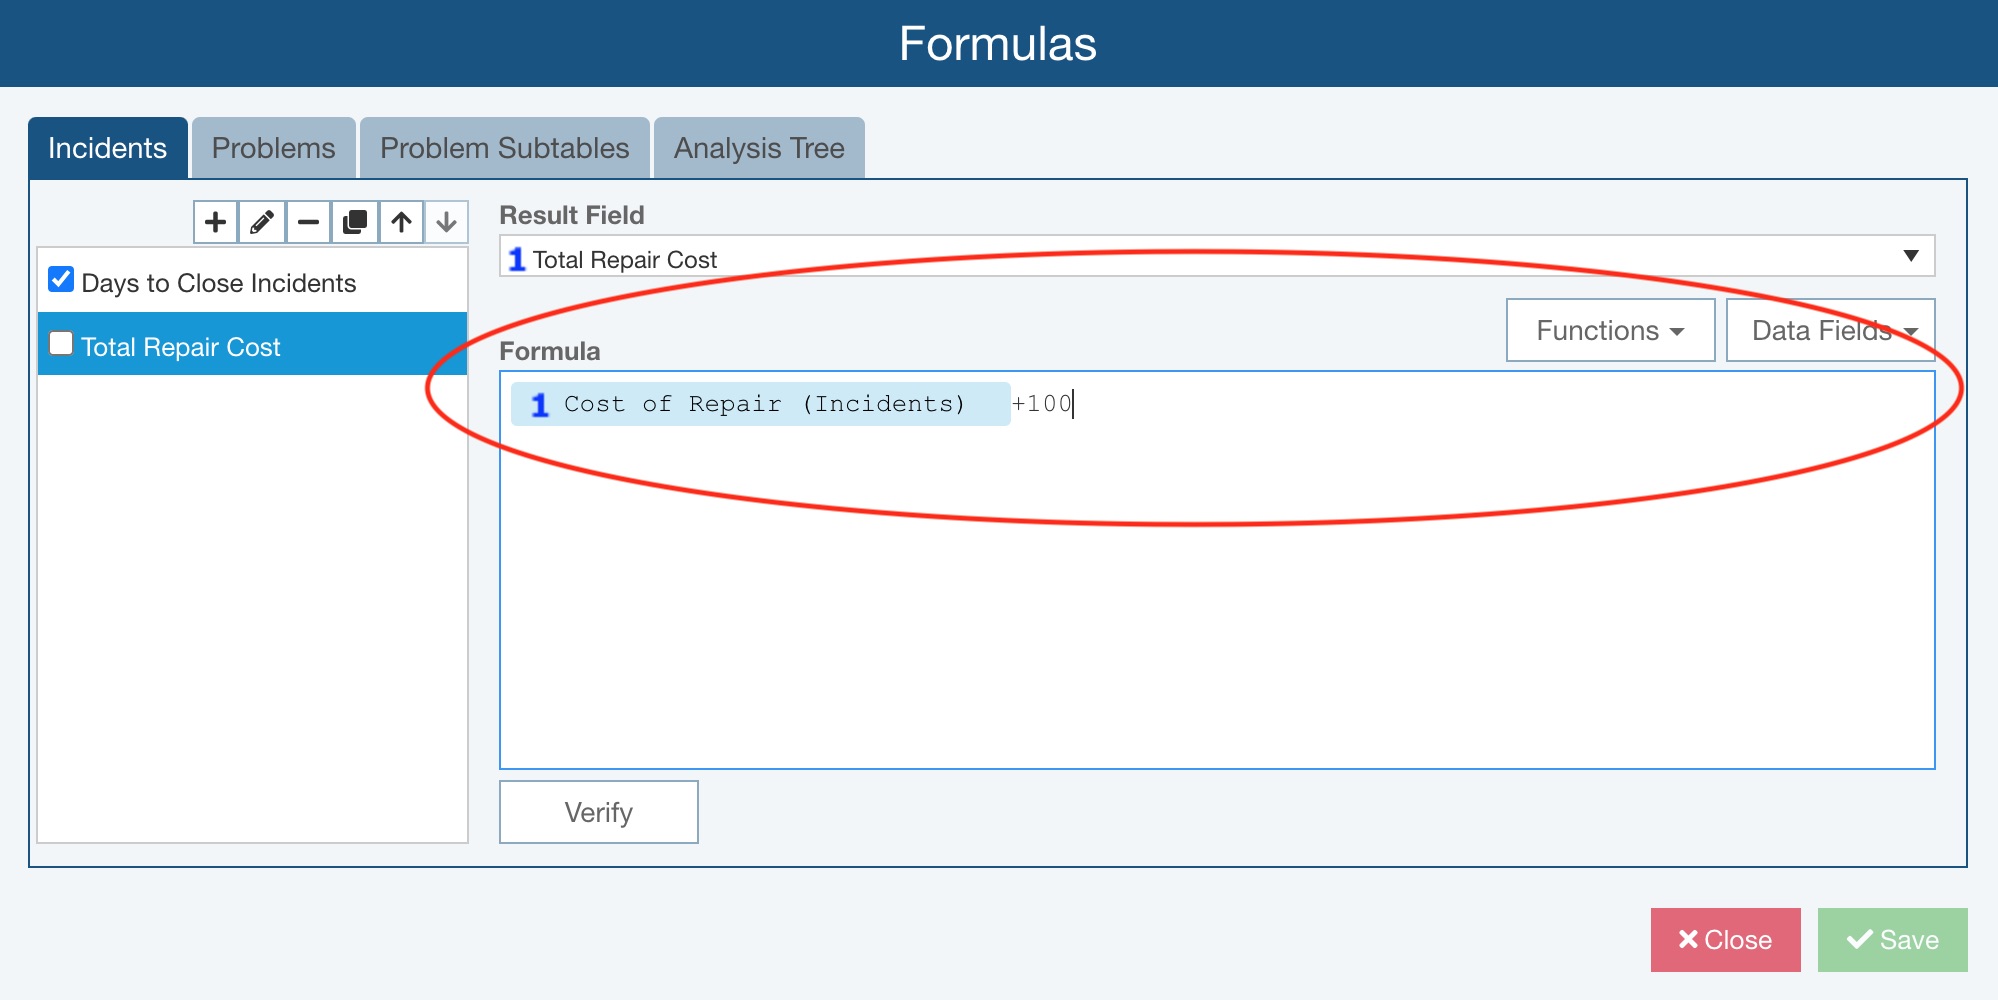
In the Formula field, you can then define the equation for your formula, or custom calculation. You can enter constant values from the keyboard as needed and also use the Functions and Data Fields features.
Depending on the type of formula you are defining, by clicking Functions, you can add Arithmetic Operators, Date Functions, Logical Operators, Constants, Math Functions, Rollup Functions, and/or Aggregate Functions.
Arithmetic Operators provide the basic addition, subtraction, division, and multiplication operations.
Date Functions allow you to add days, use the current date in a custom formula, determine the days between two dates, and incorporate the date into a custom formula.
Logical Operators allow you to compare fields and incorporate if-then-else statements into custom formulas.
Constants allow you to incorporate commonly used constant values into your custom formulas, such as TRUE (given value of 1), FALSE (given a value of 0), FRMULT (uses the value set in the Analysis as the Failure Rate Multiplier), and BLANK (clears the data in a field).
Math Functions allow you to include common mathematical functions, such as raising a value to a power [Pow(number, power)]and finding the square root of a value [Sqrt(number)], into your custom formulas.
Rollup Functions, including sum, average, minimum and maximum, allow custom formulas to find and use details from the applicable child records and roll the results up the Analysis Tree. Rollup Functions are only available for Analysis Tree formulas.
Aggregate Functions, including sum, average, minimum, maximum, count, and concatenate allow custom formulas to find and use details from the applicable child records. Note that the first, and often only, parameter for the Aggregate functions is the field to consider. For the ConcantentateField function, the first parameter is the field you want to join together; the second parameter is an optional separator, such as "," or ";" or "and" or "\r\n". The "\r\n" option moves each value to the next line. If no separator is defined, Relyence will use a return so that all values appear on separate lines. Aggregate Functions are available for Analysis Tree formulas, as well as FMEA Worksheet formulas.
For any added Functions, you can use the Data Fields button to include the appropriate data fields. You can also use the Data Fields button to add fields outside of any functions as part of the formula to be completed. Note that when adding Data Fields, you can also type "@" in the Formula field and the start of the text of the field name to add a data field without using the Data Fields button; once you see the appropriate field, click to select it.
Once your custom formula is defined, click Verify to make sure it is valid.
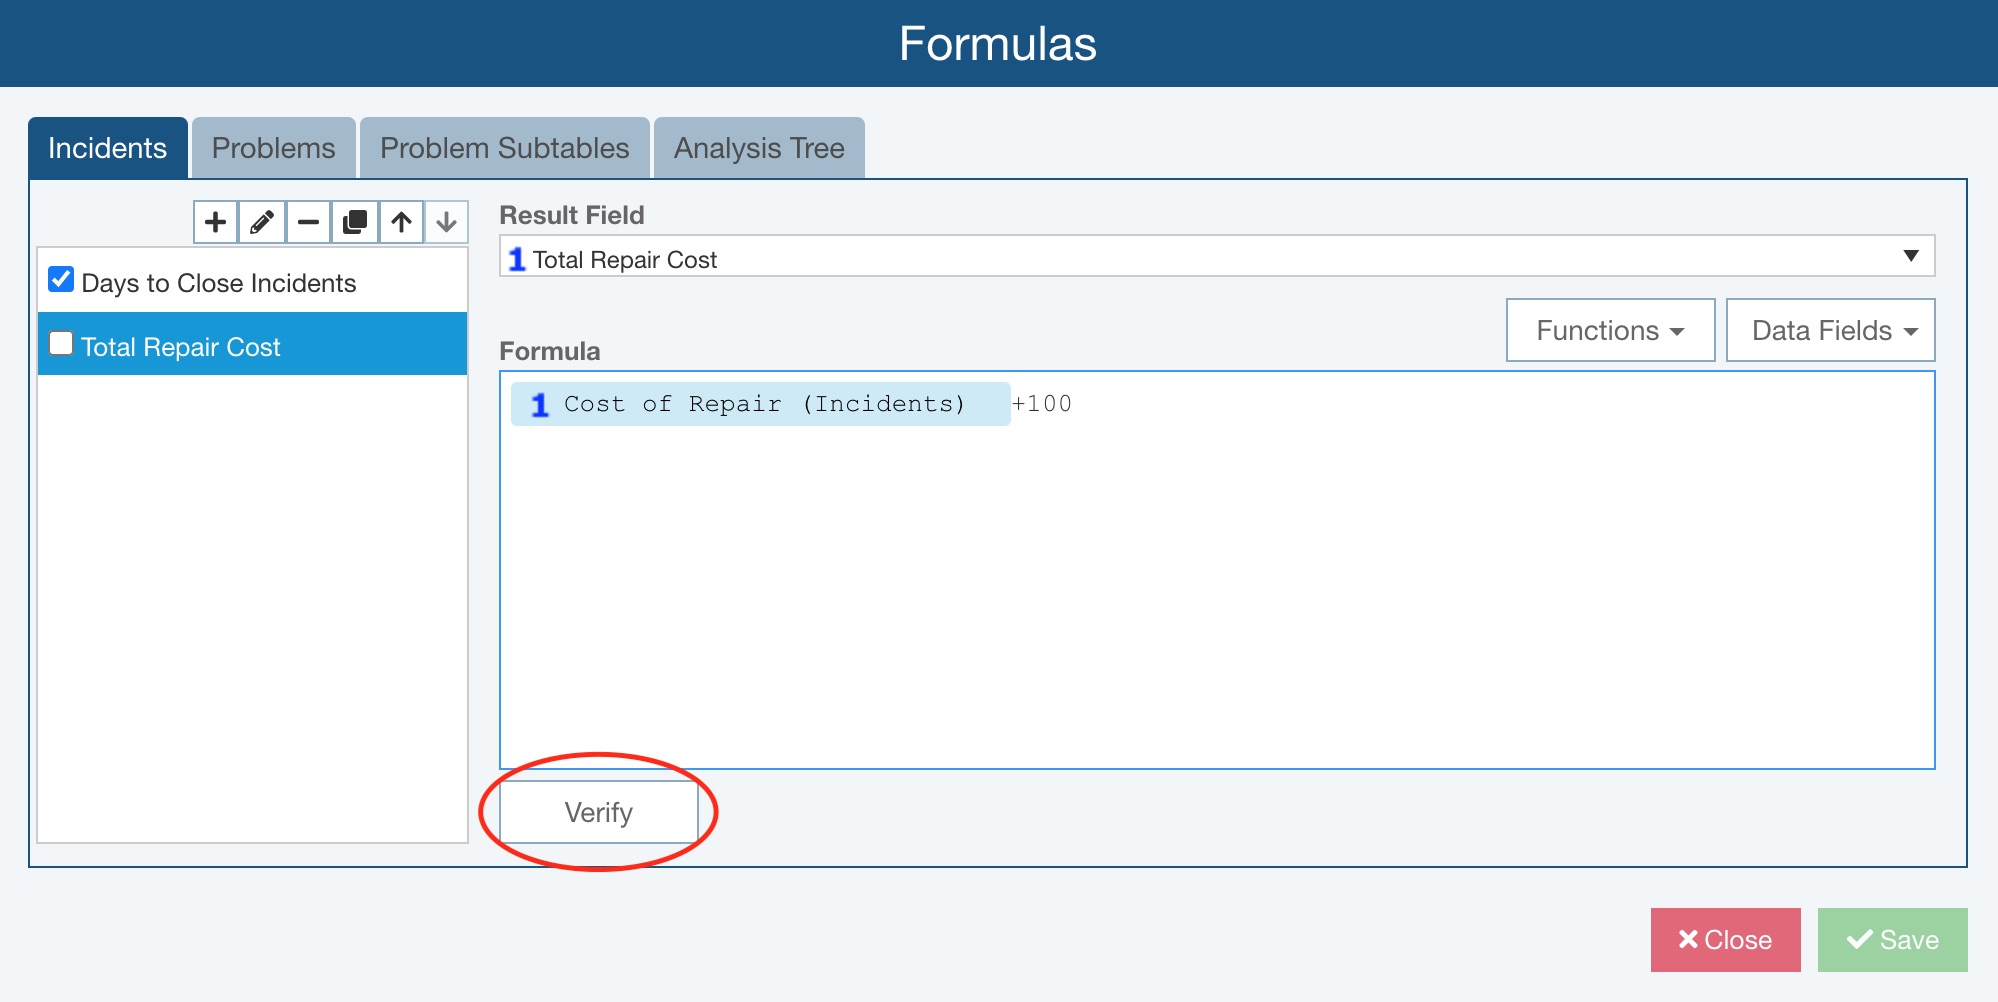
A green pop-up will appear in the bottom right stating "Formula is valid" to indicate if the formula is valid.
If the formula is not valid, an error message will appear in red just below Verify and a red icon appears next to the formula name.

Note that if you attempt to save while one or more formulas are not valid, a message indicates that "One or more formulas have errors. Do you want to continue saving?" Choose Yes or No.
Once you have completed defining your custom Formulas, click Save and then Close to return to the Analysis.
Enabling and Disabling Your Custom Formulas
You can also enable and disable your custom formulas. If you want to disable a formula, clear the checkbox next to the formula name.
When you calculate, including your custom formulas, only your enabled formulas will be computed.
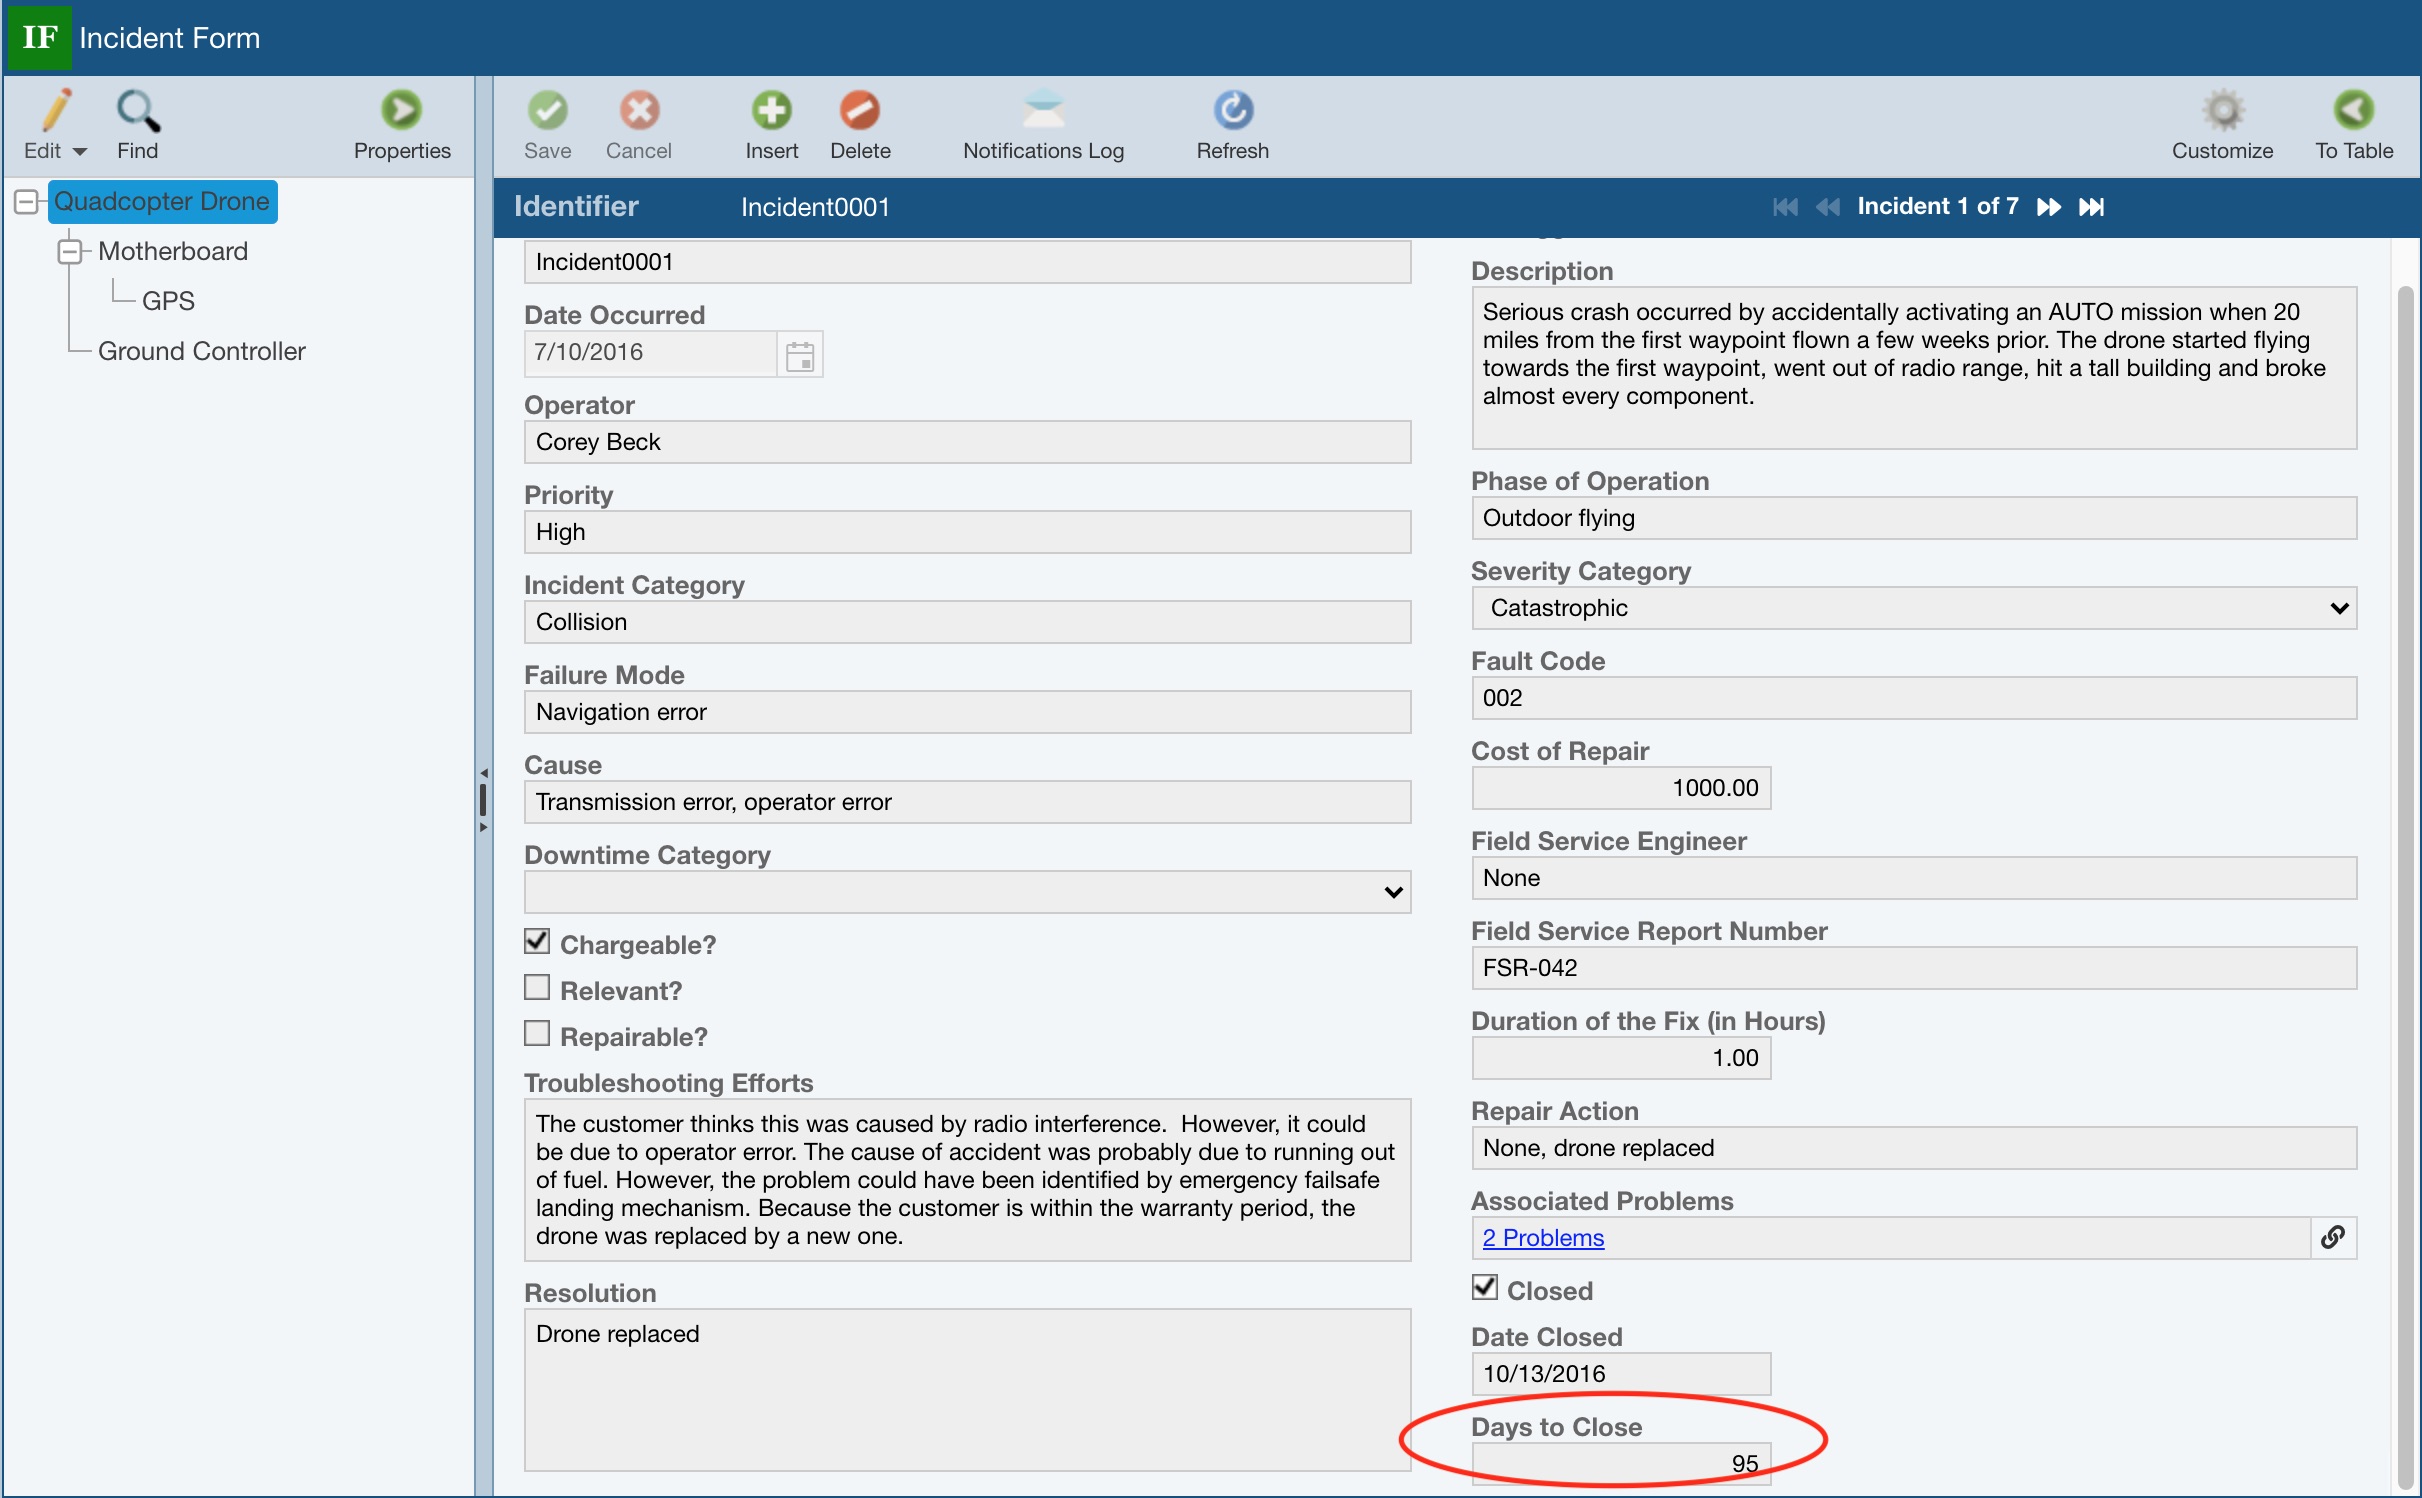
The results of your custom formulas will appear on your Tables and Forms where you have included the Result Field, and also on your reports where the Result Field is included.
Calculating Your Custom FRACAS Formulas
To calculate your custom formulas, select Calculate from the Sidebar menu when FRACAS is active. On Calculate FRACAS dialog, select Formulas.
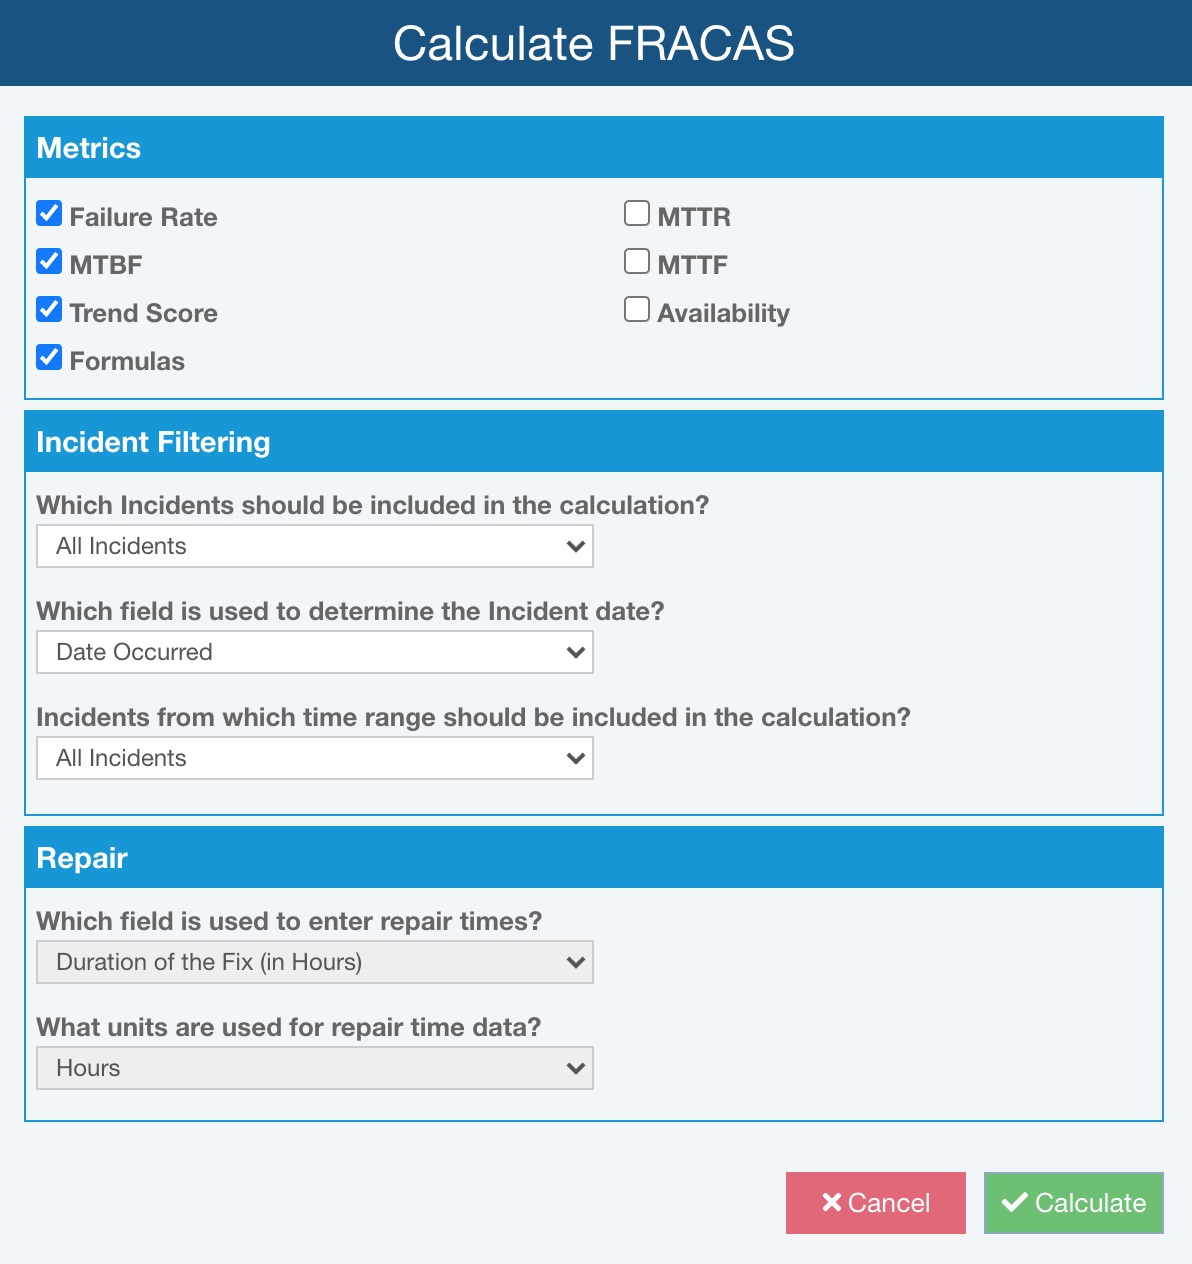
Click Calculate.
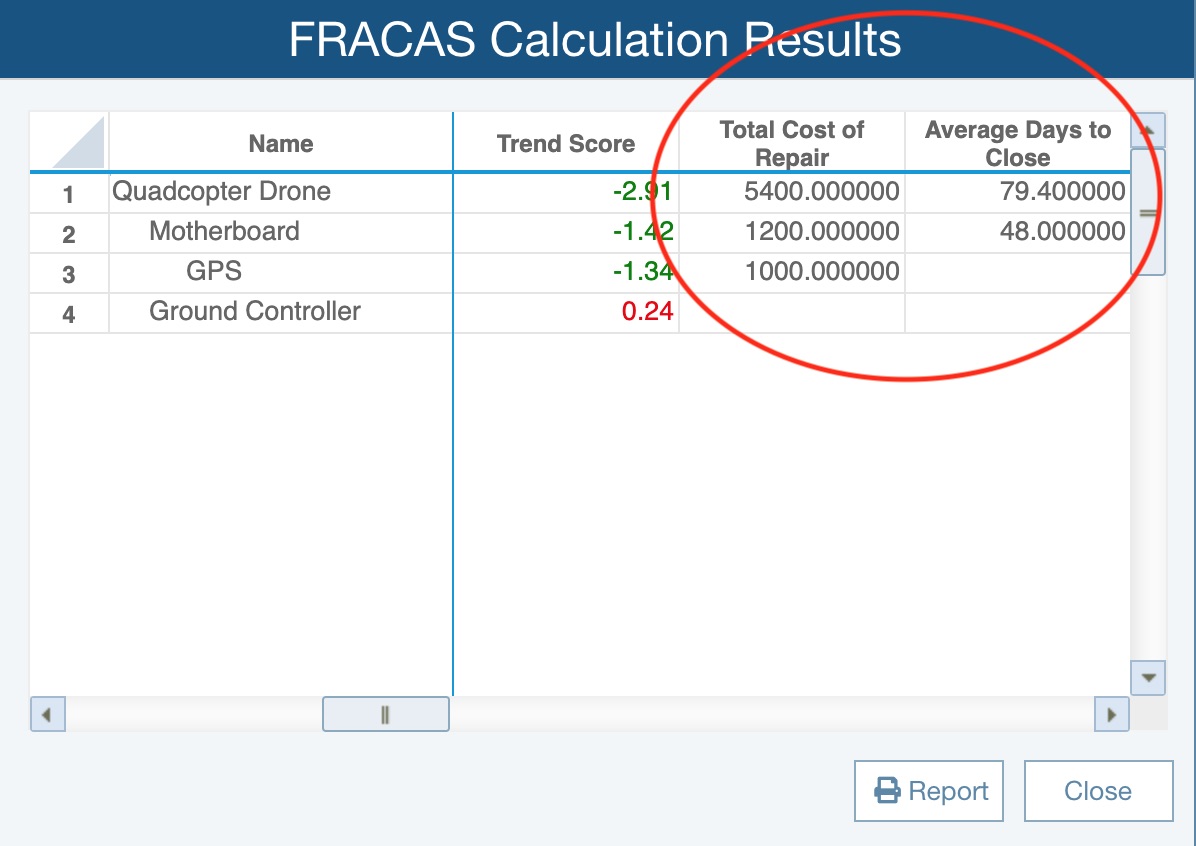
The results of your FRACAS Roll up formulas will appear on the FRACAS Calculation Results dialog.
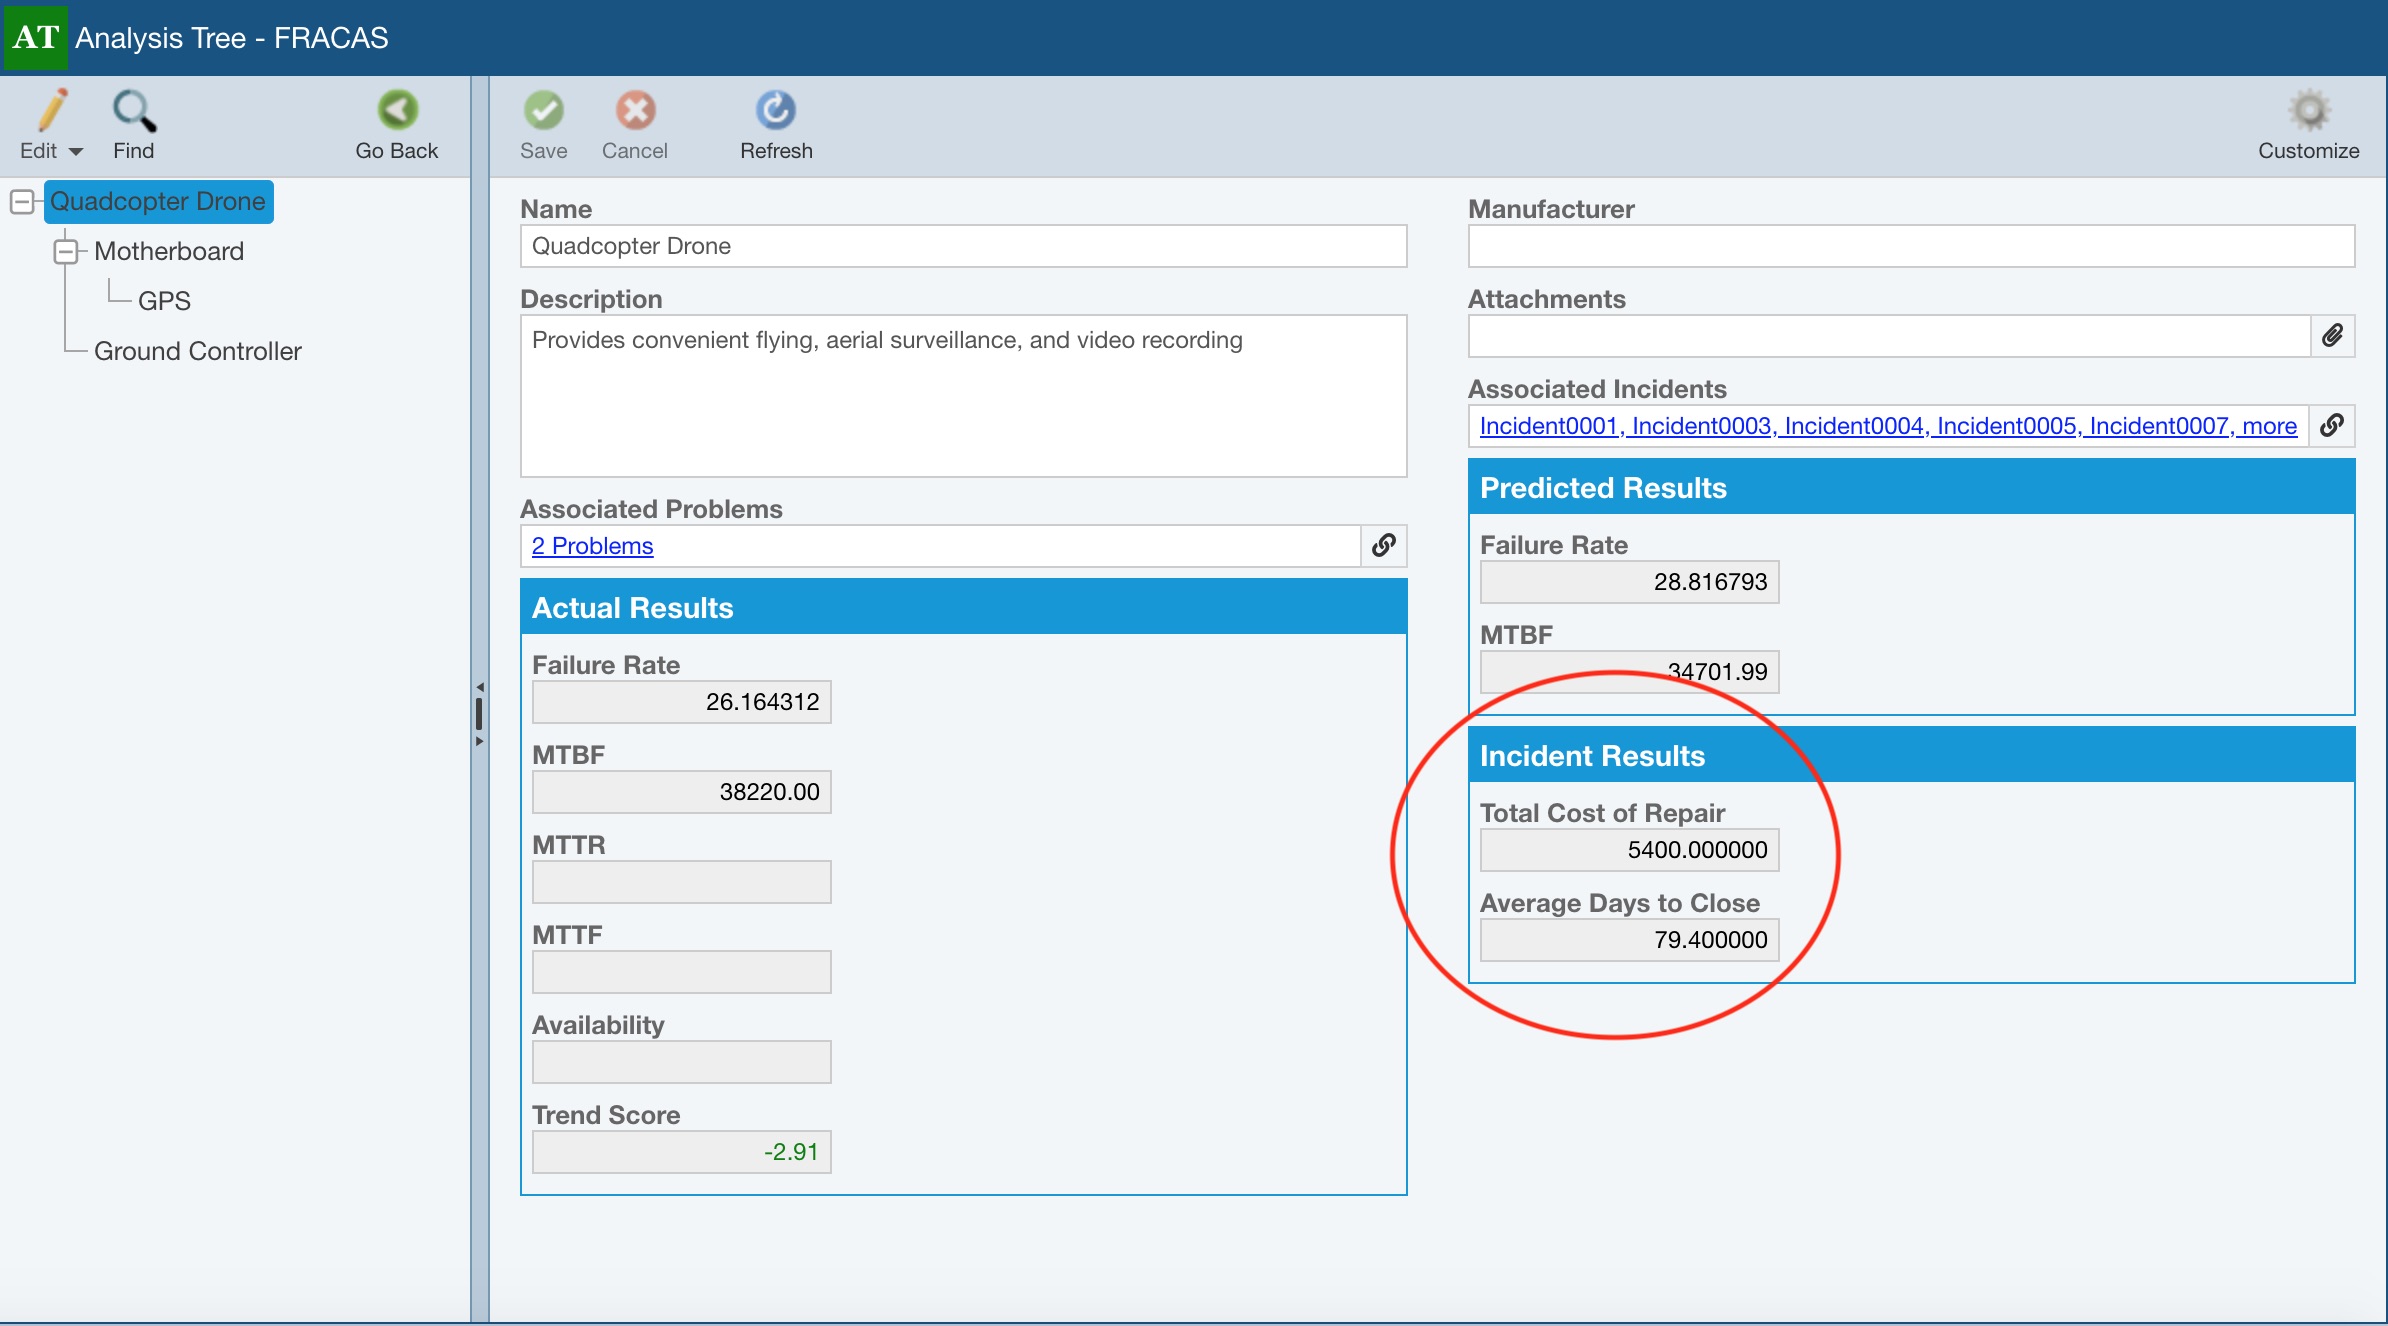
The FRACAS Roll up results will also appear on the Analysis Tree Properties form if you have the Result field shown. For information on customizing the Analysis Tree Properties form to show data fields you choose, see the Customizing the FRACAS Analysis Tree Properties topic.
The FRACAS Incident and Problem formula results will appear on your FRACAS Tables and Forms where you have the result field shown. For more information about customizing your FRACAS Tables and Forms to show the fields you choose, see the Customizing the FRACAS Interface topic.