Derating Analysis
It is often preferable that devices operate at some level below the maximum threshold. Determining the level of stress that is acceptable is based on your own product requirements. You may have your own levels of acceptable stress, or you may want to use a published derating standard that delineates acceptable levels of component stress.
In Relyence Reliability Prediction, you can choose from one of the built-in derating standards, create a completely custom derating profile, or start with a supplied derating standard and modify it to suit your needs. Relyence Reliability Prediction supports the following commonly employed derating standards:
- MIL-STD-1547
- MIL-STD-975M
- TE000-AB-GTP-010
If derating analysis is enabled, Relyence Reliability Prediction automatically performs derating analysis during failure rate calculations. Any components exceeding their stress limitations are flagged and appear in red on your tables and reports. Using the Relyence Pi Factors feature, you can view the specific overstress condition for any component in your Analysis.
You can create as many custom Derating Libraries as you want. However, only one Derating Library can be enabled for derating analysis.
Enabling Derating Analysis
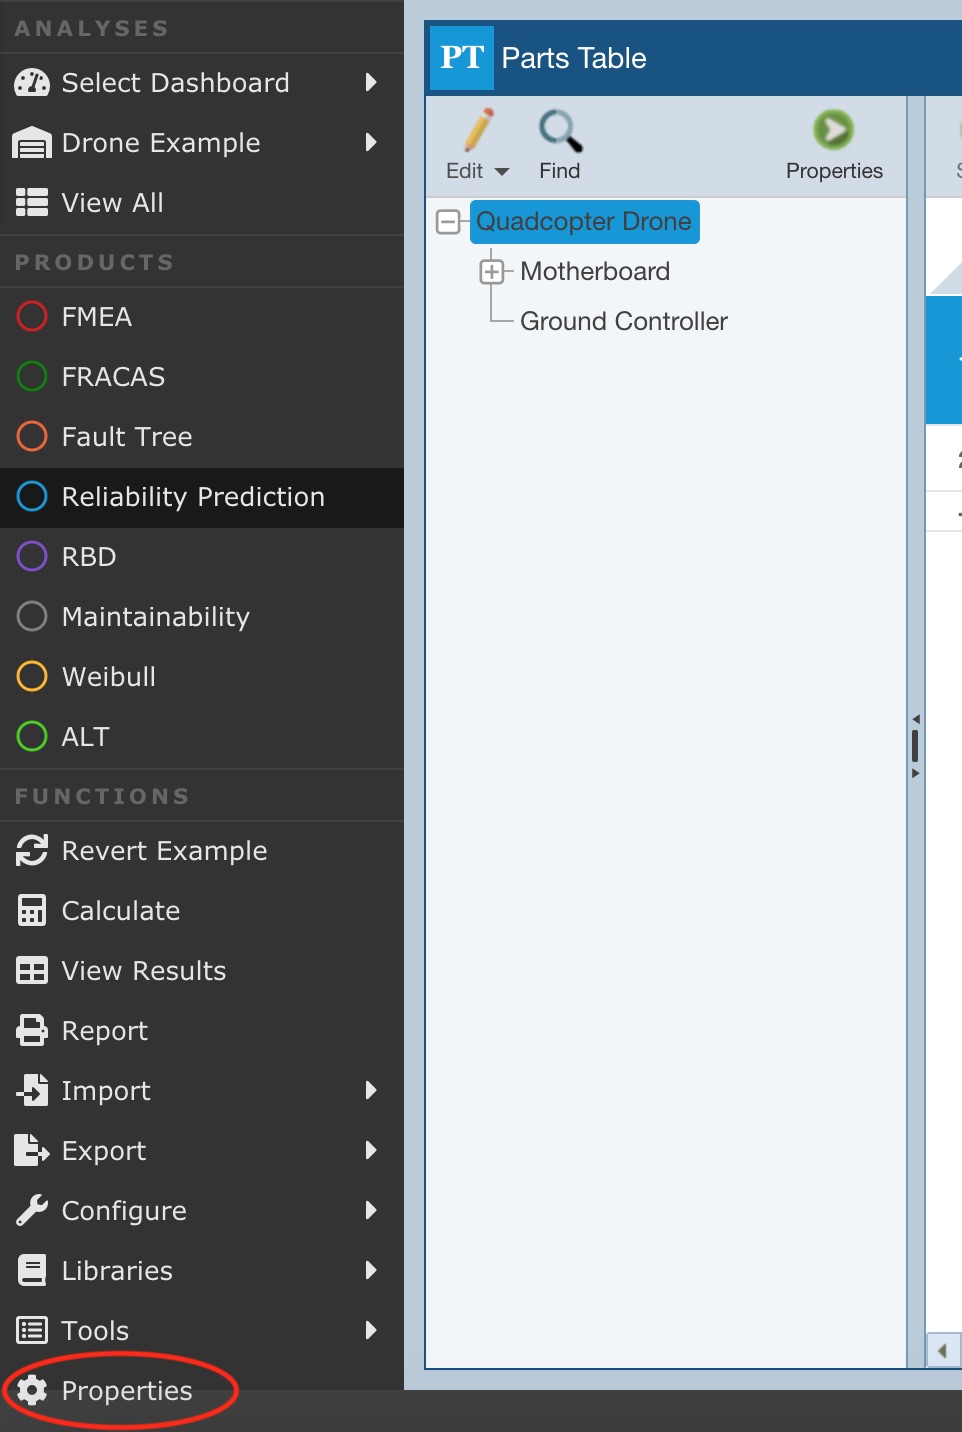
To enable derating analysis, click Properties from the Sidebar menu when Reliability Prediction is active.
The Reliability Prediction Properties dialog appears.

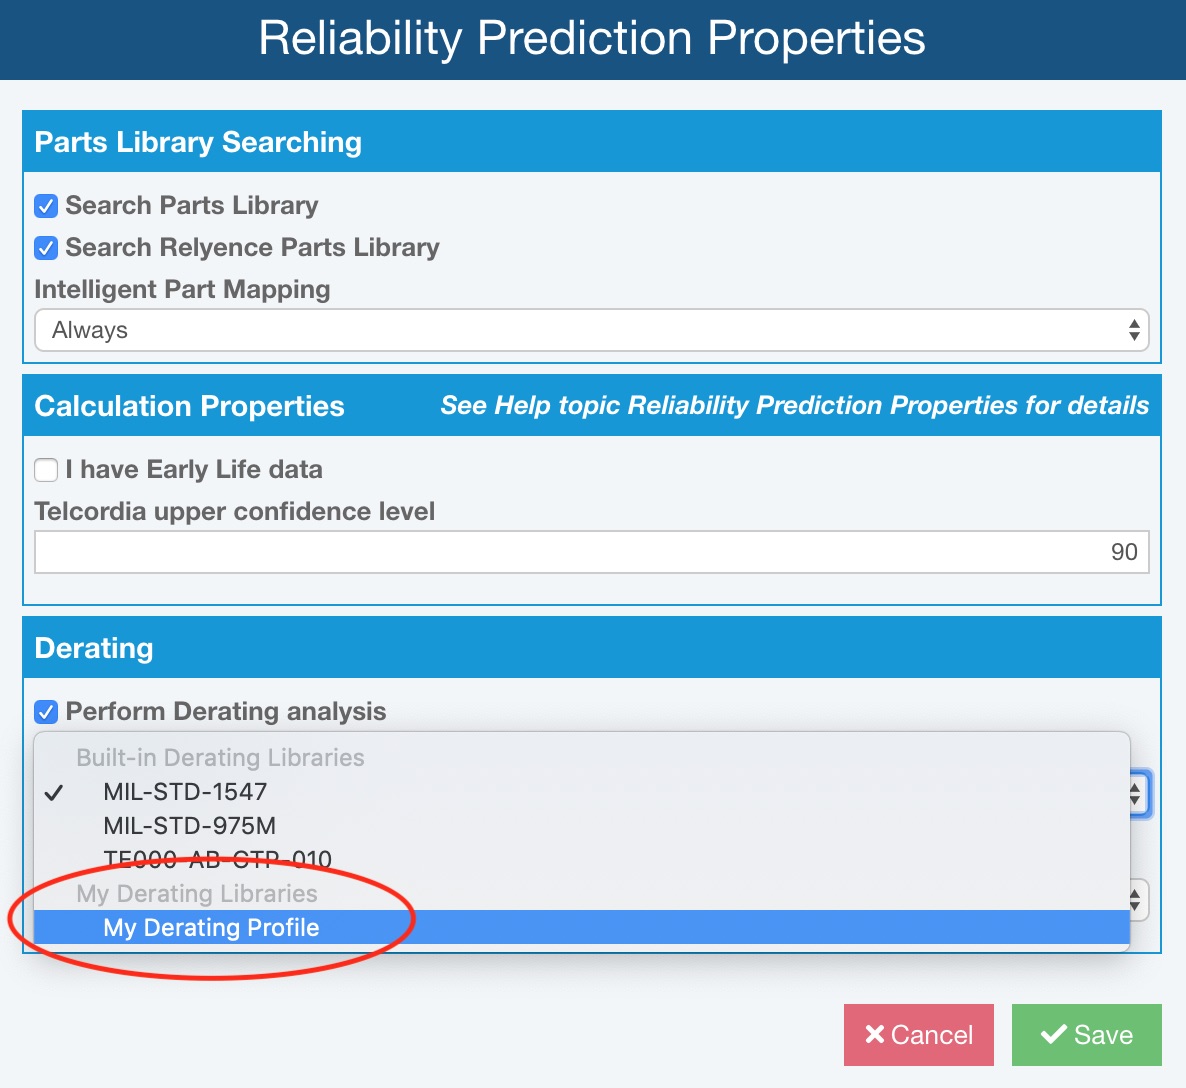
In the Derating section, select Perform Derating analysis.
Click the dropdown list arrow on the Derating Library field to select the Derating Library to use for analysis.
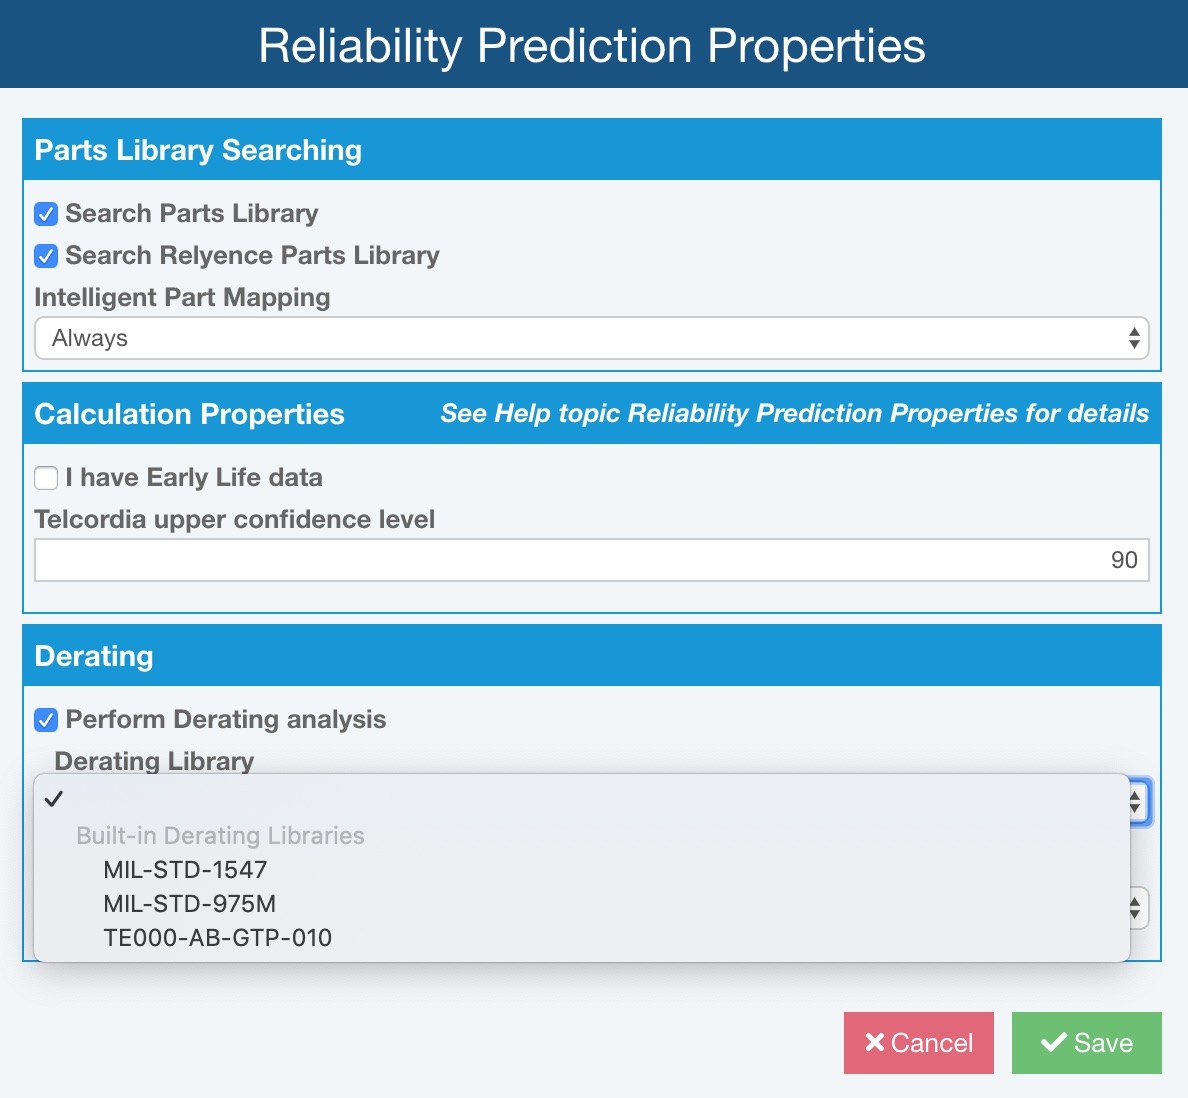
Relyence Reliability Prediction has several commonly used Derating Standards built-in, including MIL-STD-1547, MIL-STD-975M, and TE000-AB-GTP-010. You can select to use any of these Derating Standards when performing derating analysis.
You can also create your own custom Derating Libraries. If you have created any custom Derating Libraries, they will appear in the Derating Library dropdown list.
Select either Nominal or Worst Case to use as the Overstress Criteria when performing derating analysis.
Click Save to save your changes.
Creating and Using a Custom Derating Library
If you prefer, you can create your own custom Derating Library to use to perform derating analysis. To create your own Derating Library, you can either start with one of the built-in derating standards, or create a completely custom library.
Step 1: Create your Derating Library
To begin, you must create a Derating Library. You can create a completely new Derating Library, or you can also create a new Derating Library based on one of the Relyence built-in standards-based Derating Libraries and modify it to suit your needs.
Creating a new Derating Library
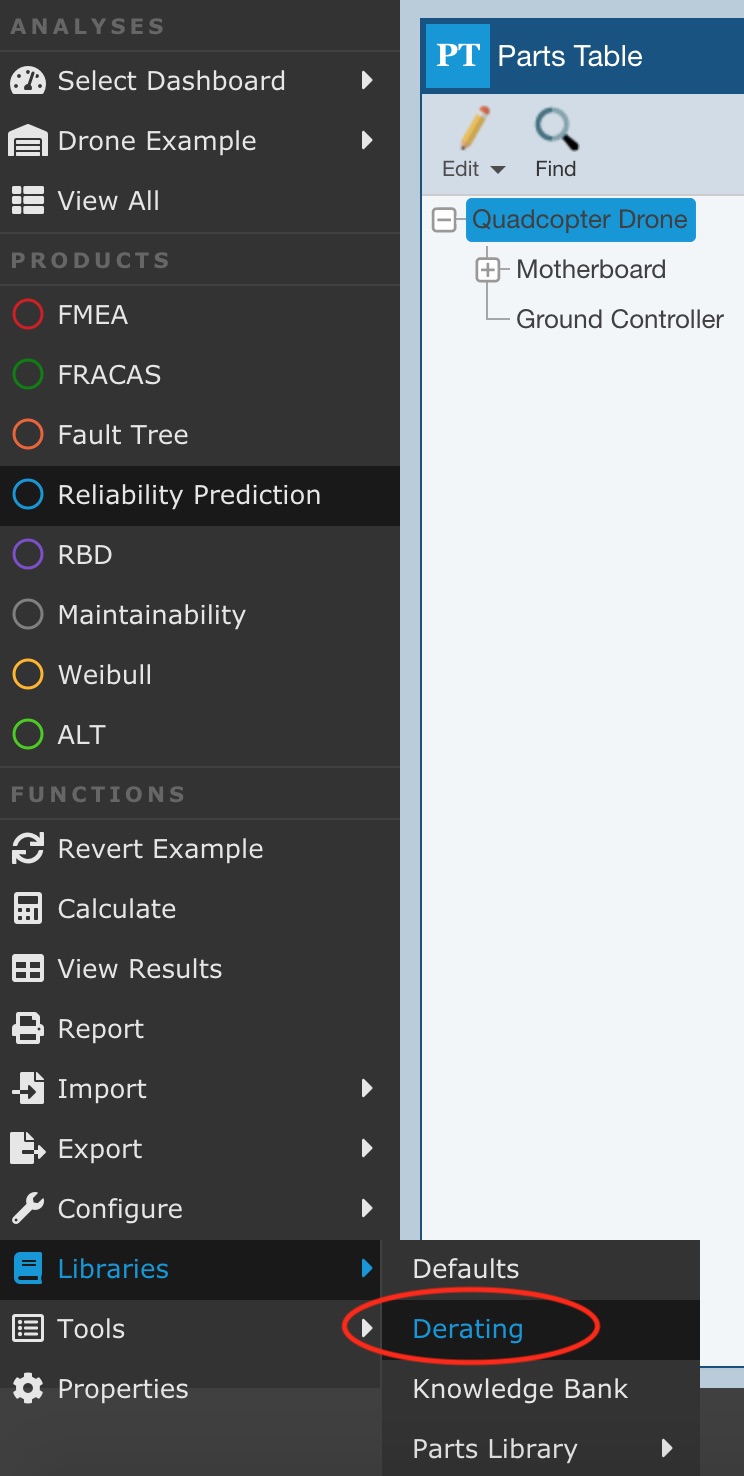
If you have not yet created a Derating Library, click Libraries>Derating from the Sidebar menu.
Note: If you have already created a Derating Library, it will opened for you. If you have created more than one Derating Library, the names of your Derating Libraries will appear in the Libraries>Derating submenu. Click the appropriate Derating Library name to open it.
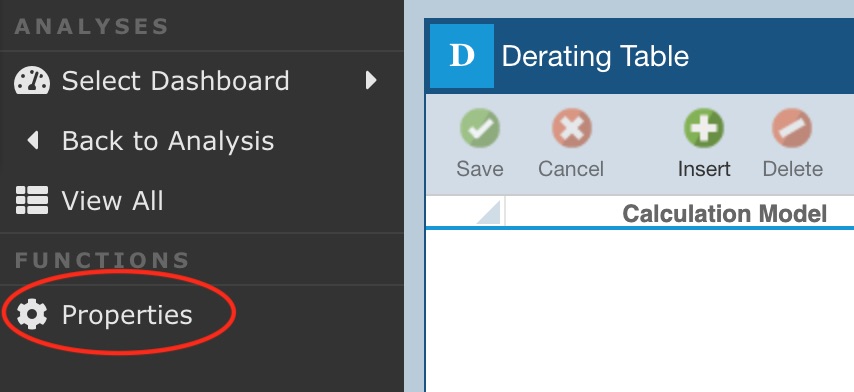
A new Derating Library will be automatically created, and an empty Derating Table appears.
![]()
The new Derating Library is named Derating Library 1. If you want to rename the Library, click Properties in the Sidebar menu.
The Derating Library Properties dialog appears.
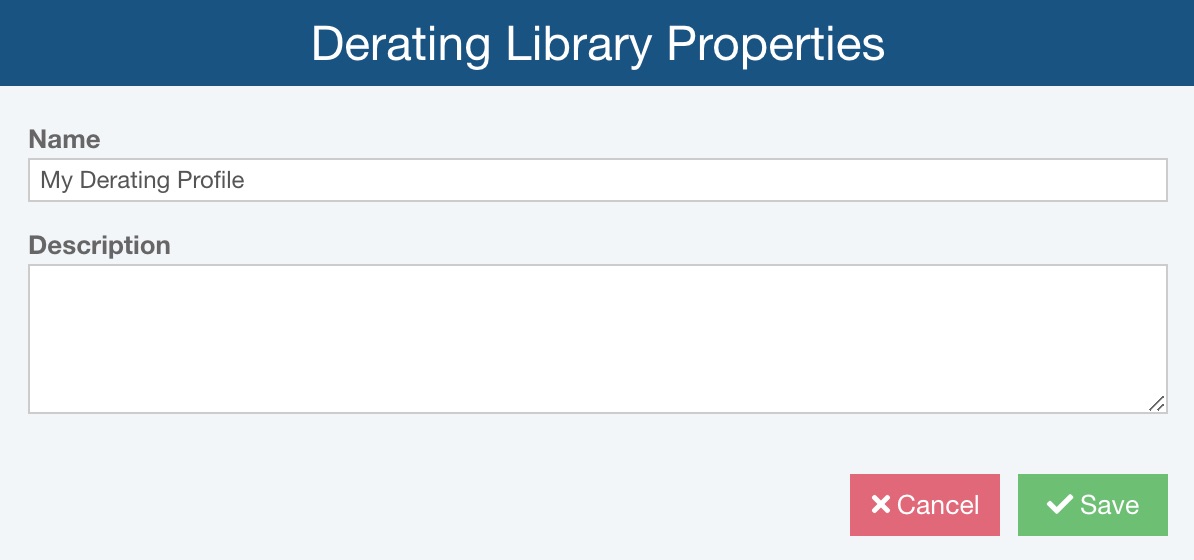
Enter the Name and Description, if desired, of your Derating Library and click Save.
Now move on to Step 2: Add your derating settings.
Creating a Derating Library based on a built-in standards-based Derating Library
To create a Derating Library based on a supplied Library, you will need to use the Manage Analyses function.
Click Manage Analyses from the Account Menu. (Note: You will not see the Manage Analyses function in the Account menu if you do not have permission to access it. In the case, you will have to contact your Relyence Administrator to request access or to create a Derating Library for you.)

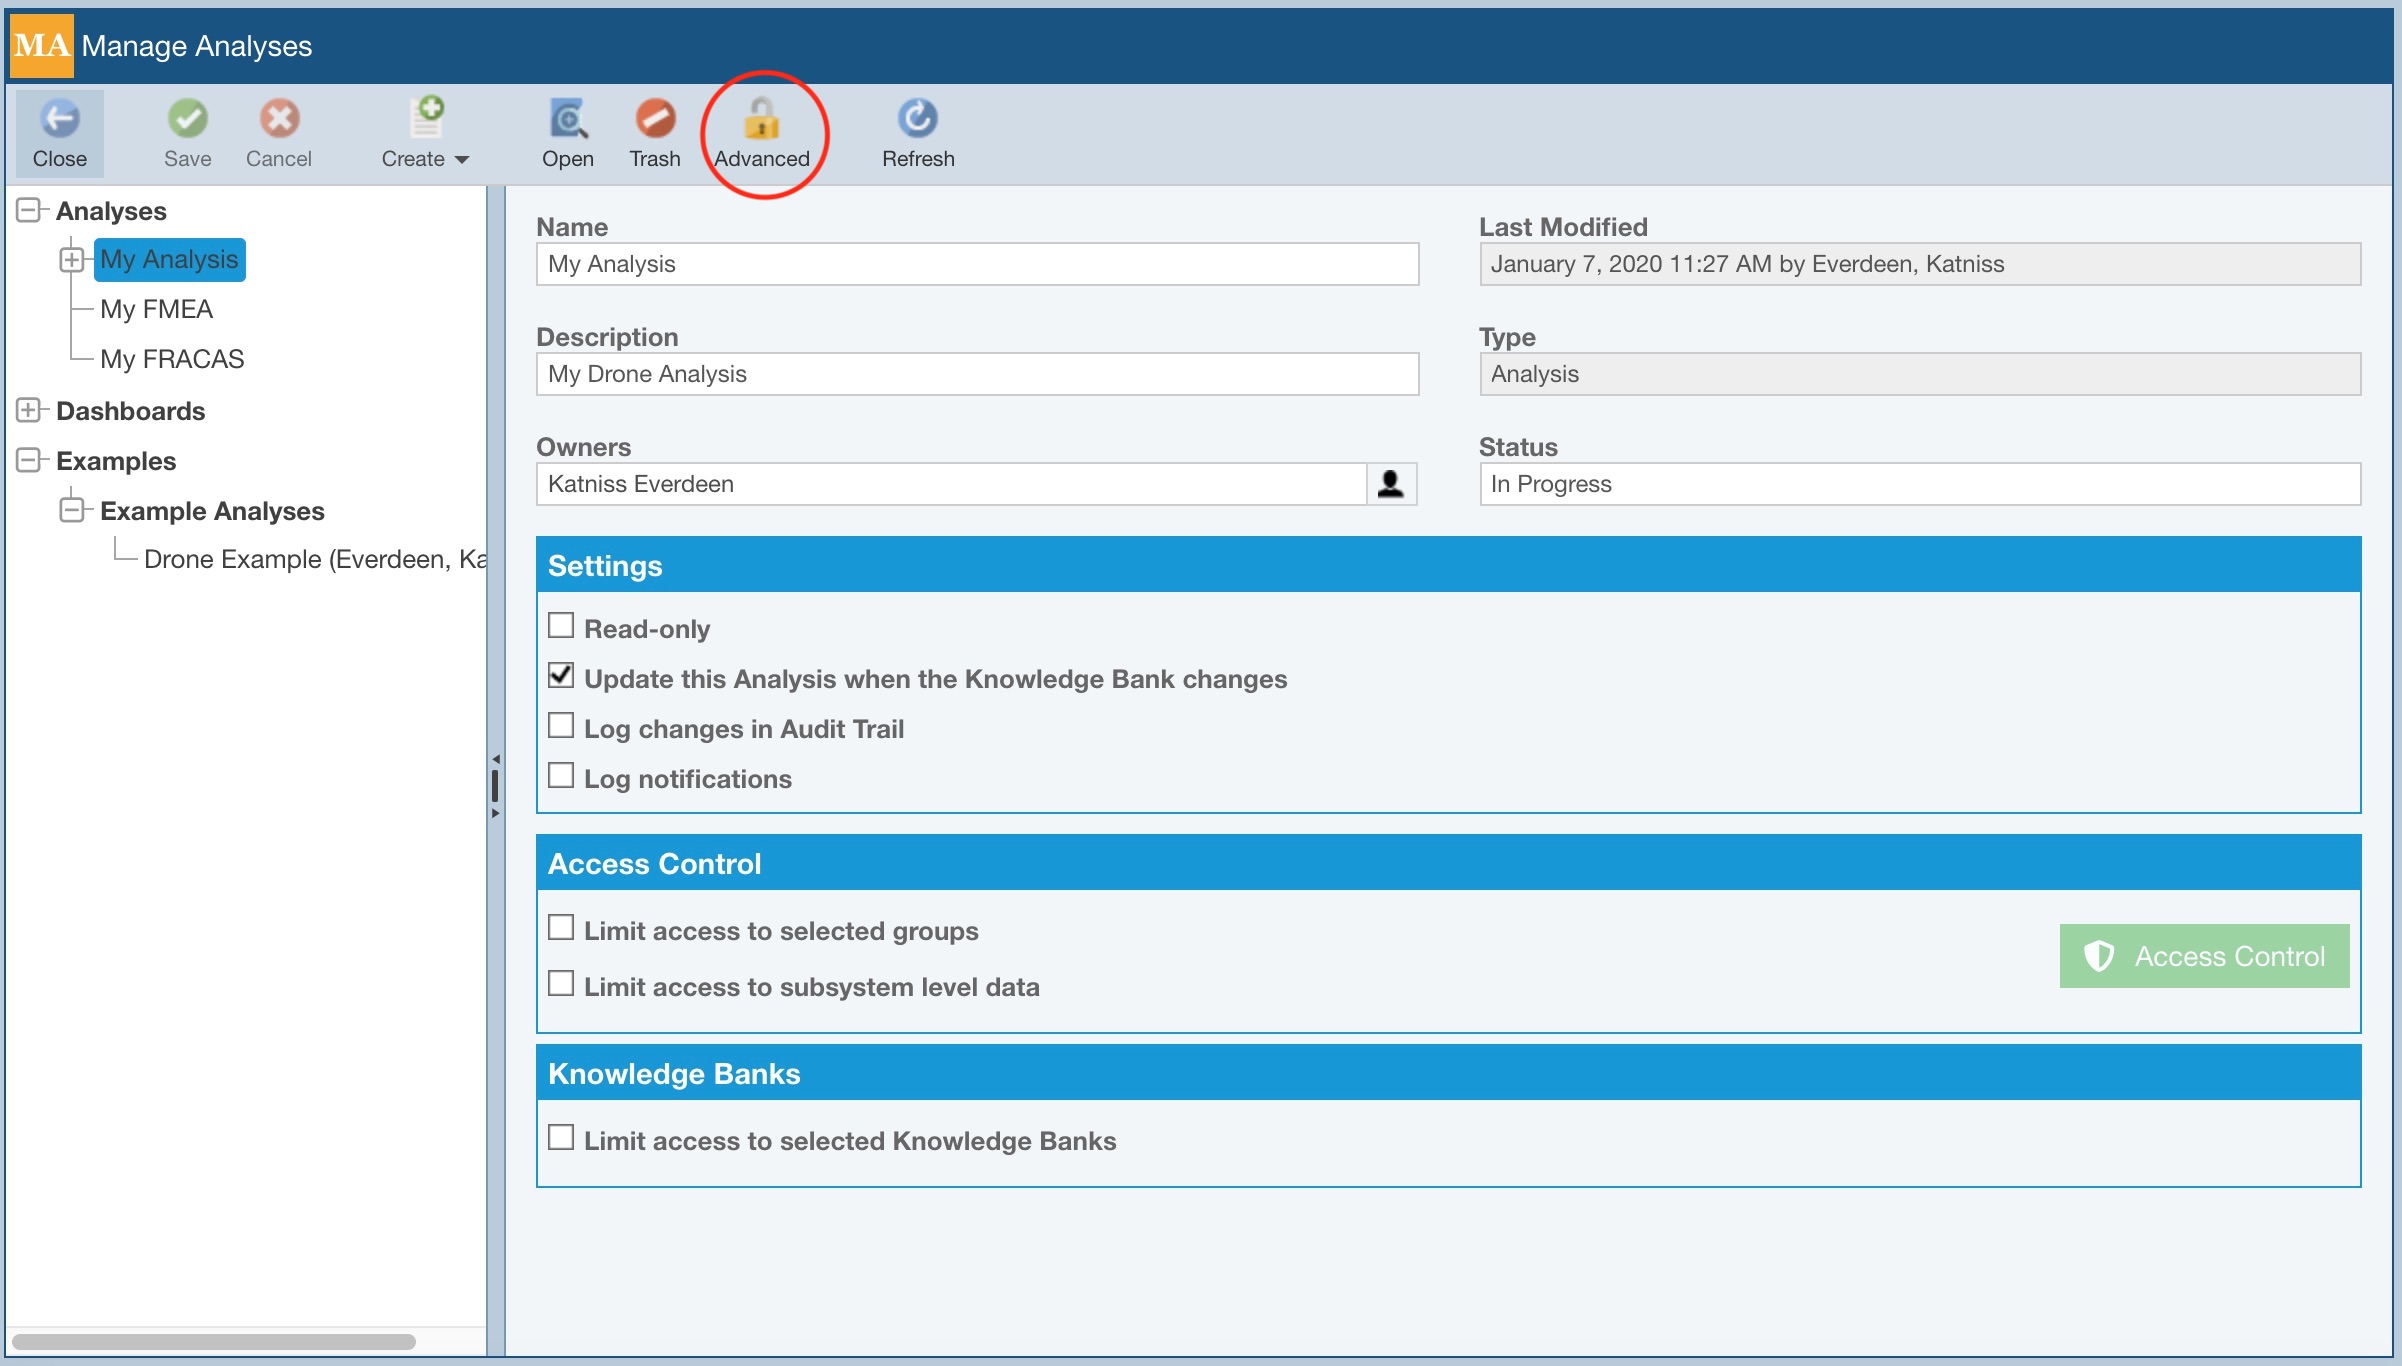
The Manage Analysis page appears. Click the Advanced button in the toolbar to show the Reliability Prediction Libraries.
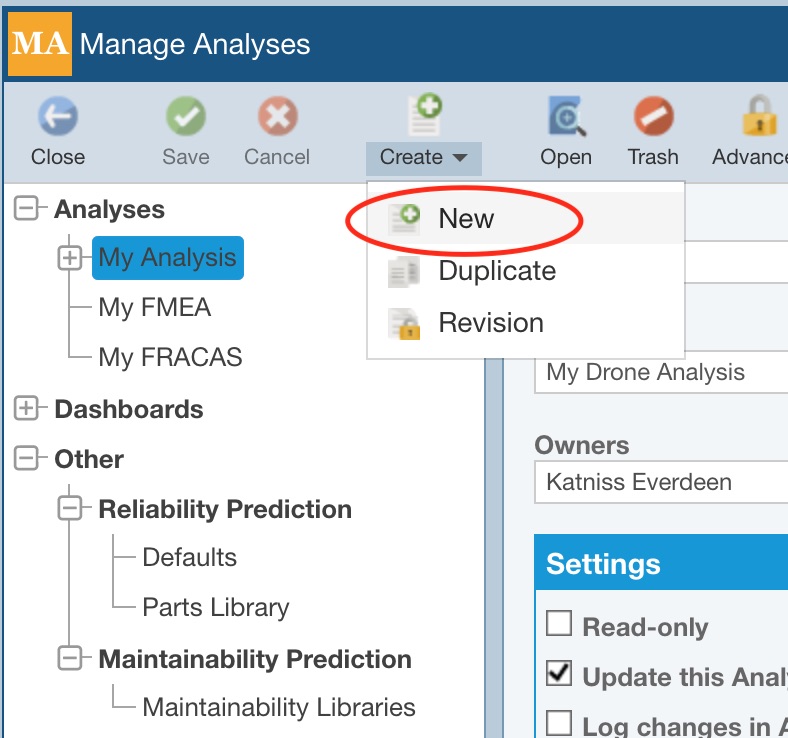
Click Create>New from the toolbar.
The Create New dialog appears. Enter the Name for your Derating Library. Enter a Description if desired. Select Derating Library from the I want to create a new list.
To create a Derating Library based on a built-in standard, select Create based on an existing Derating Library; otherwise, clear it. If creating based on an existing standard, select the desired standard from Derating Library to use as basis list.
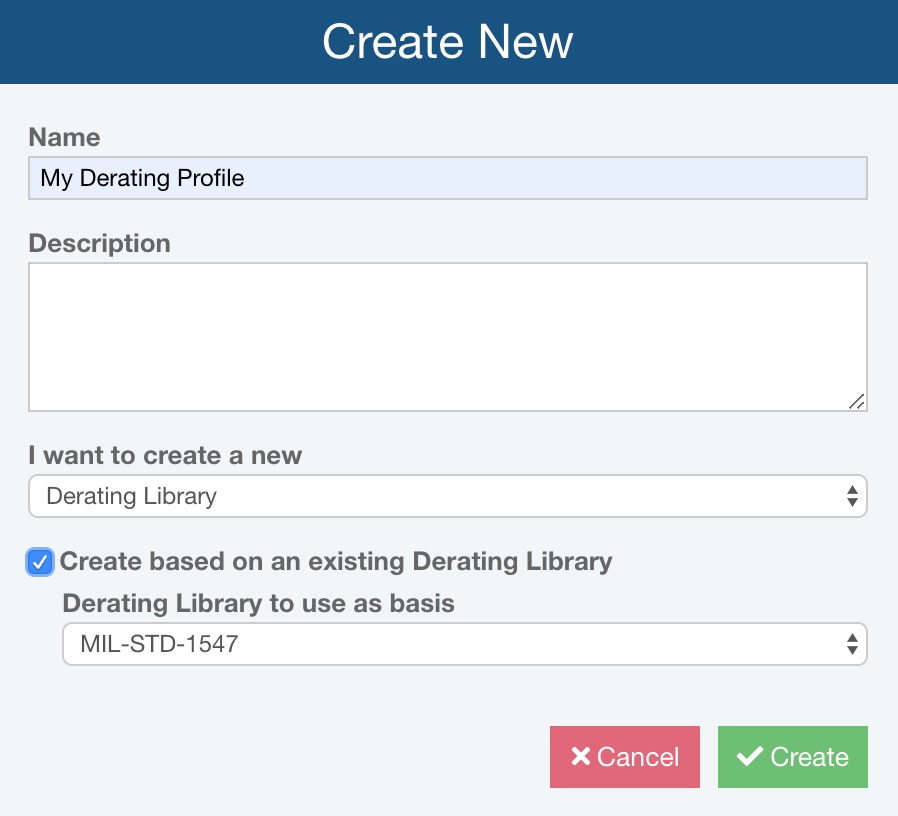
Click Create to create your new Derating Library. The new Derating Library will be automatically opened for you.
Step 2: Add your derating settings
The Derating Table
The Derating Table enables you to enter the information about the component types and stress levels you wish to set derating levels for.
The Derating Table columns data are all required, and will vary depending on the Calculation Model selected. The additional data columns describing the Part (Category, Subcategory, and Type) and stress Parameter choices also vary.
To Insert a new item in the Derating Table, click the Insert button on the toolbar.
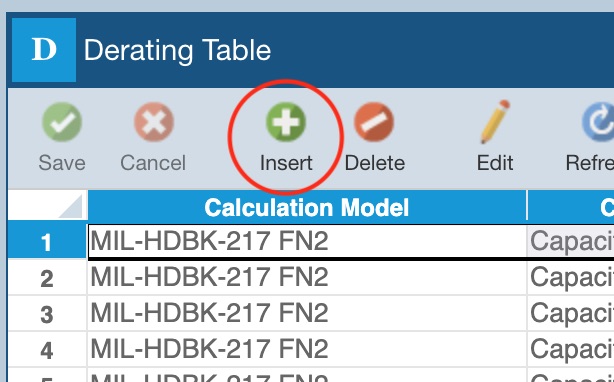
The Insert Derating dialog appears.
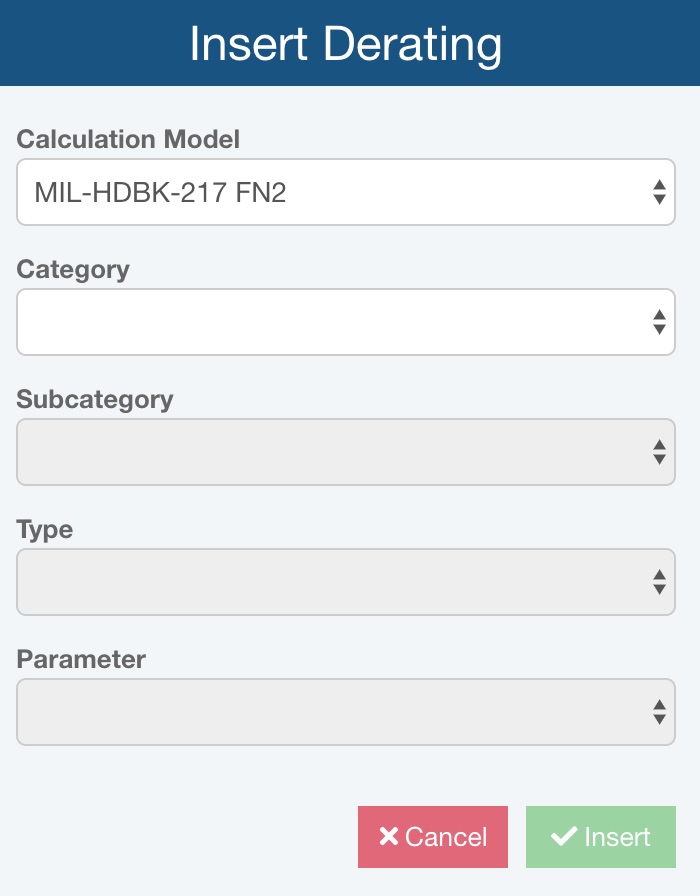
Enter the data parameters and click Insert to add a new item.
To edit any line item in the Derating Table, select the desired row and click Edit from the toolbar to bring up the Edit Derating dialog to make your changes.
To delete any line item in the Derating Table, select the desired row and click Delete from the toolbar. Click Yes to confirm.
The Derating Form
The data on Derating Form varies depending on the stress parameter.
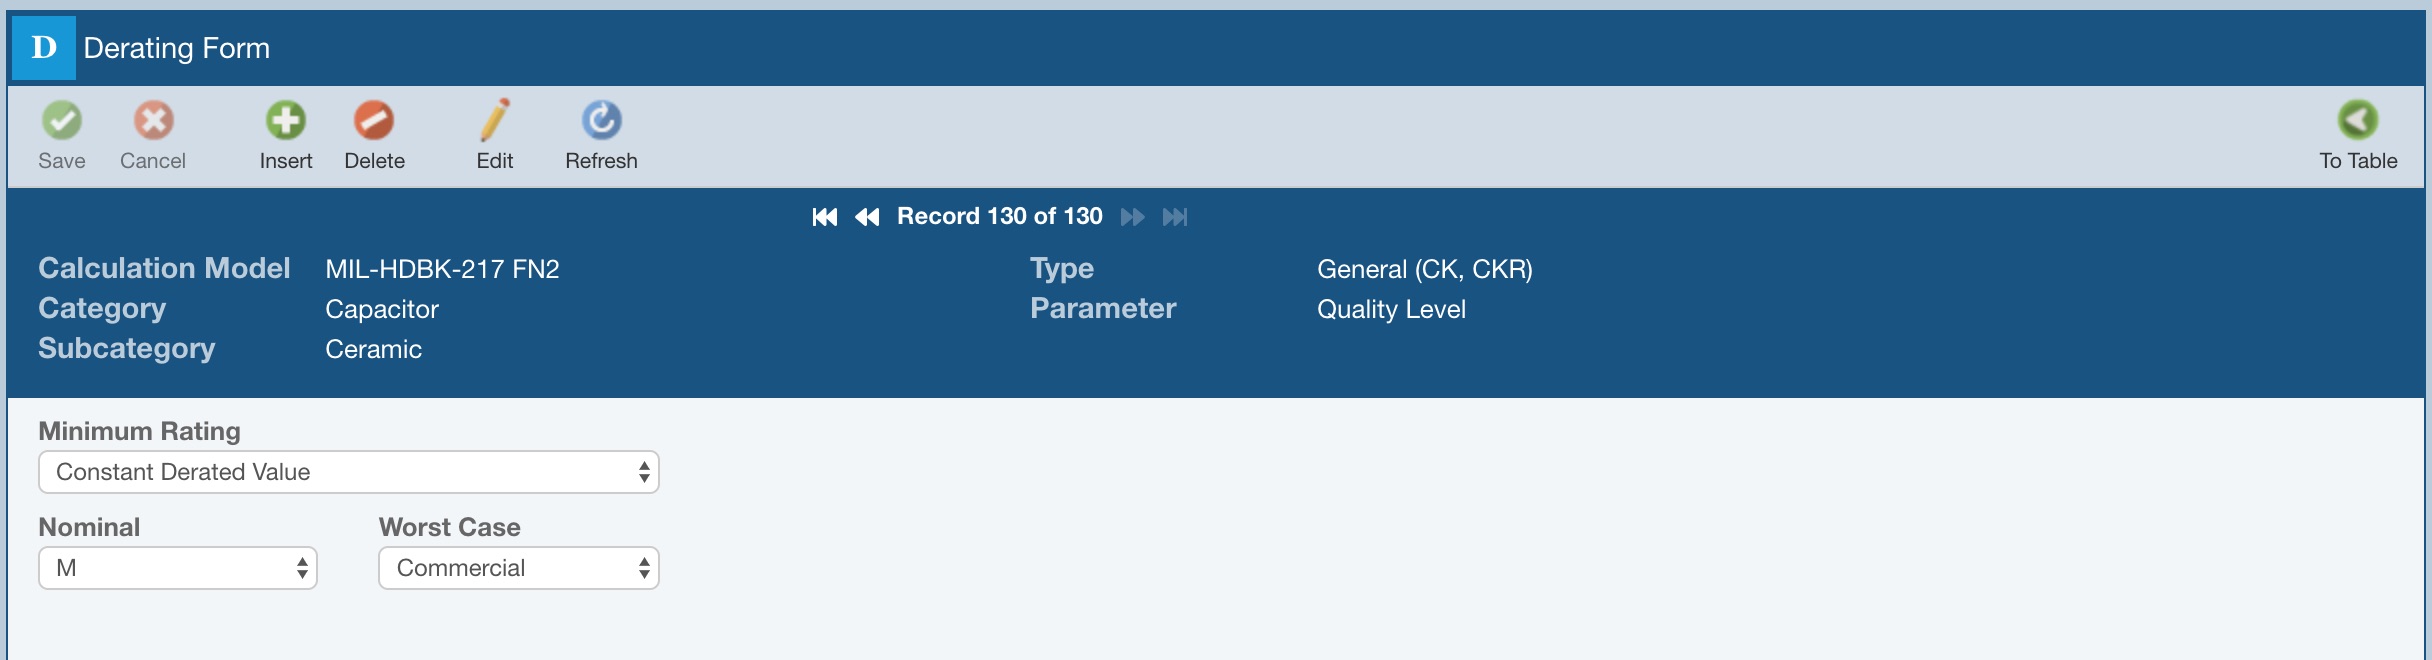
Quality
When setting Quality levels for derating, you can set Constant Derated Values for Nominal and Worst Case Quality Levels.
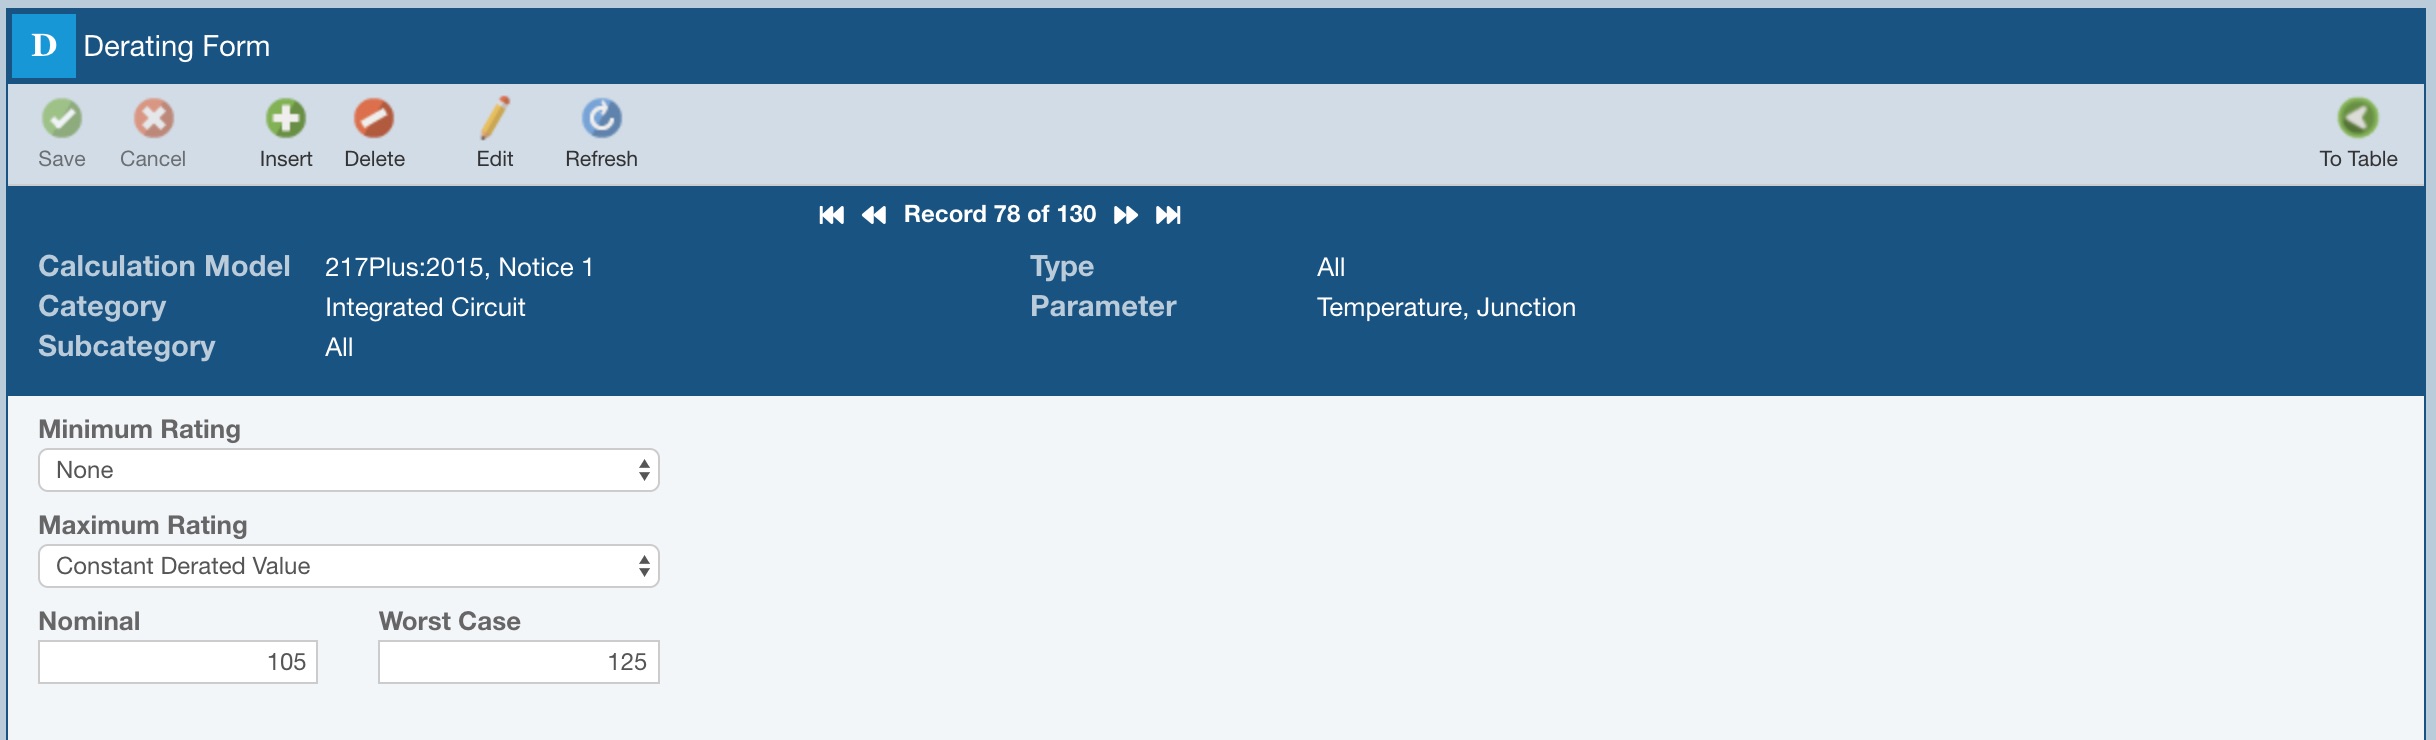
Temperature
When defining Temperature derated levels, you can set both Minimum and Maximum Ratings. You can select to derate based on a Constant Derated Value, or you can select Increment Minimum Rating or Decrement Maximum Rating. Enter Nominal or Worst Case values as desired.
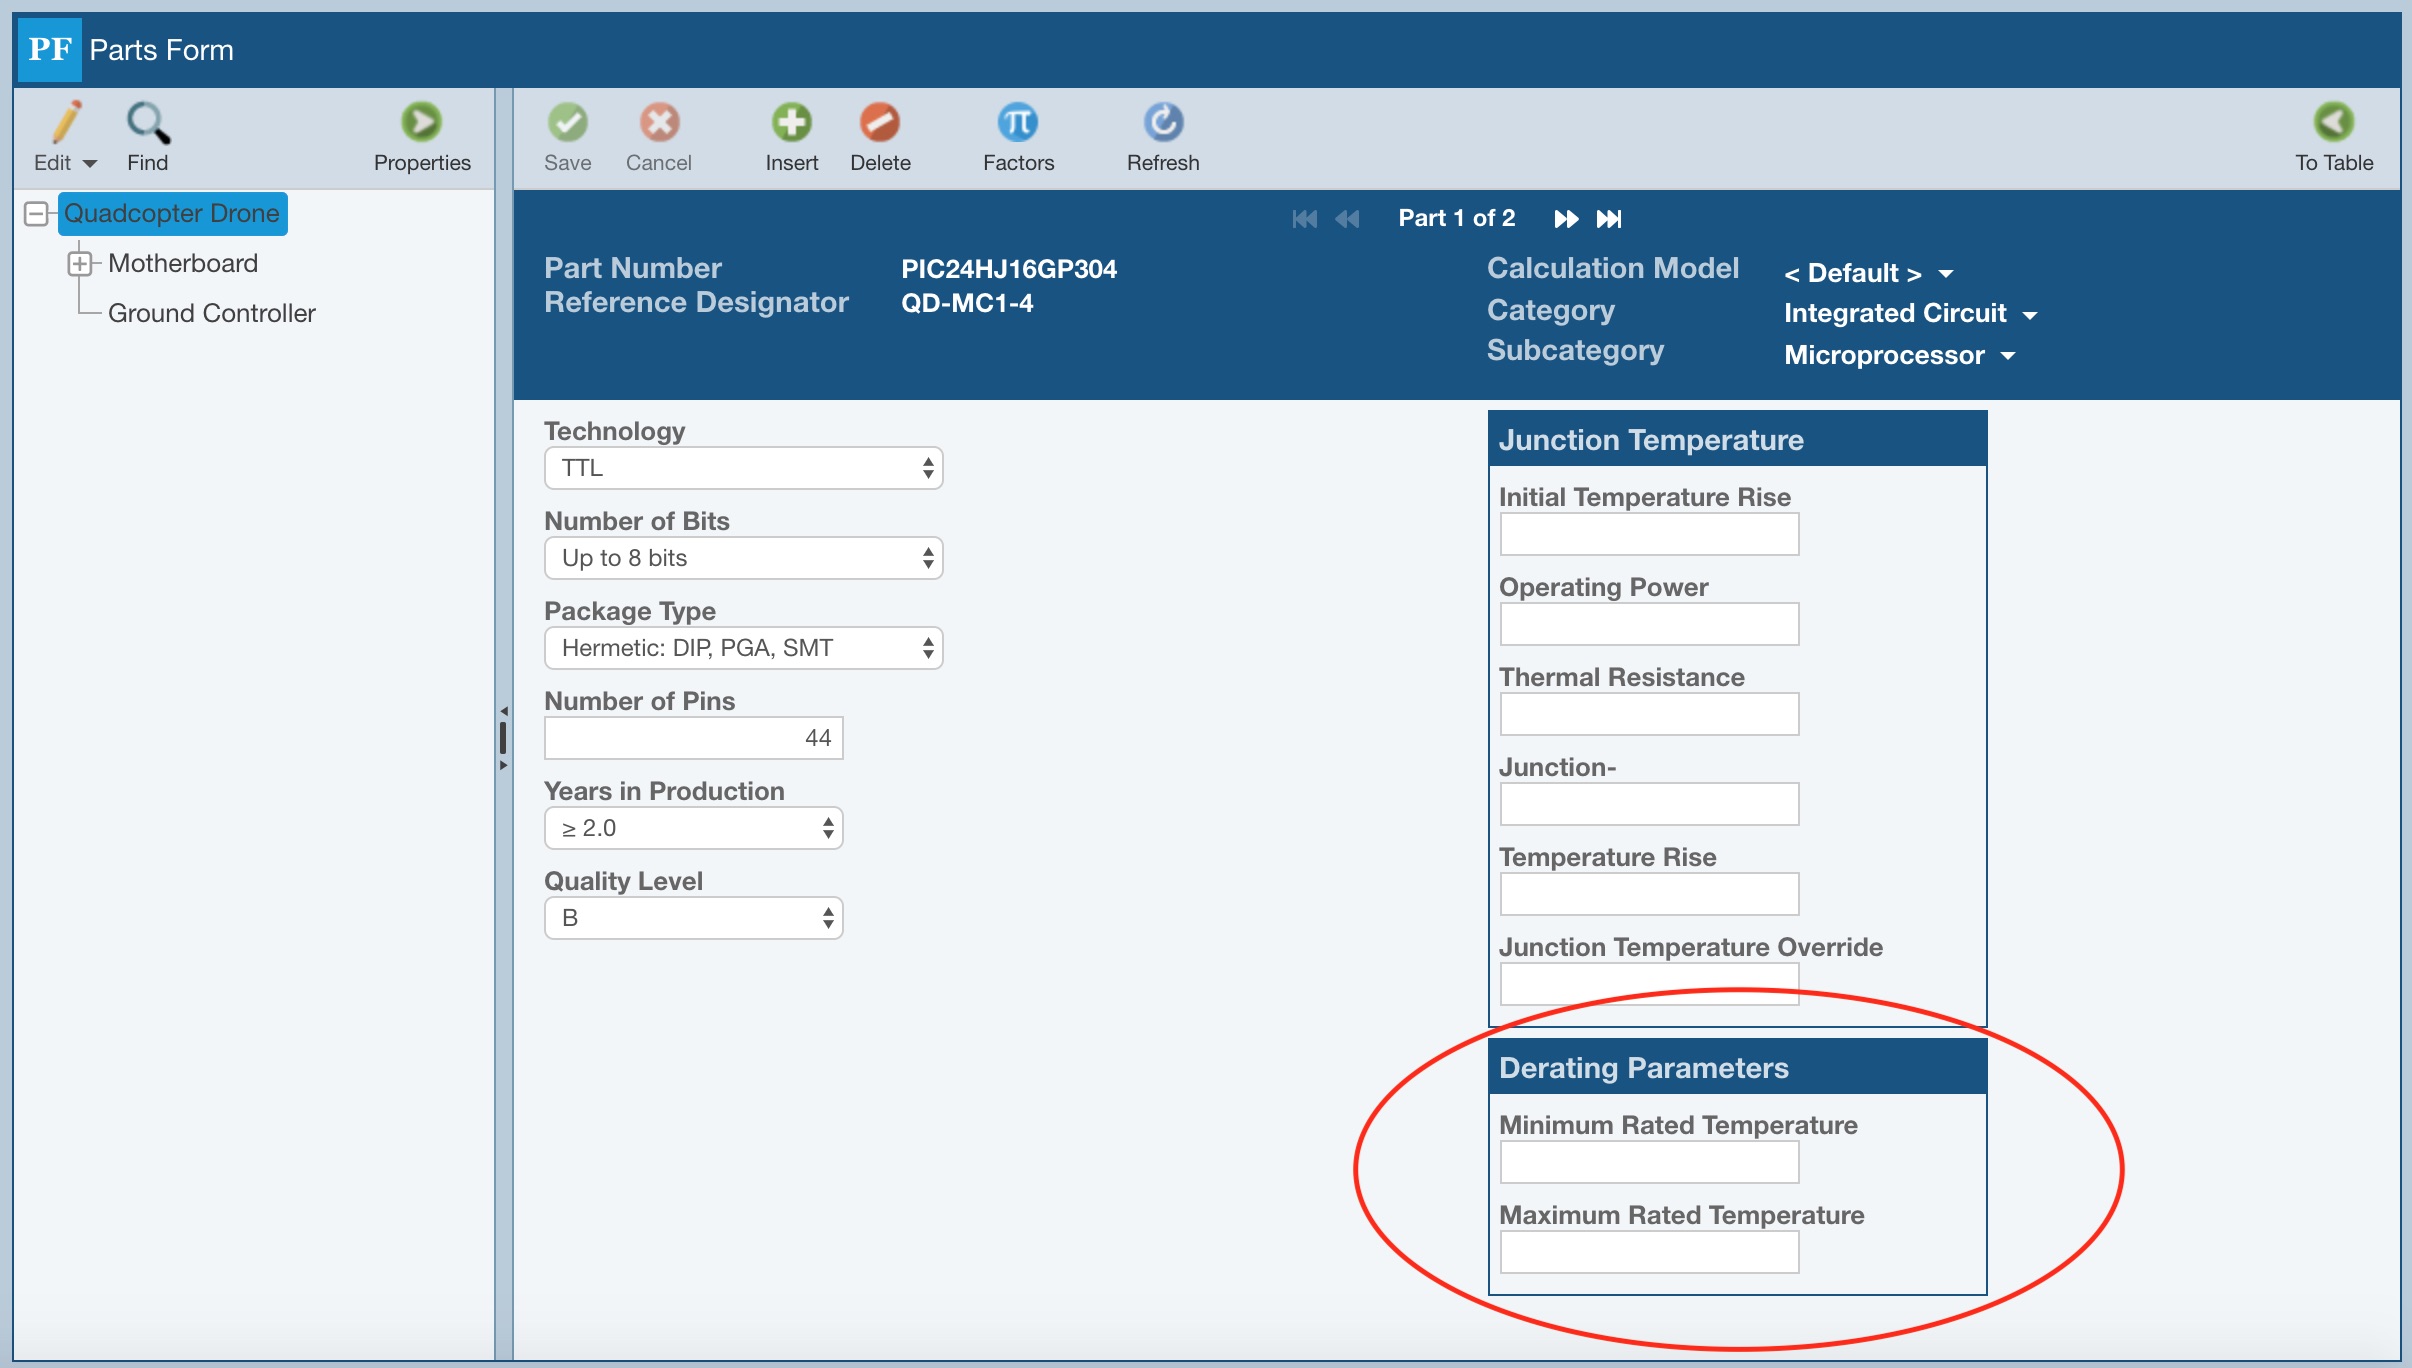
Derating Parameters on Reliability Prediction Part Forms
If Derating analysis is enabled, and if a component can be derated based on temperature, the Derating Parameters section will display on the Parts form with the Minimum Rated Temperature and Maximum Rated Temperature fields. This data is required if you have selected Increment Minimum Value or Decrement Maximum Value in your Derating Library settings for this component type.
Current, Voltage, and Power Stress
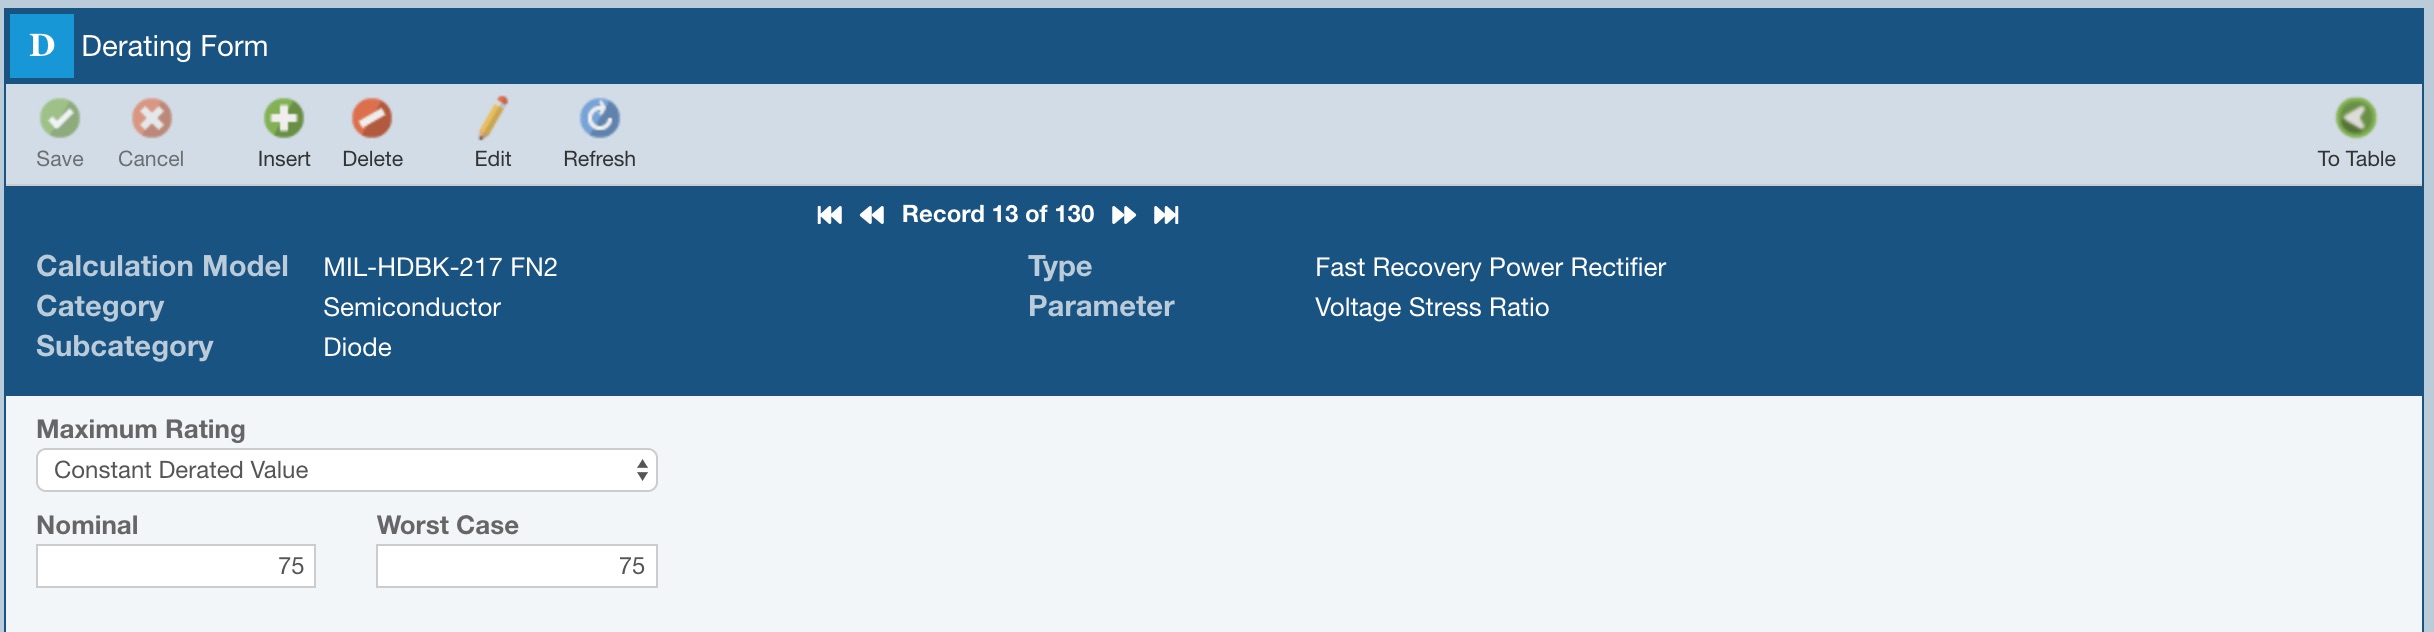
For the Maximum Ratings for current, voltage, and power stresses, you can select to use a Constant Derated Value, a Standard Derating Curve, or a User-Defined Derating Curve.
If using a Constant Derated Value, enter the desired Nominal and Worst Case values.
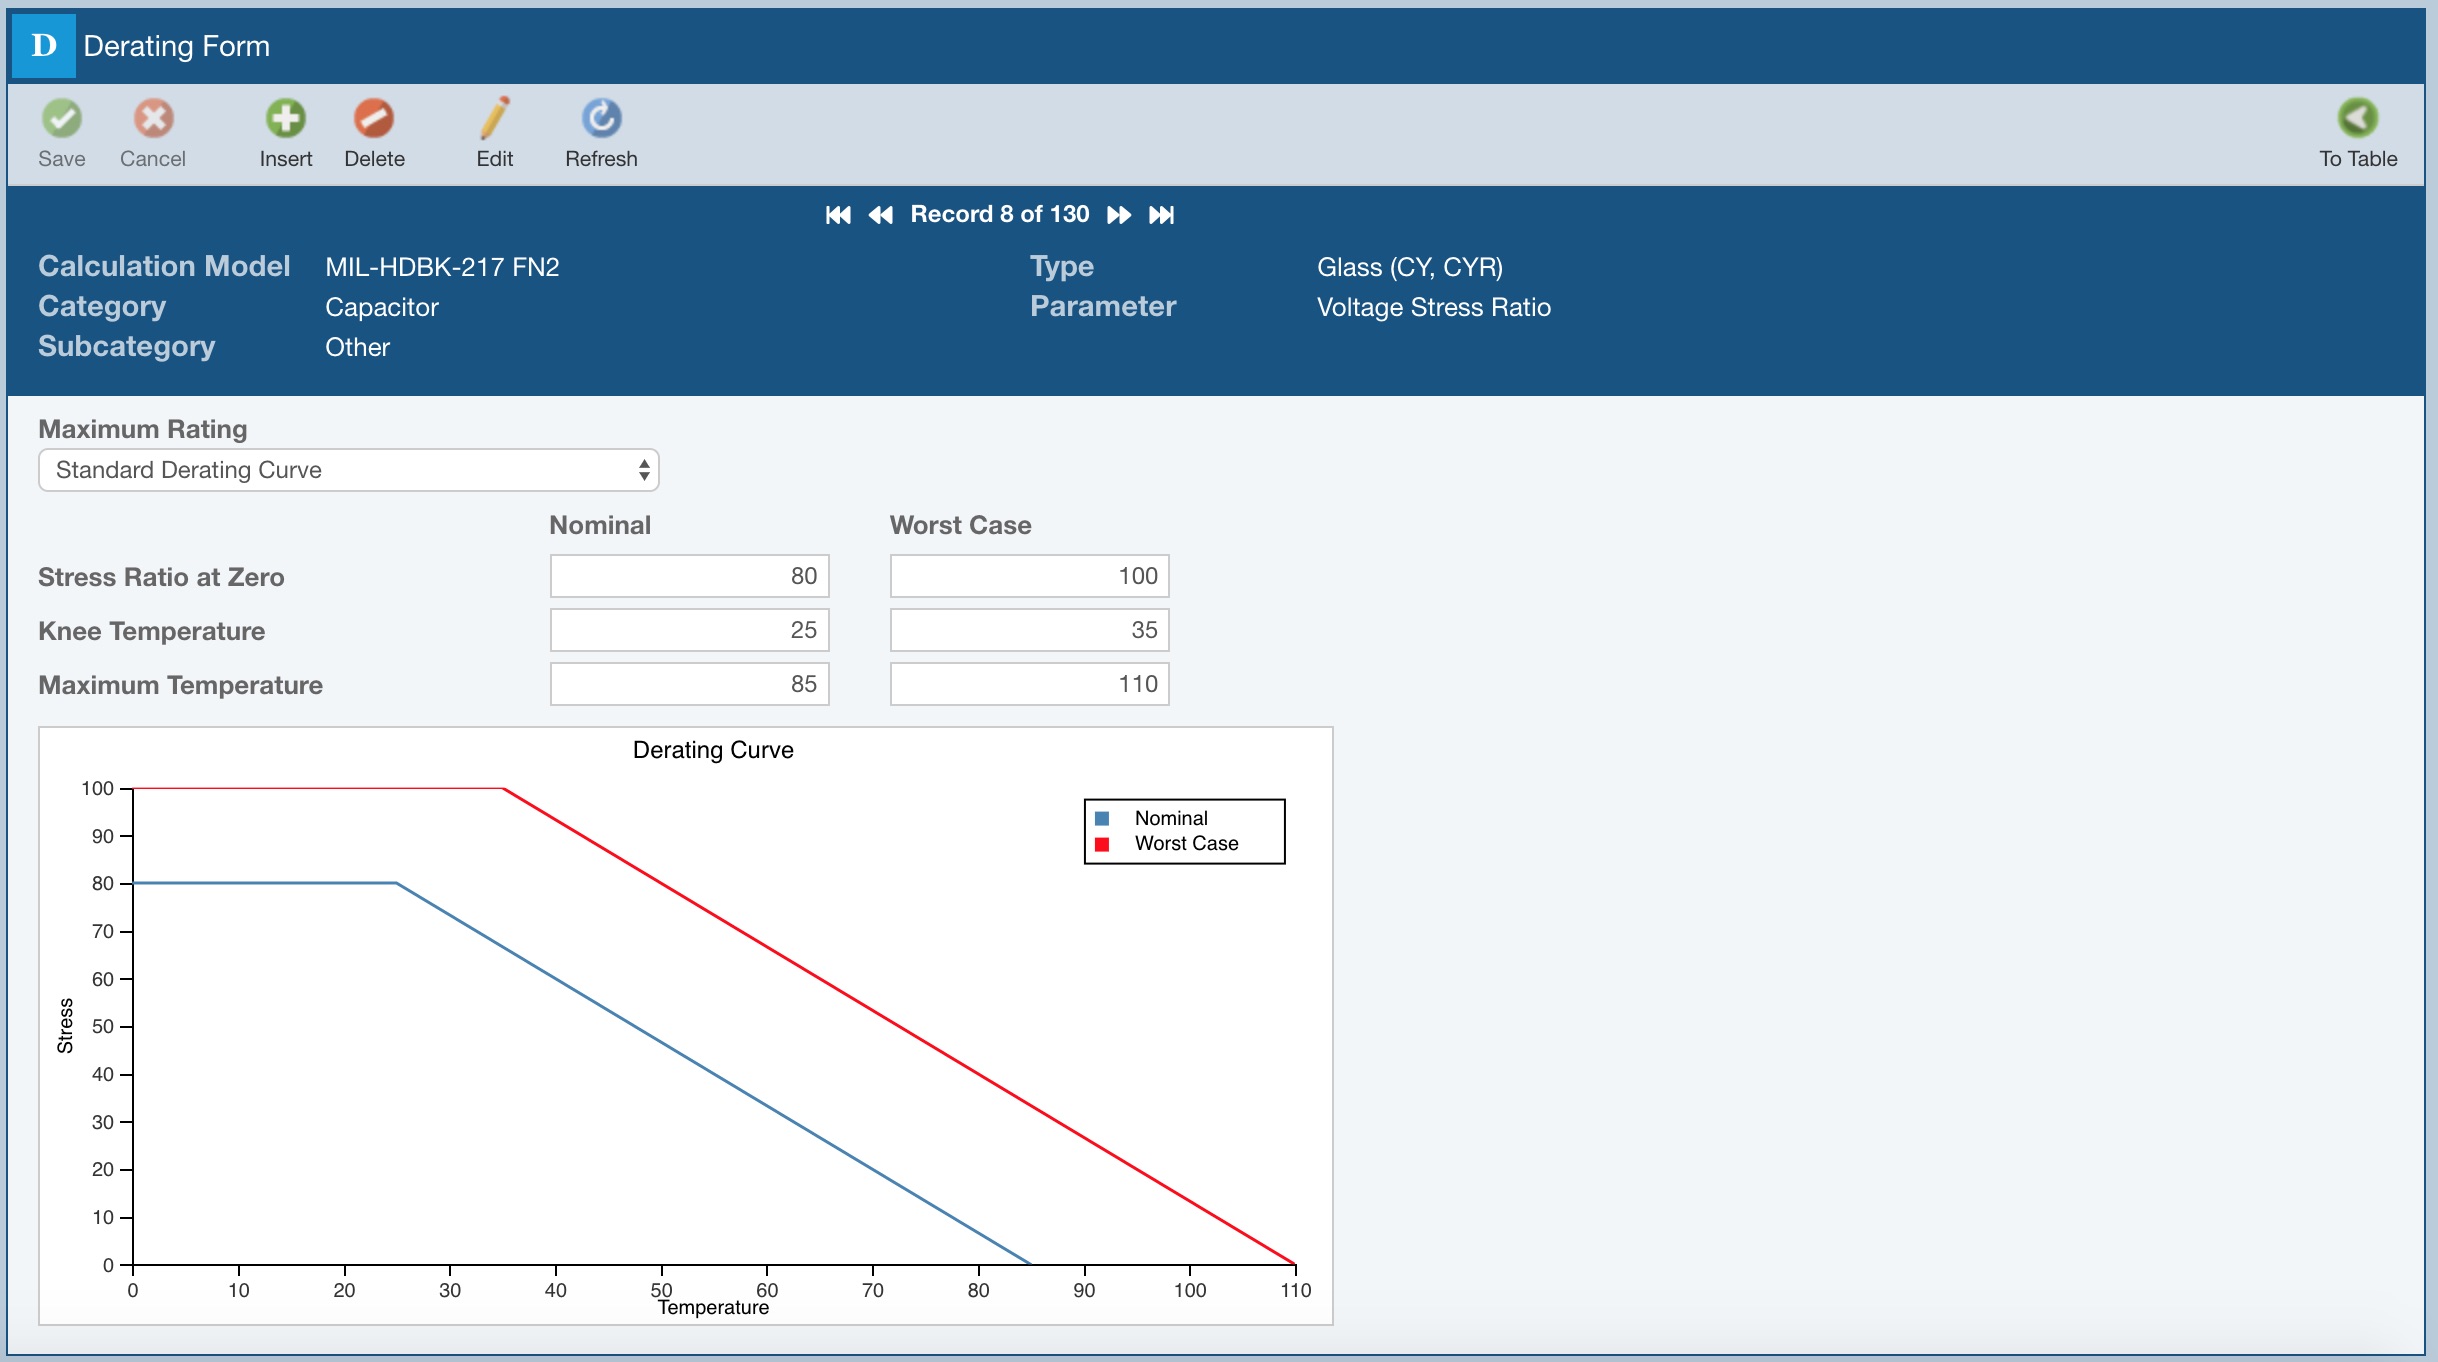
If using a Standard Derating Curve, you must specify the three required elements of the curve needed for derating analysis: the Stress Ratio at Zero, the Knee Temperature, and the Maximum Temperature. A visual depiction of the derating curve will be shown as a helpful reference.
Derating curves are commonly shown on device datasheets. The graphs show how the level of stress a device can safely operate at is dependent on temperature. The stress level at which the device can operate decreases in a linear fashion with respect to temperature. When viewing the derating curve, if a device is operating at a stress point above the blue lines on the graph, it is operating above the nominal stress levels. If a device is operating at a stress level above the red line on the graph, it is operating above its worst case limits.
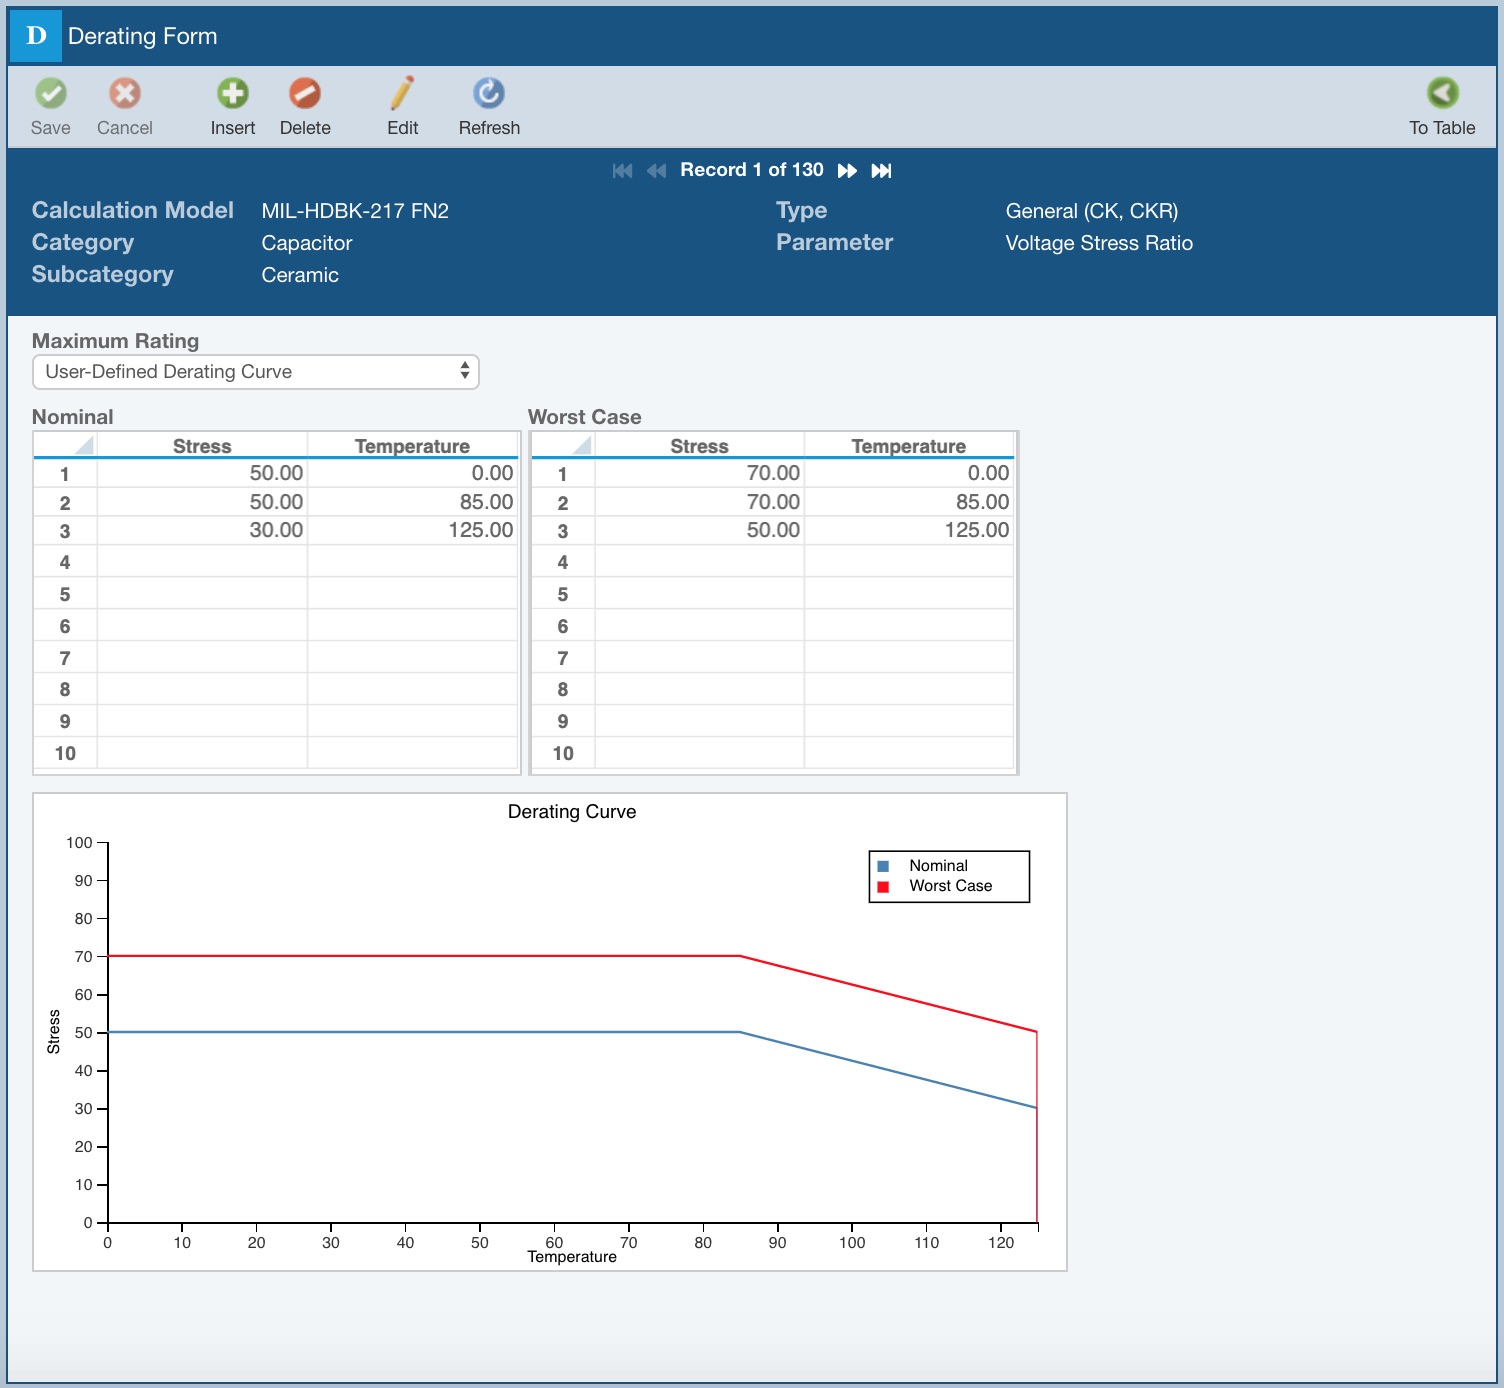
If you do not want to use a standard derating curve, you can define your own curve by entering data points along the curve line to use for analysis. You specify up to 10 Stress and Temperature paired data points to define your Nominal and Worst Case curves. A visual depiction of your derating curve will be shown as a helpful reference.
Step 3: Select your Derating Library
To use your own Derating Library, you must enable it in Properties. Click Properties from the Sidebar menu.
The Reliability Prediction Properties dialog appears. Select Perform Derating analysis to enable derating. Click the Derating Library dropdown list and select your custom Derating Library from the list.
Opening a Derating Library
You can use the Manage Analyses function to open a Derating Library for viewing or editing. Or, your custom Derating Libraries can be opened from the Sidebar menu when Reliability Prediction is active.
If you only have one custom Derating Library, click Libraries>Derating and it will be automatically opened.
If you have more than one Derating Library, the Derating Libraries will be shown in the Libraries>Derating submenu. Select the desired Derating Library to open from the list.
Performing Derating Analysis and View Derating Results
Relyence Reliability Prediction automatically performs derating analysis during calculations. The default overstressed conditions are always checked, i.e. components operating over their maximum stress ratings. If you have a Derating Library enabled, derating analysis is also performed based on the derating settings in that Library.
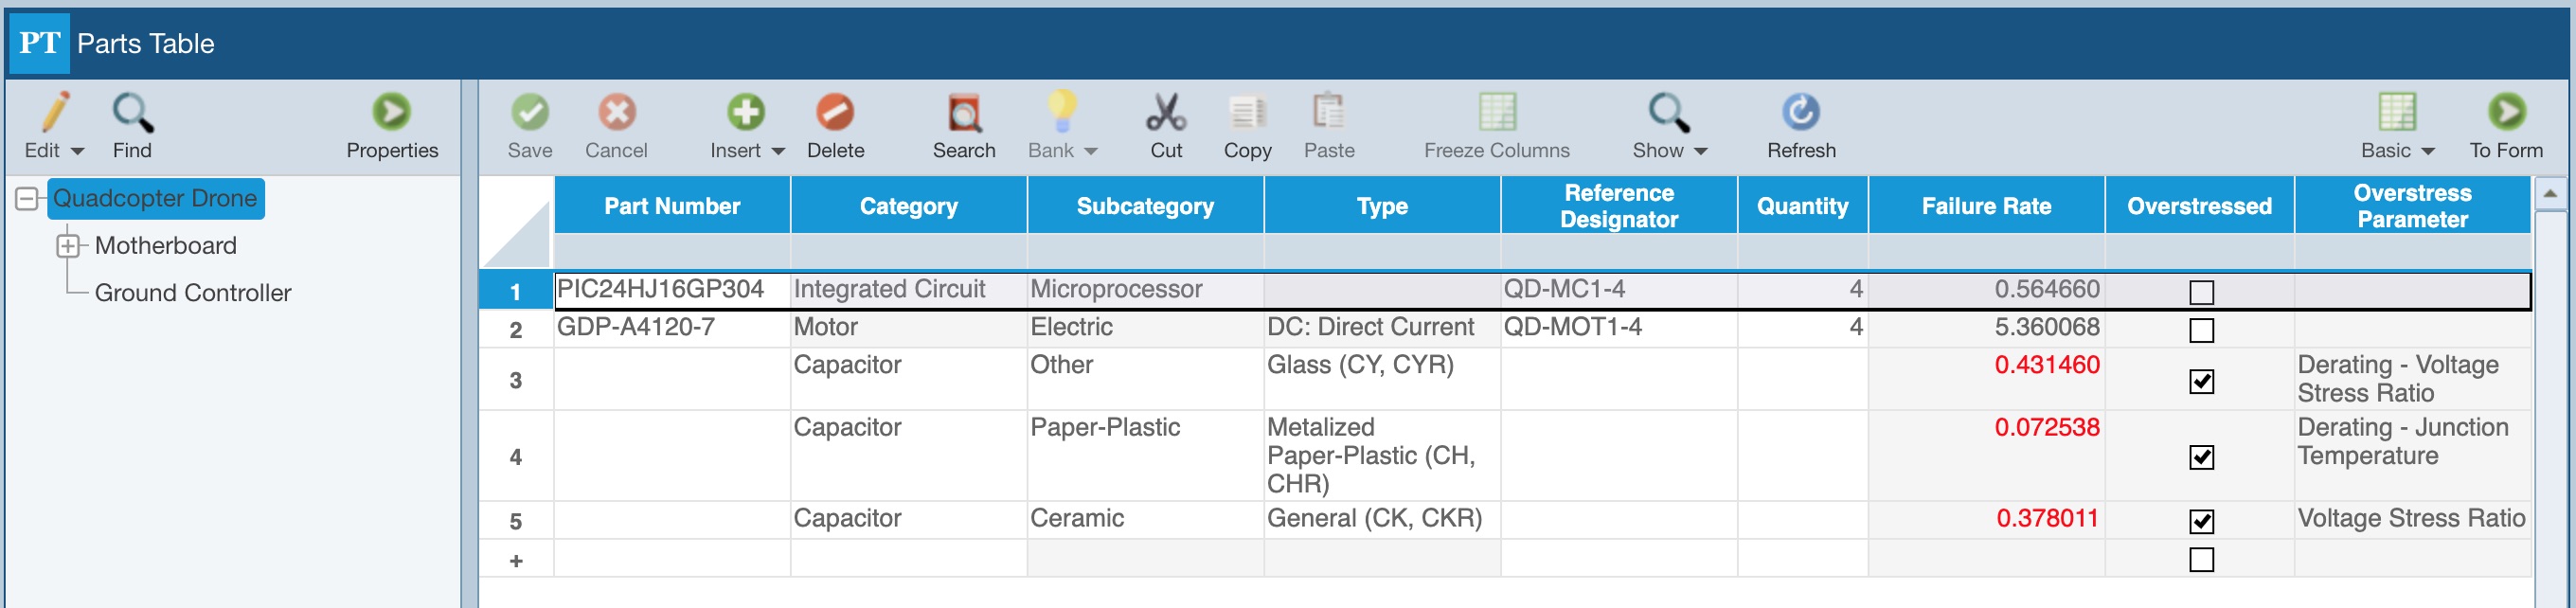
Parts overstressed or over their derated ratings will be marked as Overstressed, the Overstressed Parameter will be set to indicate the cause of the overstress, and the Failure Rate will be shown in red. This data can be shown in the Parts Table. The Overstressed fields are not shown by default, so you may need to customize your Parts Table if you prefer them on your Parts Table and/or reports. For details on customizing, see the Customizing the Reliability Prediction Parts Table topic.
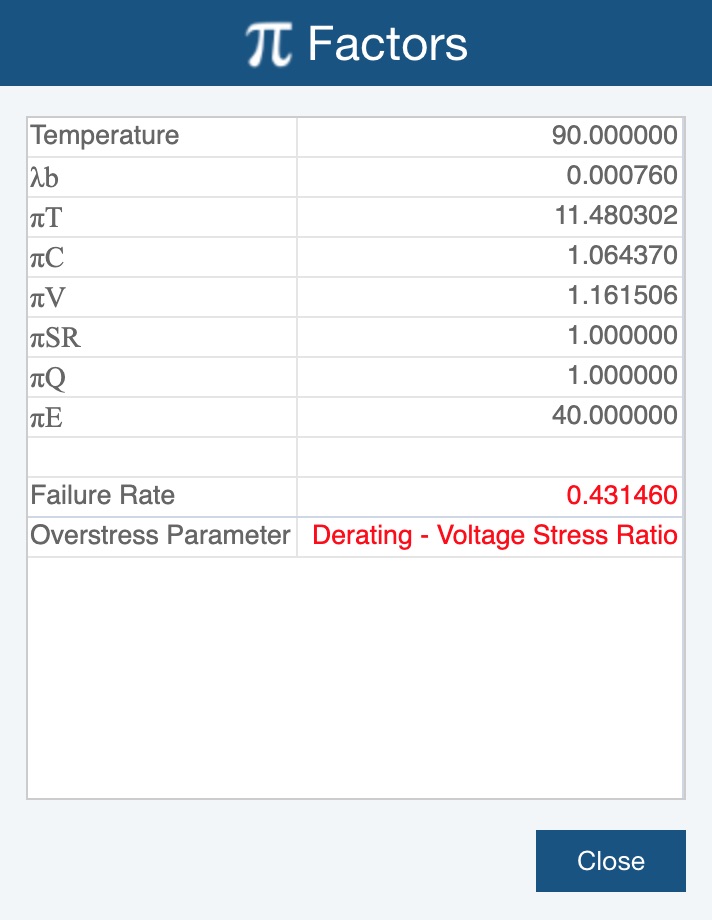
Additionally, the Pi Factors dialog will display the overstress indications. To view the Pi Factors for a Part, click the To Form button on the Parts Table to display the Part Form. Then click the Factors button in the toolbar to view the Pi Factors dialog.
When you have opted to perform Derating analysis and are generating a Reliability Prediction report, you have the option to include the Derating Profile field within the report header. For more details, see the Customizing Reliability Prediction Report Headers topic. Including the Derating Profile field in the report header will include the name of the Derating Library in use with the Analysis along with the setting for the Overstress Criteria (Nominal or Worst Case). Note, as described above, you select the Derating Library and Overstress Criteria on the Reliability Prediction Properties dialog. Shown below is a sample Reliability Prediction Analysis report where the Nominal Overstress Criteria from the MIL-STD-1547 Derating Library are in use, where the Derating Profile data is included in the report header for reference.
