Using Failure Direct Connect in FMEA
If you are new to Failure Direct Connect, it may be helpful to review the Getting Started with Relyence Failure Direct Connect tutorial.
Reviewing Failure Data add requests from FRACAS
The FMEA component of the Relyence Failure Direct Connect feature allows FMEA team members to review items that were requested to be added to the FMEA by the FRACAS team.
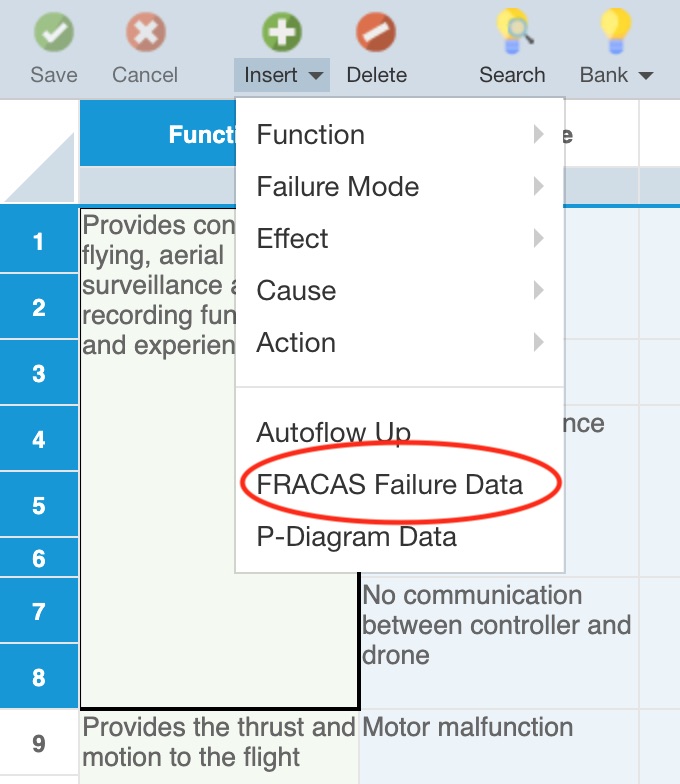
On the FMEA Worksheet, from the FMEA toolbar, click Insert>FRACAS Failure Data.
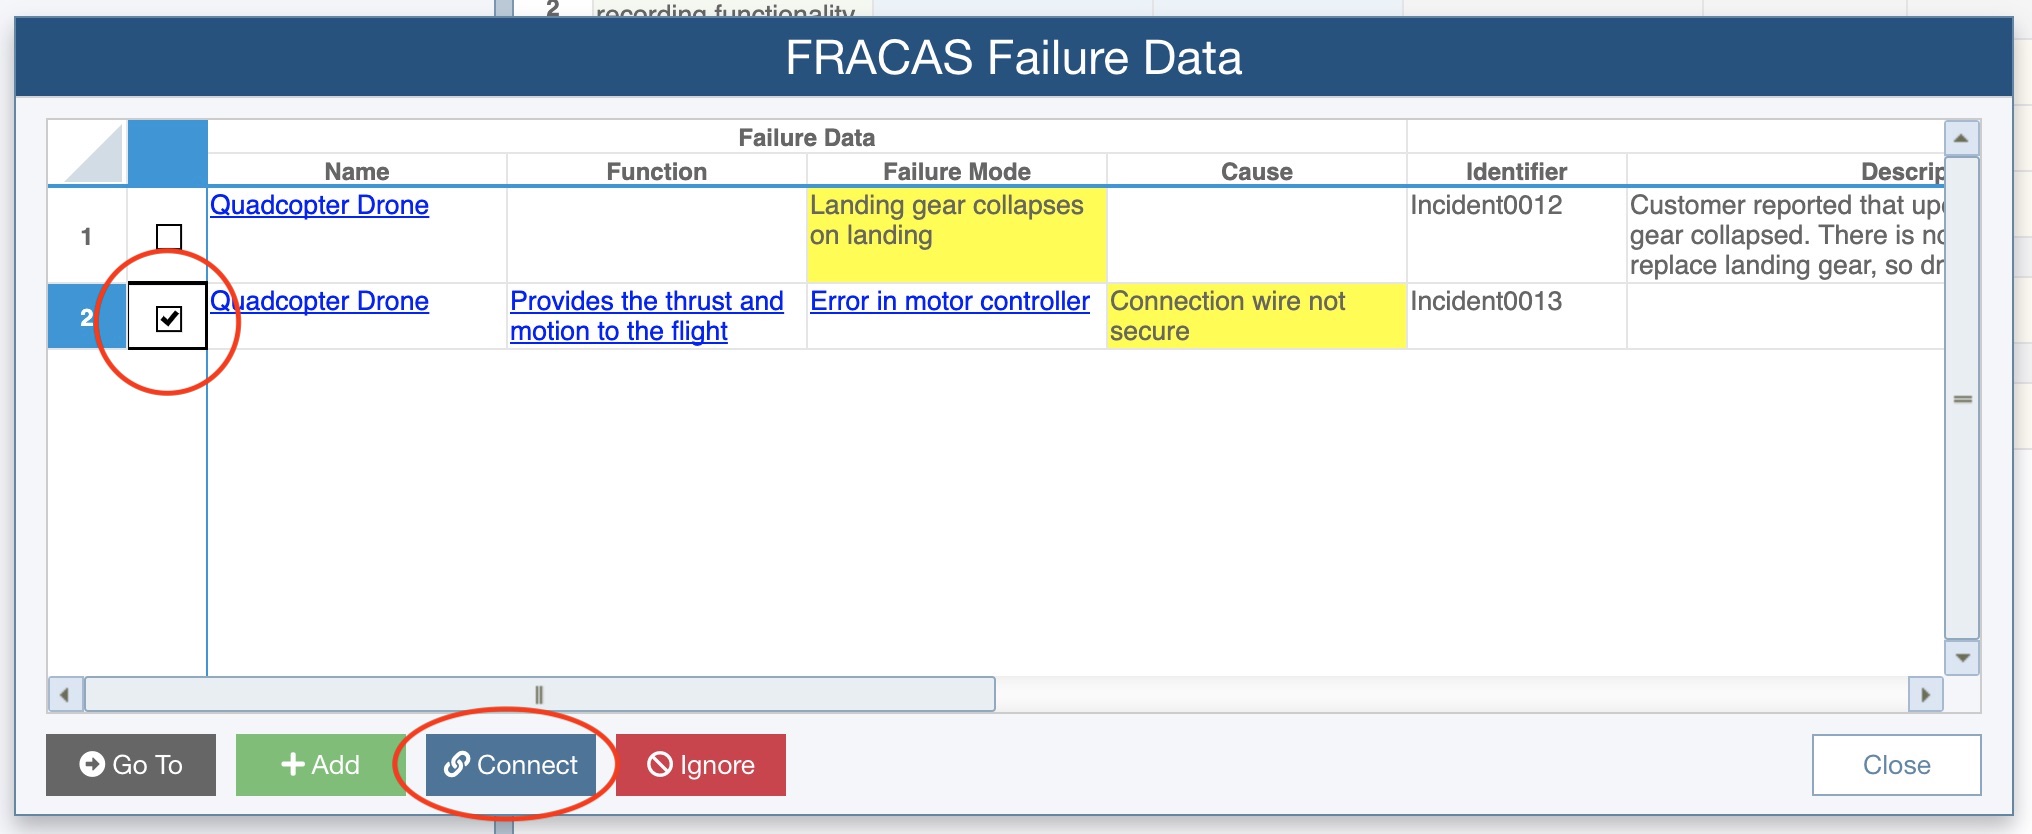
The FRACAS Failure Data dialog appears. The dialog displays all the requests for new data additions to FMEA made by the FRACAS team. In the example below, we can see that one new Failure Mode and one new Cause were added via FRACAS. FRACAS Incident data related to the newly requested addition is also shown for informational purposes.
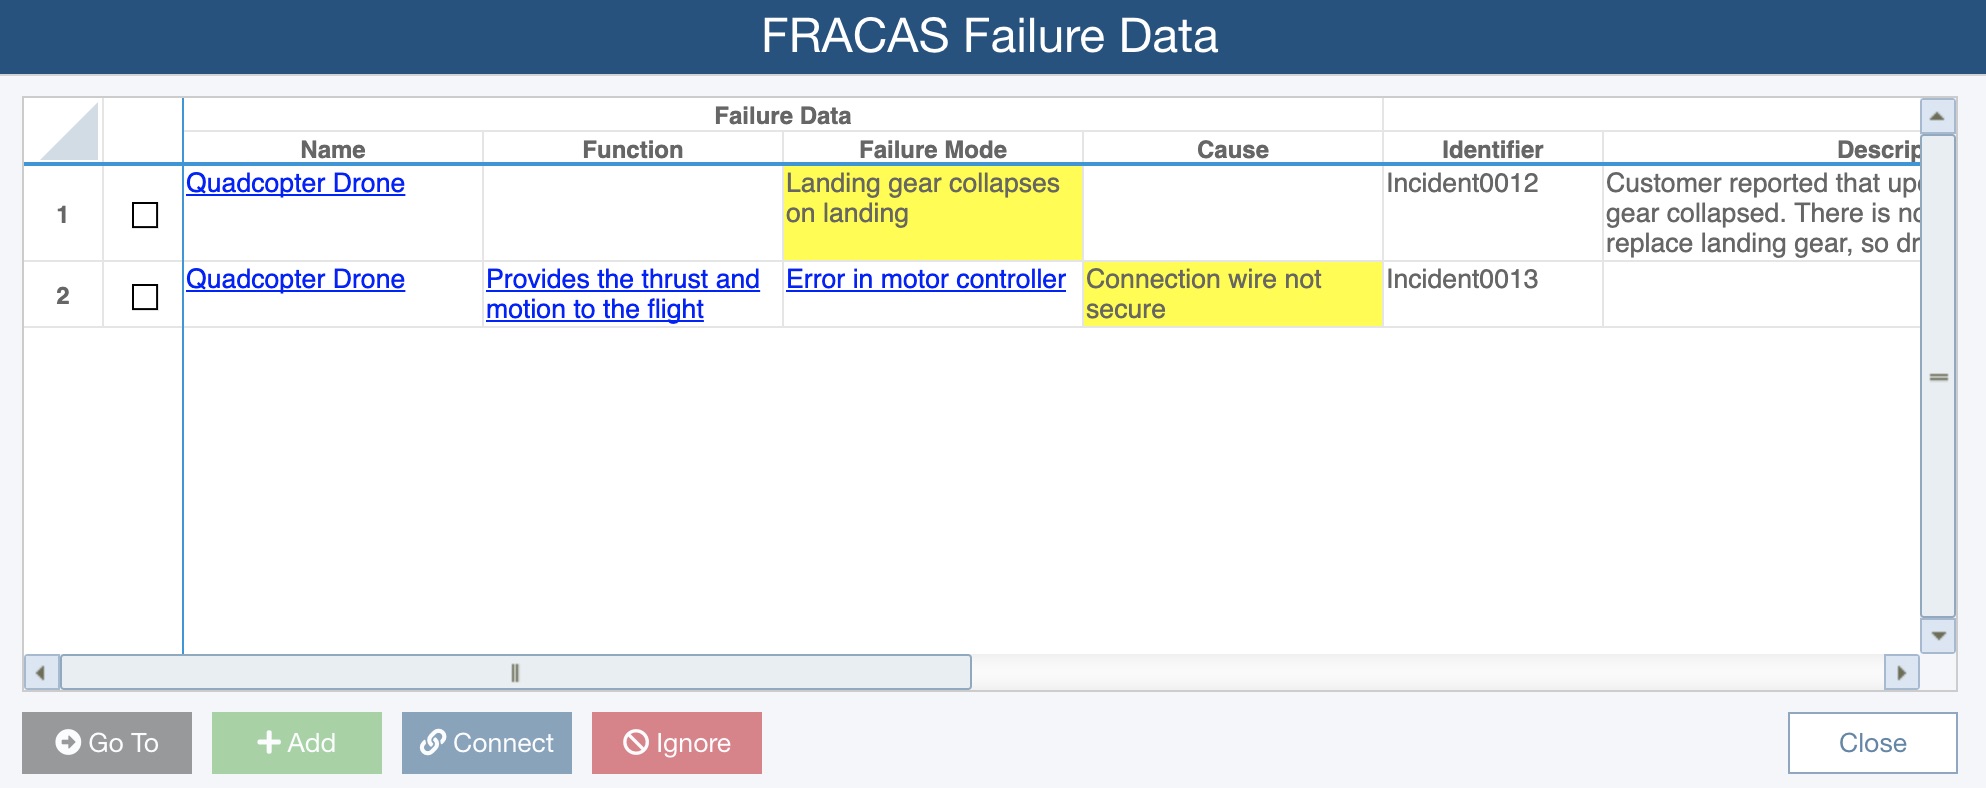
You can click on any hyperlink in the FRACAS Failure Data dialog to automatically navigate to that location in the FMEA Worksheet.
Adding data to FMEA from FRACAS Failure Data add requests
Upon reviewing the FRACAS add request, you may decide that your Worksheet needs to be updated with the new failure information.
 When using Failure Direct Connect, new data is added at the currently active location in the FMEA Worksheet.
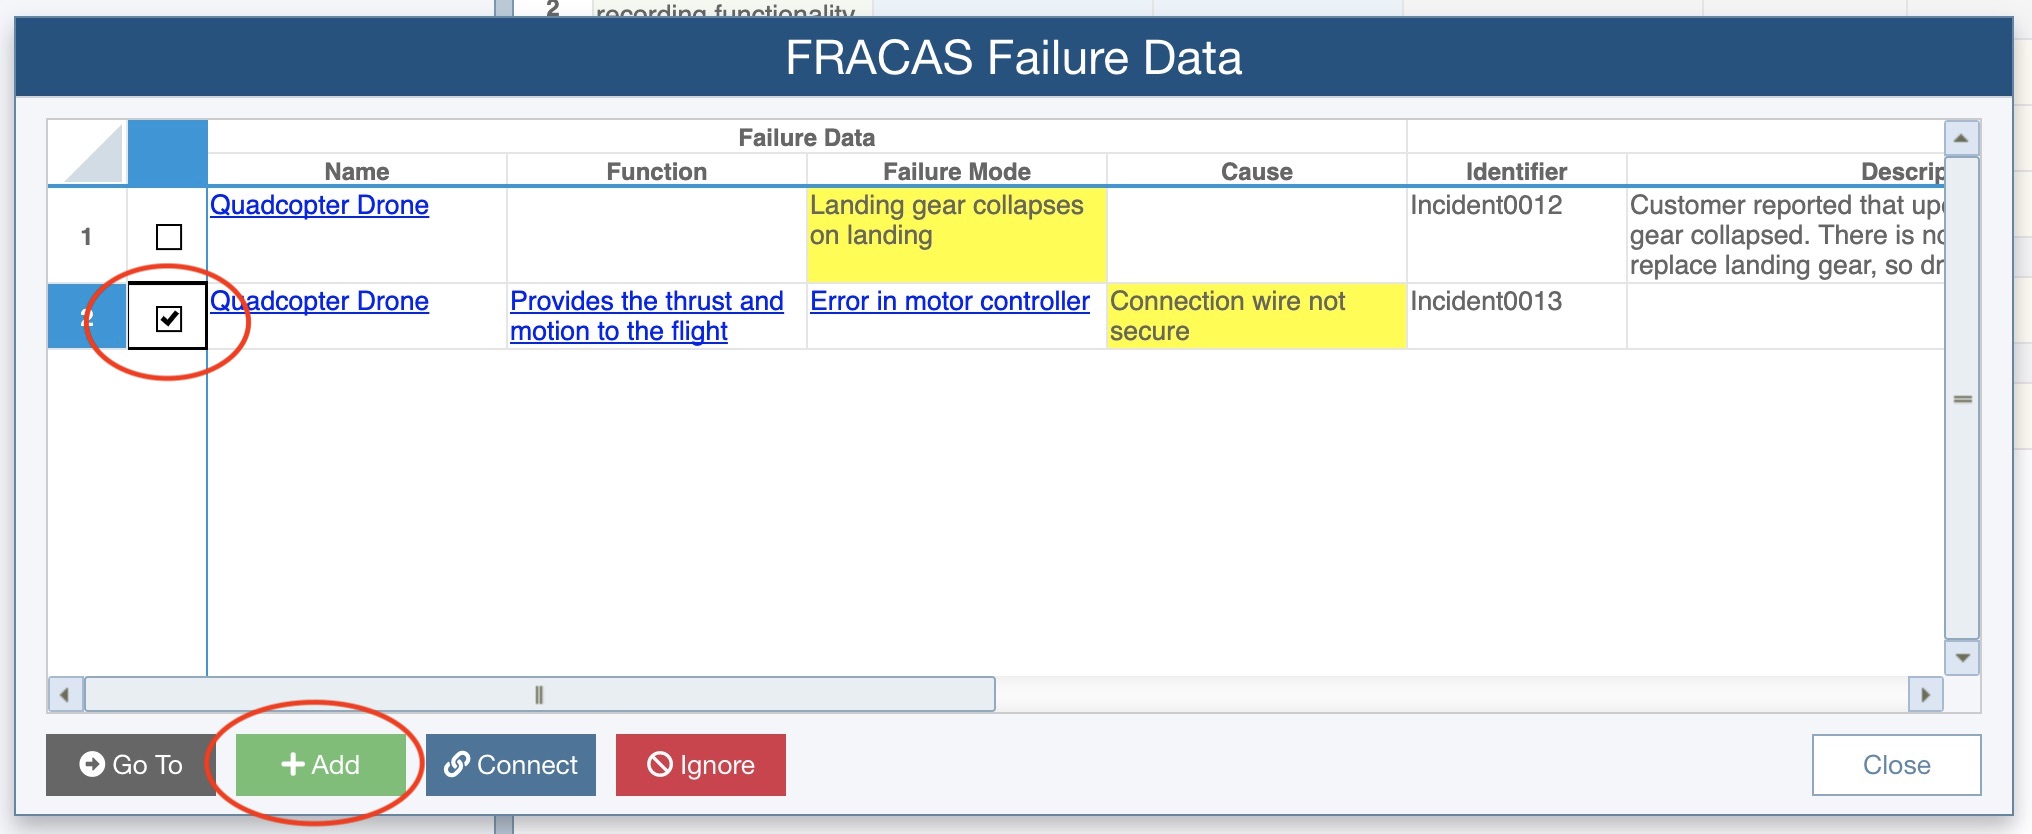
If no FMEA links are present for the add request, you will need to determine the appropriate location in the FMEA Worksheet for the addition. Go the FMEA Worksheet and locate the appropriate location for this new information. Select the checkbox in the applicable row of data to add and click the Add button to add the data.
If links are present for the add request, you will need to navigate to that location in the FMEA Worksheet. The Add button will not be enabled until properly positioned. To navigate to the location for this item in FMEA Worksheet, select the checkbox in the applicable row and click the Go To button. Or use the hyperlinks to navigate to the location.

Once at the appropriate location in the FMEA Worksheet, the Add button will be enabled. Click the Add button to add the new failure data.
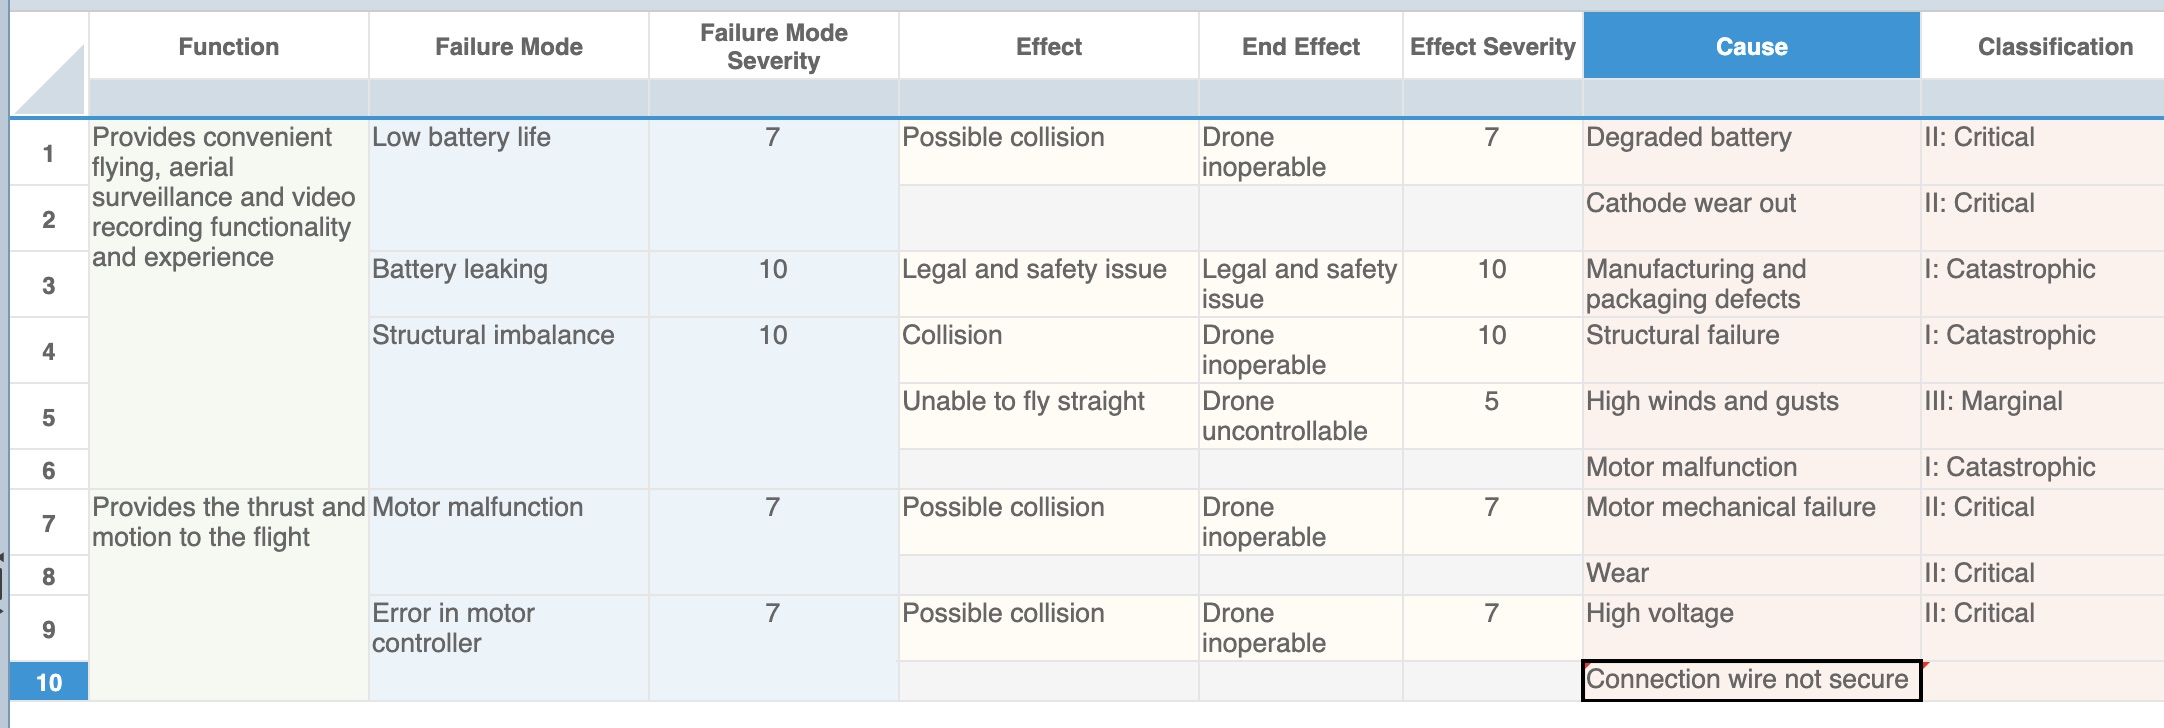
The new item appears in the FMEA Worksheet and work can proceed to evaluate this new failure information.
Also, the item has automatically been connected to the FRACAS Incident, so the next time a FRACAS team member reviews the Incident, the link icon will be displayed to indicate the FMEA connection.
Connecting FRACAS Failure Data add requests to existing FMEA data
Upon reviewing the FRACAS add request, you may determine that the request does not represent new FMEA data, but is already covered in your FMEA.
In this case, navigate to the appropriate item to connect to in the FMEA Worksheet, select the checkbox for the row in the FRACAS Failure Data dialog, and click the Connect button.
This will update the FRACAS failure information to the data from FMEA and automatically make the changes to the FRACAS Incident.
When the FRACAS team revisits the Incident, the new data will be shown along with the link icon to indicate it is now connected to existing FMEA information.
Ignoring FRACAS Failure Data add requests
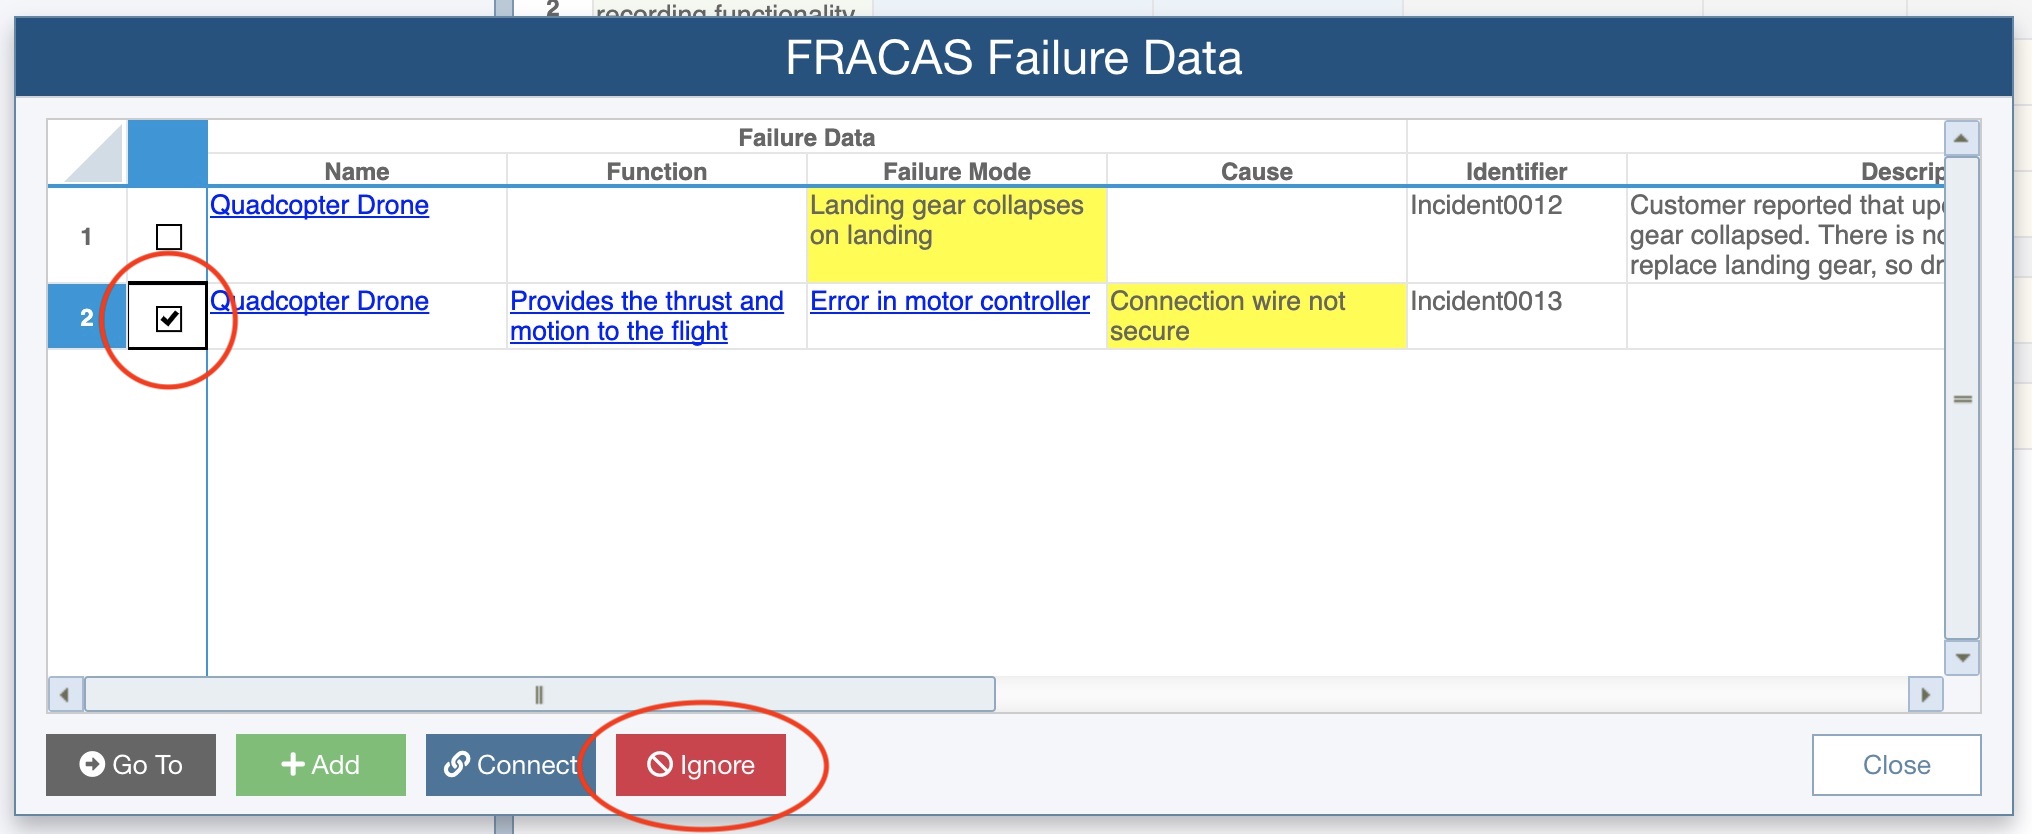
You can customize Failure Direct Connect to allow the entry of disconnected failure data. If this option is enabled, then the FMEA team has a third option when deciding what to do with new FRACAS failure information requests: it can be ignored, or disconnected. If this option is not enabled, the Ignore button does not appear. For details on customizing Failure Direct Connect, see the Customizing Failure Direct Connect topic.
If you want to ignore an item requested for addition by the FRACAS team, select the checkbox for the row, and click the Ignore button. The data will remain as is in FRACAS and the Not connected to FMEA checkbox will automatically be selected in the Failure Data widget for the FRACAS Incident.
Completing the FMEA review of Failure Data add requests from FRACAS
You are not required to take care of each add request in the Table. If you bypass some of the items they will remain in the list and reappear the next time you click Insert>FRACAS Failure Data. Items that you selected to Add, Connect, or Ignore will no longer appear in the Table.
Once you have completed reviewing the items in the FRACAS Failure Data dialog, click the Close button to close the dialog.
Your changes have been made to your FMEA Worksheet, but not yet saved. To save all the changes made, click Save from the toolbar.
To cancel the changes, click Cancel. If you cancel, then all the items will reappear in the FRACAS Failure Data dialog the next time to click Insert>FRACAS Failure Data.
Viewing Connected Incidents
You can view a list of FRACAS Incidents connected to your FMEA items in your FMEA Worksheet.
See the Customizing the FMEA Worksheets topic for details on how to customize your FMEA Worksheet to add columns.
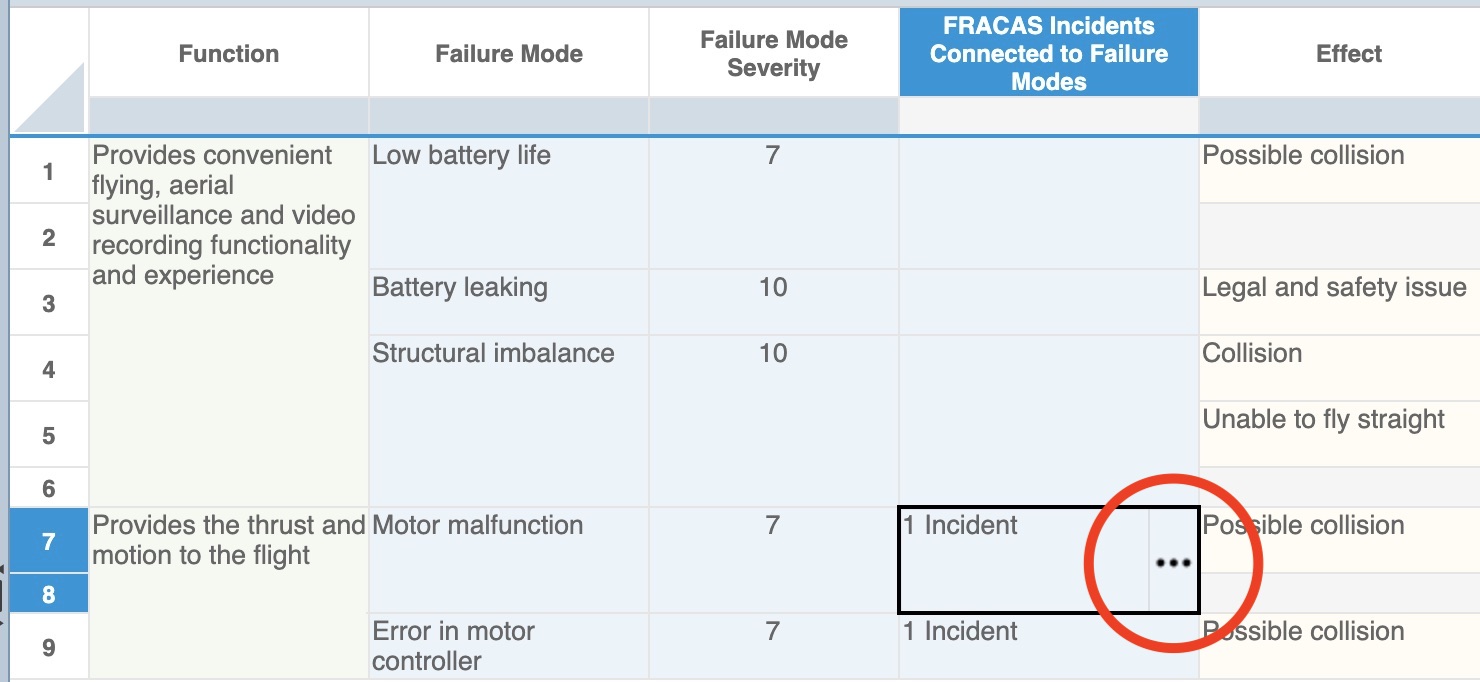
A FRACAS Incidents Connected to data field must be added to your FMEA Worksheet to view the list of connected Incidents. Because Incidents may be connected FMEA Functions, Failure Modes, Causes, and/or Effects, you can select any or all of the available data fields to add to your FMEA Worksheet: FRACAS Incidents Connected to Functions, FRACAS Incidents Connected to Failure Modes, FRACAS Incidents Connected to Causes, or FRACAS Incidents Connected to Effects.
When on the FMEA Worksheet, the FRACAS Incidents Connected to fields will display the number of Incidents connected to the selected FMEA item.
Click the Expand [...] button in the FRACAS Incidents Connected to field view the list of Incidents and associated data.
The Connected Incidents dialog appears.
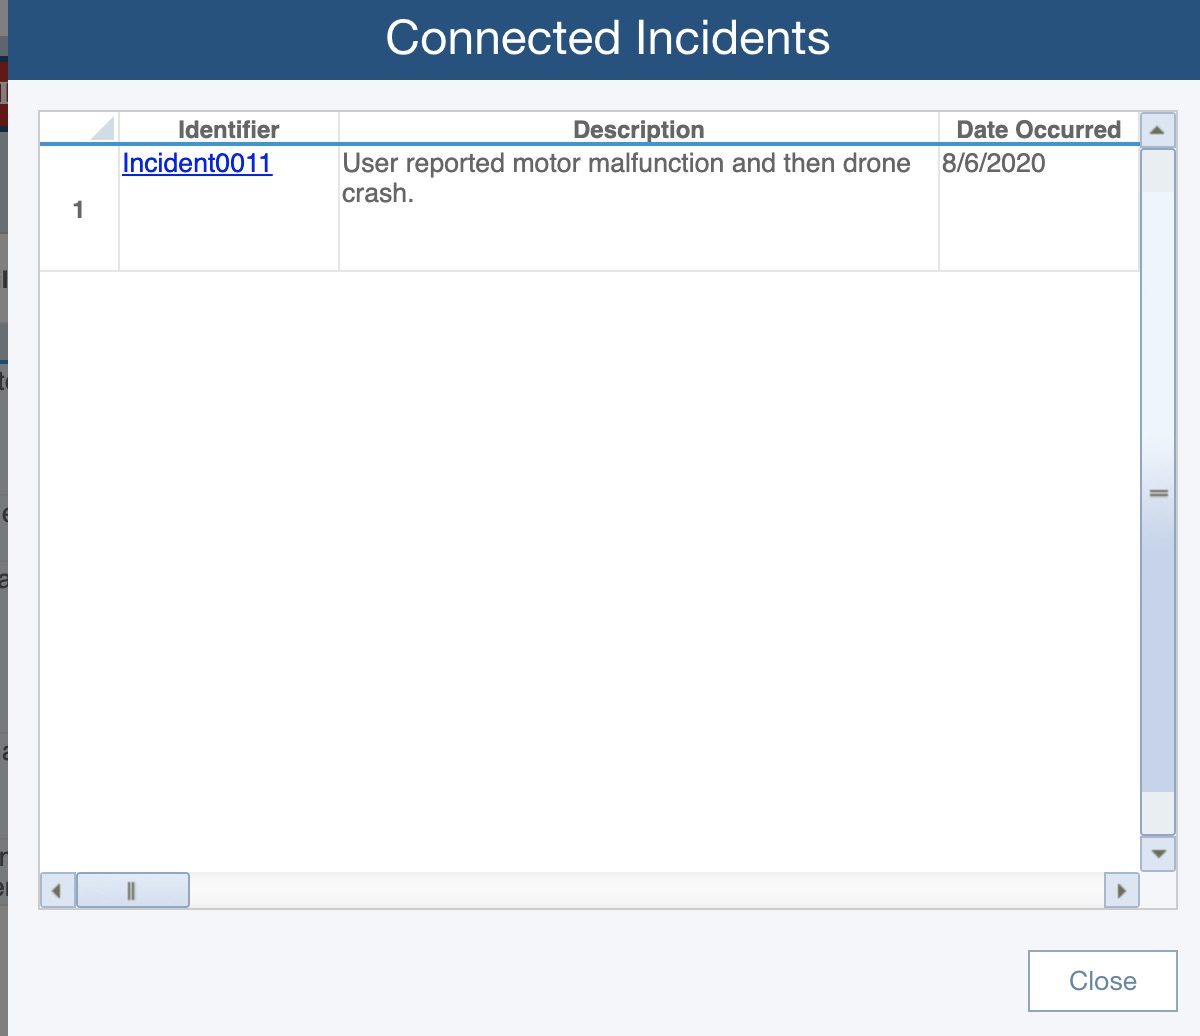
The Identifier is a hyperlink field. Clicking the hyperlink will navigate to the selected Incident in the FRACAS Table.