Entering Maintainability Prediction Data
Maintainability Prediction data consists of two elements: the Analysis Tree, where you define your overall product or system structure in a hierarchical format, and the Maintainability Data where you enter in the maintenance data associated with the Analysis Tree items.
Typically, you will create your Analysis Tree first, outlining all the subsystems and component parts in your product. You can choose to define this structure as high-level or as granular as you would like.
1. Define the Analysis Tree
Building the Analysis Tree if Using Maintainability Prediction and Reliability Prediction
If you are using both Relyence Reliability Prediction and Relyence Maintainability Prediction, the Analysis Tree you create in Reliability Prediction is automatically available in Maintainability Prediction. So, the easiest way to build your Analysis Tree in this case is to go to Reliability Prediction to create your Analysis Tree and add in all the component parts to the subsystems.
This is also advantageous because the failure rate calculated in Relyence Reliability Prediction are then available when performing your Maintainability Prediction calculations.
For more information about Relyence Reliability Prediction, you can review the Getting Started with Relyence Reliability Prediction topic, or see the Entering Reliability Prediction Data topic.
Building the Analysis Tree if Using Maintainability Prediction without Reliability Prediction
If you are not using Relyence Reliability Prediction in conjunction with Relyence Maintainability Prediction, you can define your Analysis Tree directly in Relyence Maintainability Prediction.
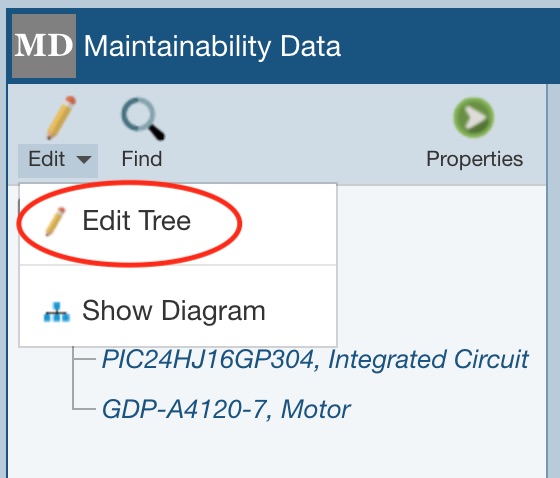
In the toolbar of the Analysis Tree pane, click Edit>Edit Tree. Note that because Edit Tree is the first item in the Edit submenu, you could also just click the Edit icon without accessing the dropdown menu. If a toolbar button with a dropdown menu is clicked, Relyence will perform the first action in the dropdown list.
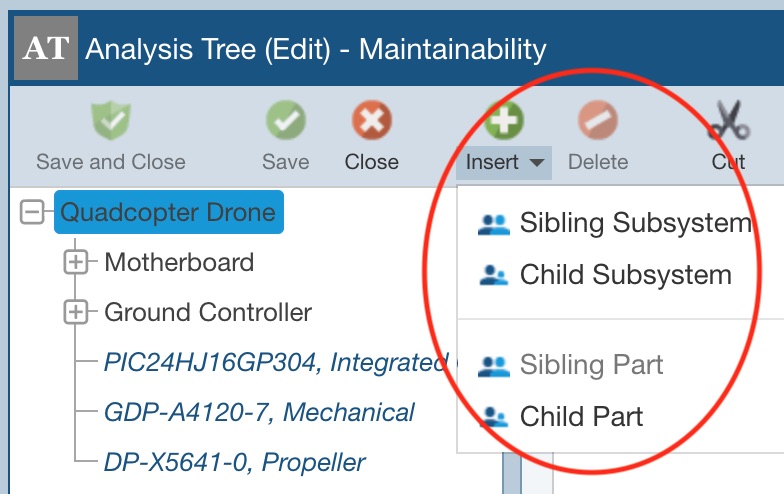
You will go to Edit Mode for the Analysis Tree. In the toolbar, click the dropdown arrow on the Insert button and click Sibling Subsystem, Child Subsystem, Sibling Part, or Child Part depending on what you want to add to your tree. (Note: When at the Part level of the Analysis Tree, only the option Insert > Sibling Part will appear because you can only add Parts at the lowest level of your Analysis Tree.)
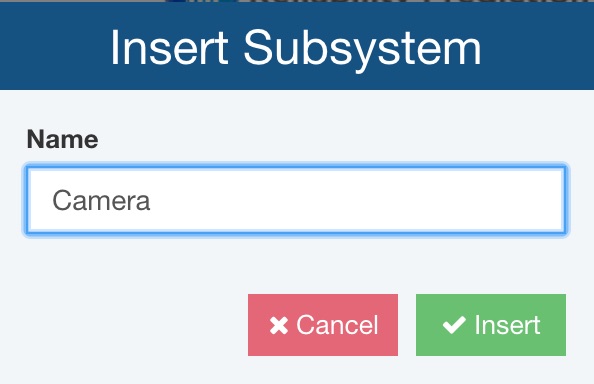
The Insert Subsystem or Insert Part dialog appears. Enter the name of the new Subsystem or Part. Click Insert to insert the new subsystem or Part.
Click Save and Close to save the changes made to the Analysis Tree.
2. Enter Maintainability Prediction Data
To enter Maintainability Prediction Data for an item in your Analysis Tree, click the item in the Analysis Tree to select it.
Select the Repairable checkbox to indicate that the item is repairable. Select the Maintenance Level from the dropdown list. By default, Relyence uses the MIL-HDBK-472 levels: Organizational, Intermediate, and Depot. You can use these or customize the levels if you prefer. See the Defining Maintenance Levels for more information on customizing the levels. Select whether you want to define your Maintenance Data by Tasks or FD&I Outputs in the Repairs By field.
In the Table, add the Tasks or FD&I Outputs necessary to repair the item. In the first column, click the dropdown arrow. The list of Tasks or FD&I Outputs will display. Relyence Maintainability Prediction includes the Tasks from MIL-HDBK-472. You can use these Tasks, as well as create your own Task Library. For more information about adding your own Tasks, see the Maintenance Tasks and Task Groups topic. You can also create an FD&I Outputs Library if you are using FD&I Outputs.
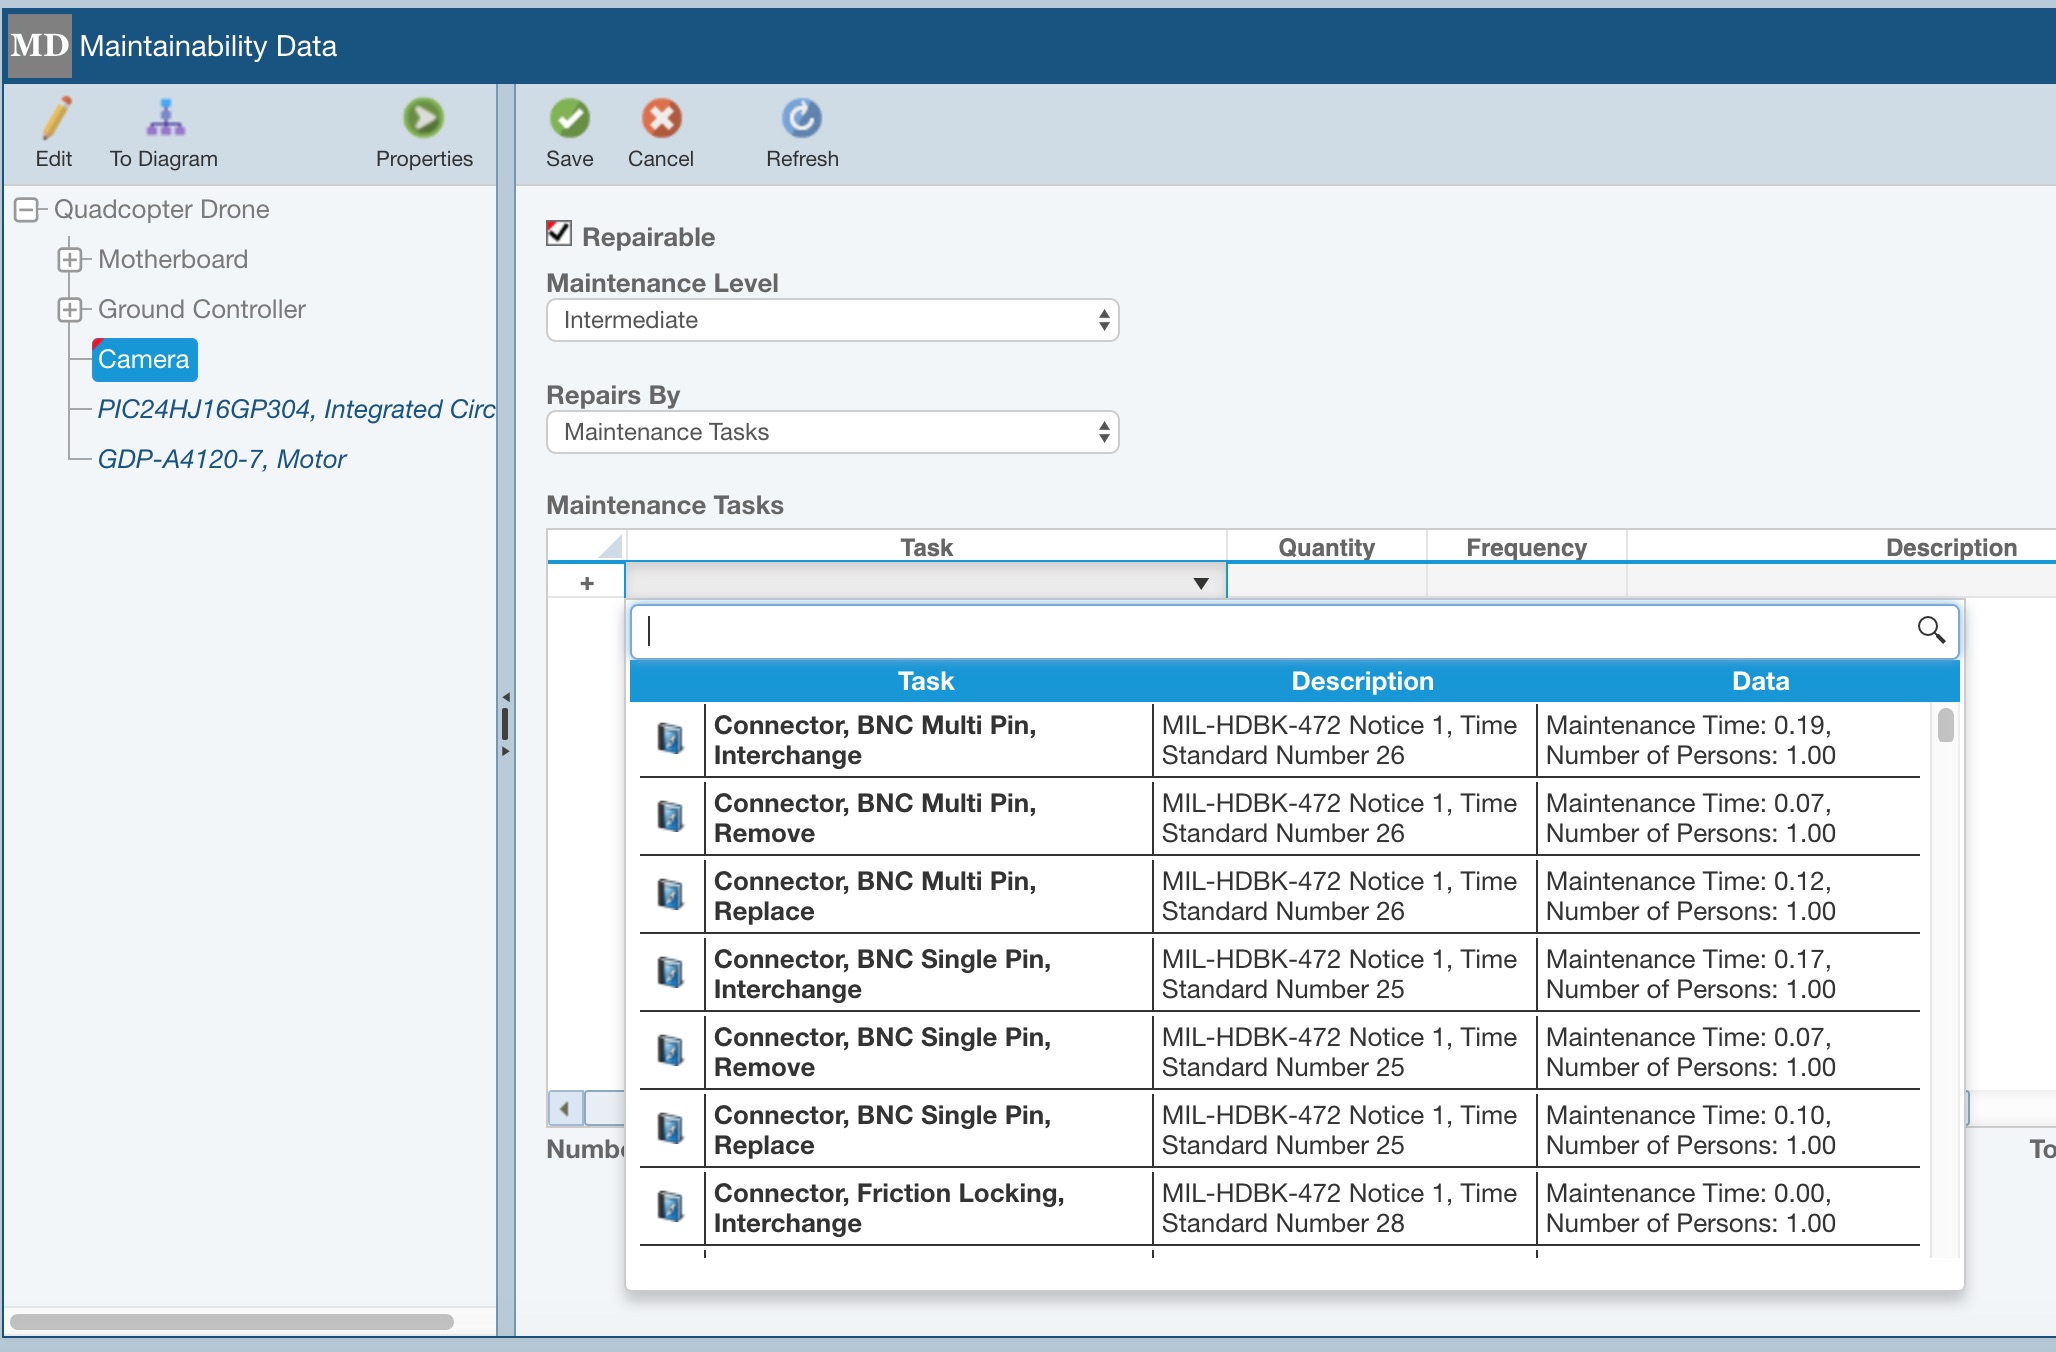
When entering Tasks or FD&I Outputs, you can type in the search bar at the top of the list to filter the list for easier data entry.
The total Number of Tasks and Total Maintenance Time are shown below the Maintenance Data Table.
Click the Save button when you have completed data entry.
Notice the Maintenance Data Table toolbar.
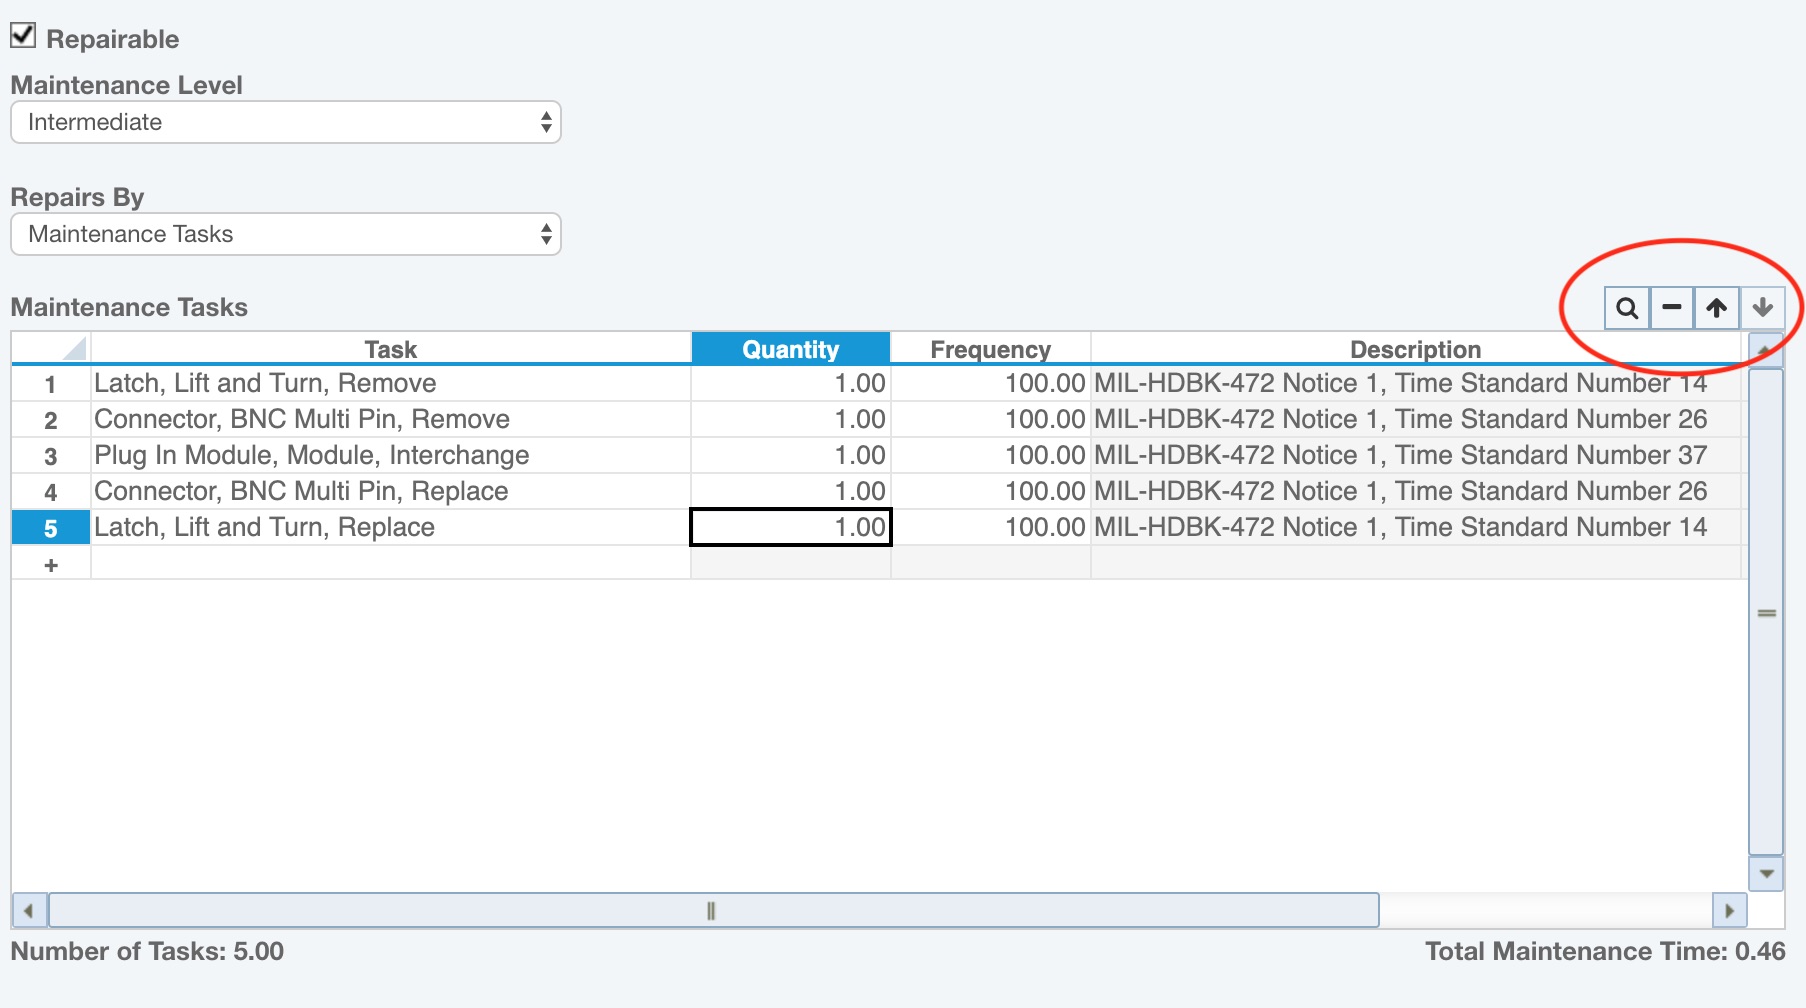
The Delete (minus) button in the Maintenance Data toolbar allows you to delete items from the Maintenance Data Table. The Move Up and Move Down (arrows) toolbar buttons enable you to reorder your items in the list.
The Search (magnifying glass) button allows you to bring up the Search Tasks dialog to filter through you list of Tasks. As you add your own Tasks your Maintainability Library grows larger, the Search feature is helpful. It is also useful to insert multiple Tasks at once.
Click the Search button. The Search Tasks dialog appears. You can select the Library to search. If you select the MIL-HDBK-472 Library, you can then select a Category and/or Type to retrieve the matching Tasks. If you select your own Maintenance Tasks or Maintenance Task Groups Library, you can enter a Name and/or Description to filter your search.
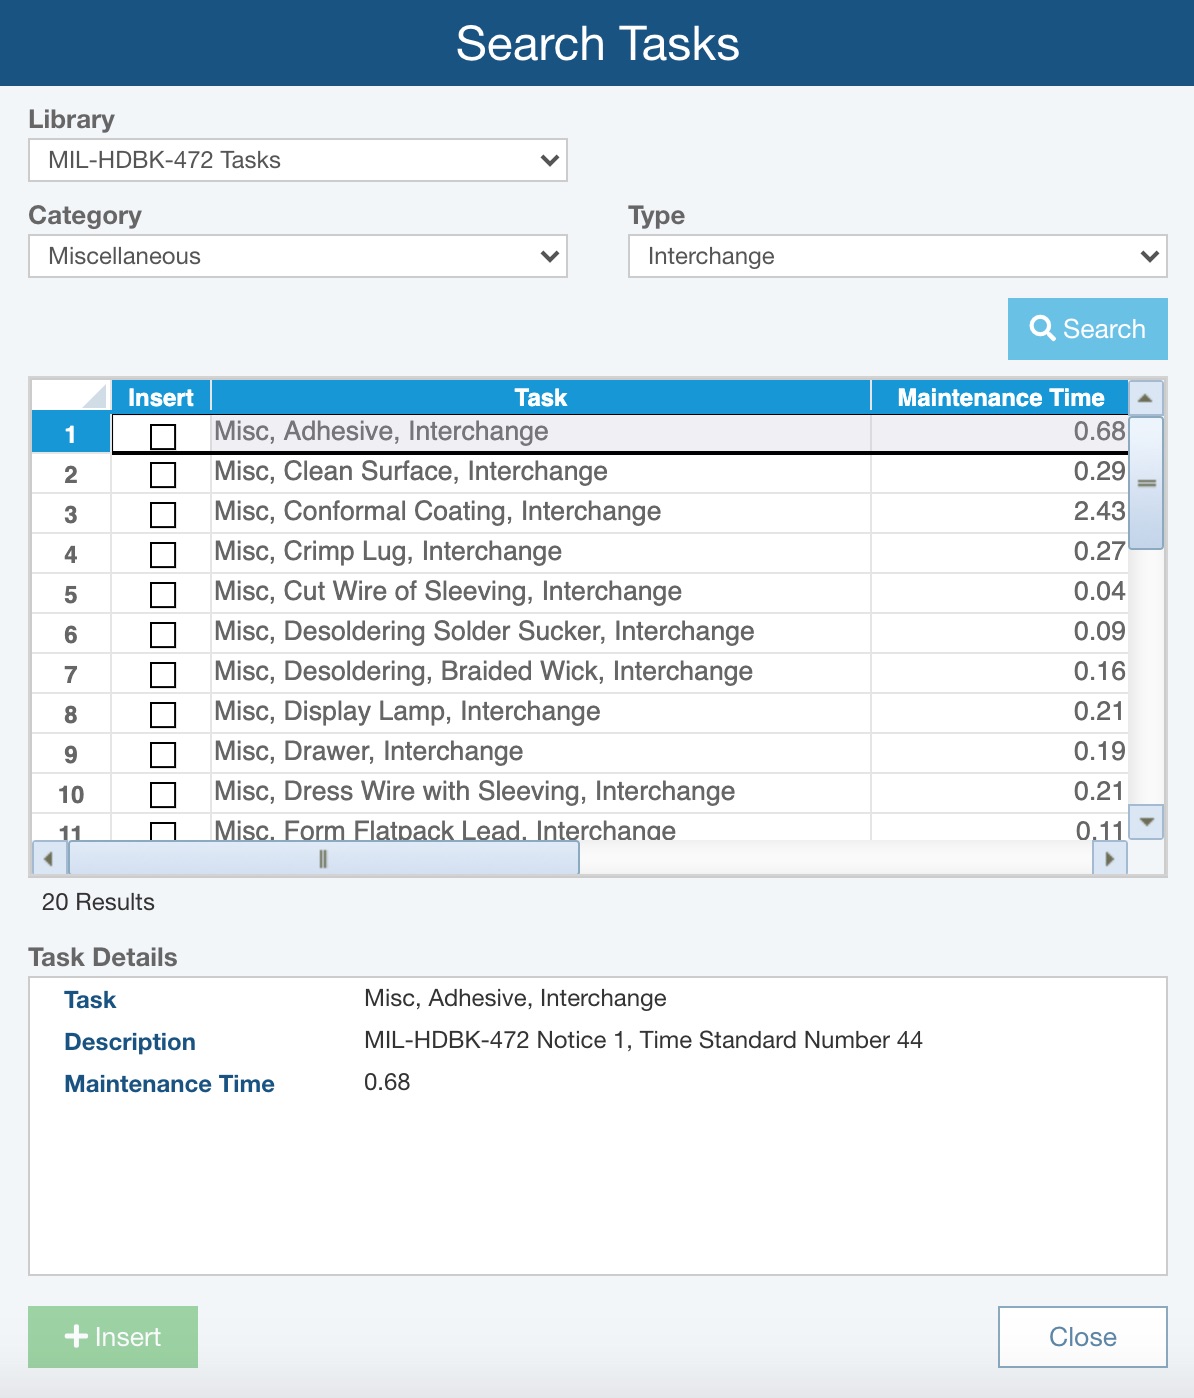
You can click through the Tasks and view the details in the Task Details pane below. To insert a Task or multiple Tasks, you select the Insert checkboxes of the appropriate Tasks and click Insert.
Click the Close button when you have completed to close the Search dialog.